The Next Level :: Fuji X-T1 Firmware v3.0

10-24mm-XE1X7023 The much anticipated v3.0 firmware (they totally skipped v2) for Fuji's X-T1 has arrived and boy is this a big deal. It has a whopping 27 new features, with more than a few of my long term requests. I won't go through all of them here as they're listed on the firmware download area on the Fuji site, but I wanted to highlight a few of the most important ones here IMO. If you don't think this update is a big deal, just think of how little difference there is between a Nikon D800 and D810. Now work out how much it would cost to upgrade from the former to the later. Did I mention this 27 feature firmware upgrade was free :o)

Focus Point Selection Without Fn Button This is a big thing and I wish it would come to all of the X-series cameras. It's actually more important for other bodies than the X-T1 as each of the four buttons on the D pad could already be set individually to move the focus point. The difference now is that you can not only do this as a single option (rather than having to set 4 individually), but the focus point moves with the first press instead of being activated by the first press than moving with each press after that. I shoot with five different X-Series bodies (not at the same time though:o) and every one of them has a different way to activate focus point selection. This drives me nuts, but if this feature was added to all the other models it would make life so much easier.

Q Menu Customisation We can now customise the Q menu and although it doesn't cover everything, there is a good choice of items that can be added. This will be super useful! There are a couple of items in the Q menu that I've never used and a couple that I really needed that were missing. Out goes Colour and AF Mode. In comes Silent Mode and Face Detection. I was really annoyed when the X-T1 was released and the ability to access Silent Mode by holding the Display button down for a couple of seconds (as it is on the X-Pro1, X-E1 and X100 series) had been replaced with quick access for function button assignments. So although I'd rather have Silent Mode on the Disp button, I'm happy that it's now in my Q Menu.

Classic Chrome Film Simulation Classic Chrome Film Simulation has been the biggest buzz among Fuji users since it was mentioned around the time of Photokina this year. It's a desaturated look that will work well for documentary photography. I'll need to shoot with it for a while to know if it will become my preferred Film Simulation, but I'm excited by it and look forward to using it this weekend. The downside right now is that none of my other cameras have Classic Chrome, so I will have to shoot with just the X-T1 or switch to another film simulation if I shoot with more than one body to keep the look consistant

Electronic (Silent) Shutter With a maximum shutter speed of 1/4000 of a second, shooting outside, wide open with f1.4 and f1.2 lenses would require an ND filter. But with the addition of Electronic Shutter, we can now shoot up to 1/32,000th of a second. Another big plus to this is that the electronic shutter is absoluly silent. You think an X100 is quiet, this has zero noise. One downside is that if you shoot in fluorescent light with the electronic shutter, you will get shaded horizontal lines across your pictures. So be very careful if you are using this feature at an event that canot be re-shot (weddings etc..)

Preview Exposure In Manual Mode on Fn Button This is another important one for me as I shoot in manual mode a lot. I can be shooting outside, then in a dark theatre or maybe doing some portraits with flash. Having to find this feature in the menu was a pain and could cause shots to be missed. I have chosen to assign this to the front Fn button at the moment, but even in the Q menu (which is now possible) this would still be a lot more accessible.

Instant Macro on Fn Button I have assigned my top Fn button for Macro. This is handy, but one of the great new features is that it acts like a toggle switch, rather that having to press 3 times, or press and use the directional pad and then hit OK. It's worth mentioning that the top plate Fn button can be assigned to a seperate function in shooting mode, but will still work for WiFi when in Playback mode. One button, two functions...nice!

Reverse AE/L and AF/L Buttons Back button focusing could feel a little awkward on the X-T1 because the AF/L button is a little too far to the right. But now the functions of the AF/L and AE/L buttons can be switched, making it move comfortable (especially if you're right eyed).

3 Custom White balance Memories I'm a lover of custom white balance whenever possible. I have both a Colour Checker Passport and an ExpoDisc which can save a lot of time in post processing. Custom White balance now has three slots to store different WB setups, ideal if you shoot regularly in different locations. I didn't expect this one.

AF + MF Another handy feature that allows you to focus in AF mode using a half press of the shutter button, but then tweak it manually using the focus ring. Default is Off, so you need to turn this on after upgrading to v3.0. As with Manual Focus, the viewfinder zooms in automatically to check focus (if Focus Check is turned on in the Screen Setup menu).

A couple of features that I'd like to see added or adjusted in a future update (not wanting to seem ungrateful).

  • I was expecting that the Exposure Compensation Dial would work in Manual Mode when using Auto ISO. This one still needs fixed, because without this Manual Mode acts like 100% auto.
  • It would be great to have more features available to be part of a Custom Setting. I'm thinking of Preview In Manual Mode and maybe Macro, but there are many more.
  • I'd like to be able to use the front Fn button to activate the D Pad as individual Fn buttons while they are in Focus Point Selection Mode. Kind of reverse from what it used to be.
  • This might be a strange request, but very useful for street photographers: I'd like to shoot using the viewfinder, but to also have the focus point displayed on the LCD. No image or anything else, just the white box or a crosshair. Then the focus point could be moved into position before raising the camera to your eye.

Fuji_LCD_Focus_Point

The main thing (IMO) for future X Series cameras (and legacy ones as much as possible), is to be as consistent as possible in button layout and features. I'm really hoping for updates to my other cameras, especially my X100S. I know the new X100T has similar features to this X-T1 update, but I haven't had the X100S that long and I'd like to get some use out of it.

Out & About With The Fuji 50-140mm f2.8

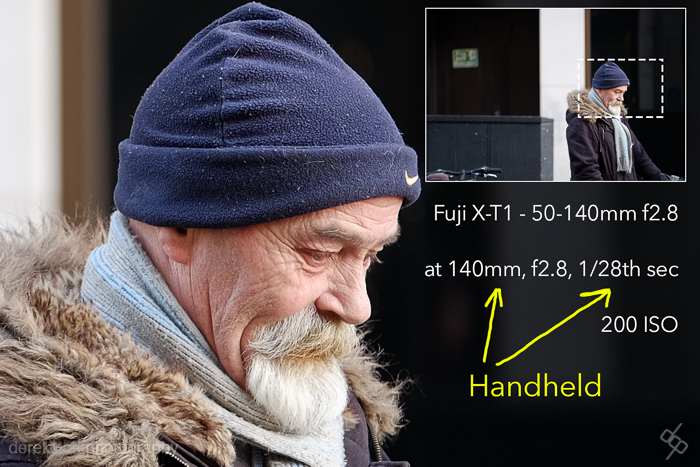
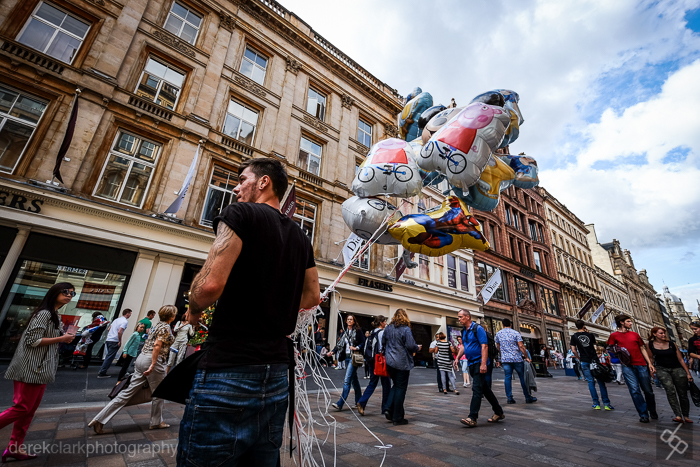
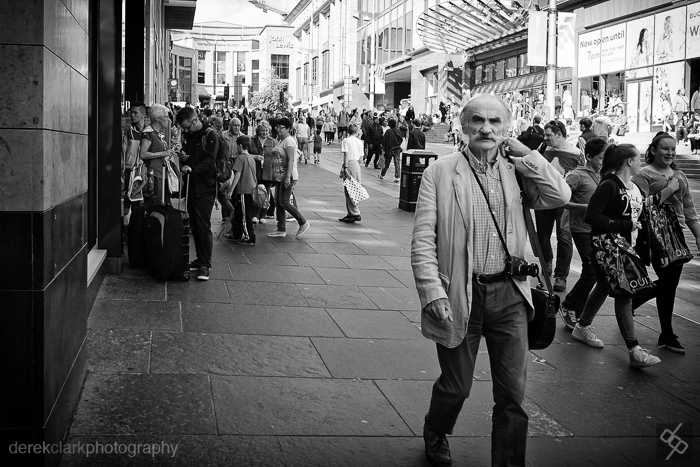
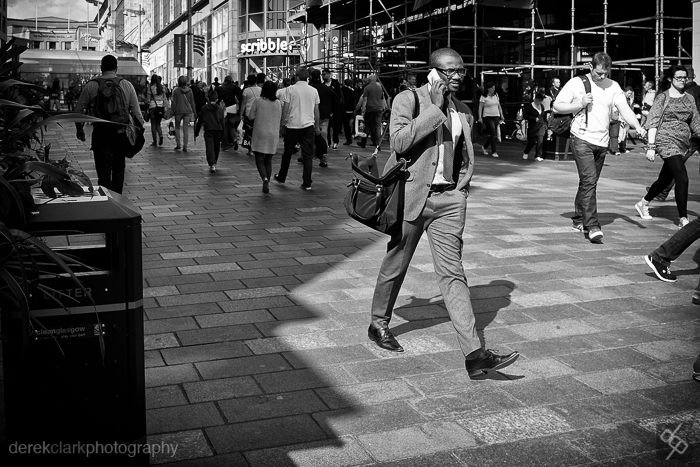
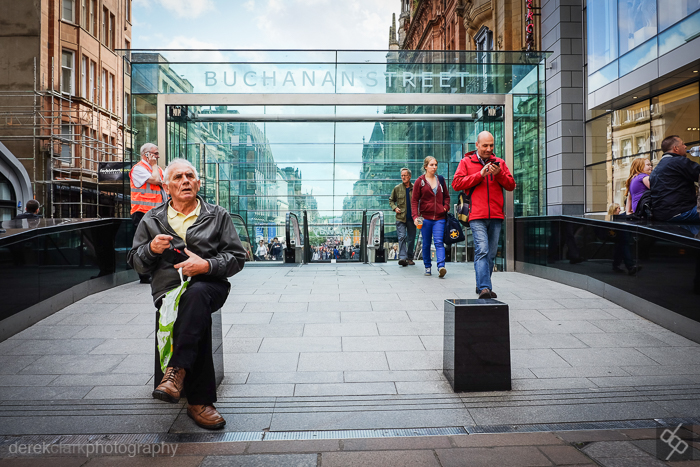
DerekClarkPhoto.com-Fuji_50-140mm-6 I went walkabout the other day while there was a bit of good weather, and by that, I mean dry and bright, because it certainly wasn't warm. I wanted to try out the Fuji 50-140 f2.8 in daylight. I've already reviewed the lens under studio conditions which you can see HERE. I ended up shooting some street photography and capturing something I wouldn't have thought possible, handholding at the equivalent of 210mm at 1/28th of a second and getting a sharp image. I had to double check the Exif Data on this one because I thought I was seeing things. As you can see from the crop above, this is again very sharp and I'm shooting wide open at f2.8. You can see the street shots I took processed in B&W using Silver Efex Pro over at 35mmStreet. But have a look at some colour shots before you go.

DerekClarkPhoto.com-Fuji_50-140mm-7 Before I reached the streets I went for a walk near the Science Centre by The River Clyde in Glasgow (Scotland). The next few pictures should show how sharp this thing is. It does take the X Series on a different direction because when the 50-140mm is attached to an X body, gone is that feeling of small, discreet, fly on the wall photography. It's a big lens and it feels and looks like a 70-200mm. The size of the camera doesn't really matter. I was using the X-T1 with the battery grip.

DerekClarkPhoto.com-Fuji_50-140mm-4

Colour, as always with Fuji, looks great. It was late afternoon, but the sun was already dropping fast

DerekClarkPhoto.com-Fuji_50-140mm-3

DerekClarkPhoto.com-Fuji_50-140mm-2

I'm not that into the look of these trees in the background, it’s a bit jaggy and distracting. But I think this is more to do with the shape of the greenery, rather than the lens. I say this because the next photo (bellow) is not like this at all.

DerekClarkPhoto.com-Fuji_50-140mm-1

I love the articulated screen on the X-T1, but I didn't think I needed one until I used it on the X-M1 when it came out and loved it. At f2.8 and with the camera so low, you can see just how buttery this lens can be. Focus is fast, silent and locks on easily on even the most difficult scenes.

DerekClarkPhoto.com-Fuji_50-140mm-5

I tried hard, but I just couldn't get any lens flare at all. The sun was bright and I was shooting towards it, but between the glass and that deep hood, there was zero flare.

DerekClarkPhoto.com-Fuji_50-140mm-12

When I shoot street photography with a 35mm, I mostly keep moving. But with this long zoom I found it lends itself to finding a good spot and waiting for interesting subjects to pass through. I can't say that I felt comfortable walking around with this lens attached to the X-T1 with battery grip, as I like to be as invisible as possible with my X100S or as I was when the sun went down on this day, with my X-Pro1 and the 18mm f2. But as this won't be a regular thing, I actually enjoyed it for what it was.

DerekClarkPhoto.com-Fuji_50-140mm-11

DerekClarkPhoto.com-Fuji_50-140mm-10

DerekClarkPhoto.com-Fuji_50-140mm-9 No problem shooting from across a busy street, as although it's a large lens, you can be a good distance away. Again you can see more street photography with this lens over at 35mmStreet

DerekClarkPhoto.com-Fuji_50-140mm-8

Fuji 50-140mm f2.8 :: It Thinks It's A Prime

DerekClarkPhotography.com-XE1X7139c

Warning. If you don't want to to spend more money on gear, do not read this post!

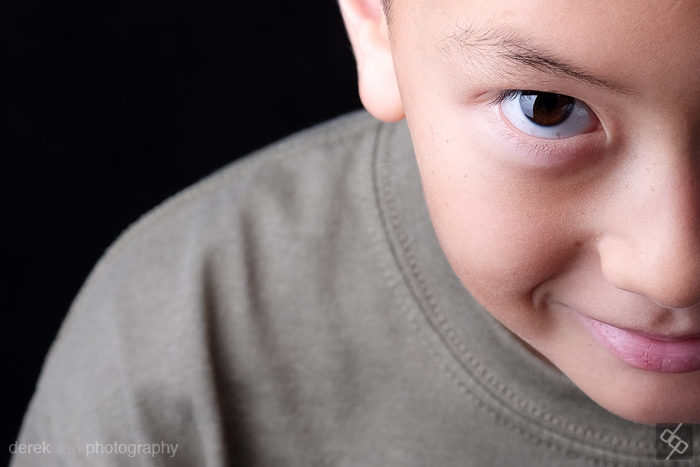
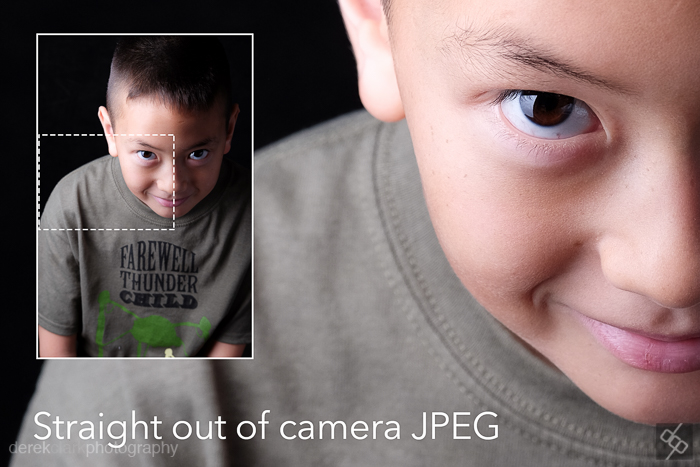
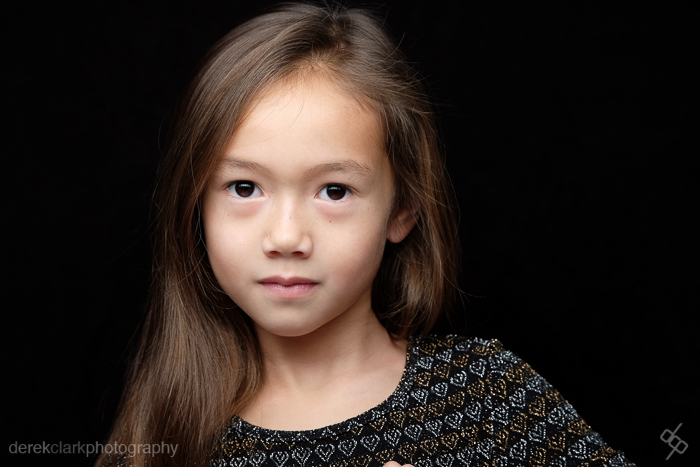
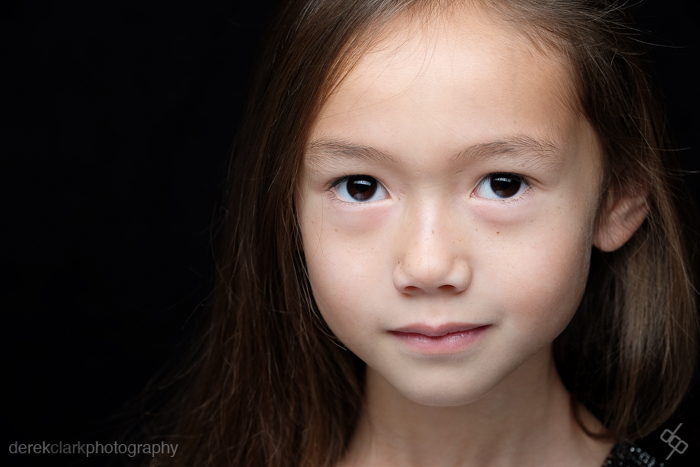
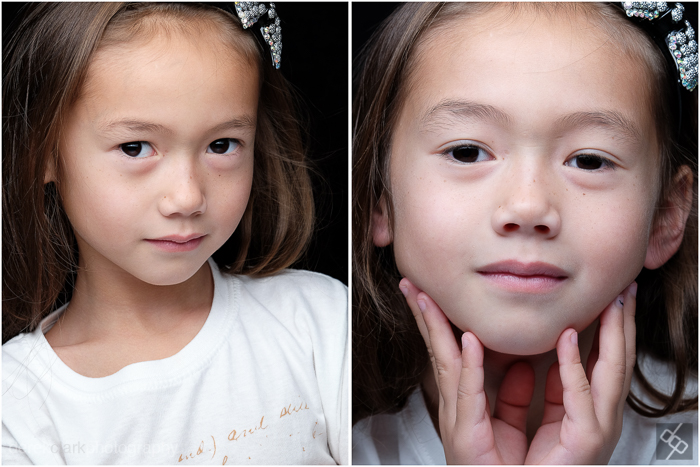
All of these portraits of my kids are straight out of the camera. I have not adjusted contrast or sharpness. This is what you get from an X-T1 and the 50-140mm f2.8. I will do a follow up post to show how great the shallow depth of field looks, but I wanted to get a review out as quick as possible and it's been a dark grey weekend. This won't be a technical review. You can find plenty of specs on the web if you need them. Specs are fine, but if they're not engineered properly, they don't mean a thing!

It seems nobody told this lens that it's not supposed to be as sharp as a prime. Come to think of it, nobody told Fuji that you can't make a zoom that performs like a prime lens either. But I'm glad, because they have pulled it off. Click on any of the portrait shots to see a full size version on Flickr.

Fuji_50-140mm_f2.8_Derek_Clark_Photo-15 Ok, so the shot above is sharp, very sharp. But look below and you will see that this is just a small crop of the original photo. Not only that, but as I said above, this is SOOC. These portraits of my kids were shot with the Fuji X-T1 and the new 50-140mm f2.8. With a full frame equivalent of 75-210mm, this is Fuji's answer to the classic professional workhorse 70-200mm f2.8. Now I own a 70-200mm Nikon and it's a fantastic lens (as is the Canon version). It's the reason I've held on to my Nikon D800, because I need that 200mm reach for my jazz photography. Fuji's other long zooms are too slow for what I need and my longest prime is the awesome 56mm f1.2. I'm looking forward to my next jazz shoot with an all Fuji setup!

Fuji_50-140mm_f2.8_Derek_Clark_Photo-13

So this shot of my son wearing his first tour t-shirt from our first father and son gig on Saturday (War Of The Worlds) is enough to show the amazing quality that the X-Trans sensor and the 50-140mm can produce. These portraits were lit using a Lastolite Hotrod Stripbox with a Nikon SB700 inside. I also used a Lastolite Trigrip 8 in 1 reflector to get clamshell style lighting. The Flash was triggered by the Flashwave III Radio Triggers. More information on using Flash with Fuji can be found in my 3 part post starting HERE.

Fuji_50-140mm_f2.8_Derek_Clark_Photo-8

The first thing you notice when you see this lens in person is the size of it. Although not as large as the Nikon or Canon version, it is however, a 70-200mm f2.8 (FF), and that means bulk. Compared to other X-Series lenses, this one is big and it's heavy. Not in a DSLR sense, but for mirrorless. But this is not a lens that you take with you every day. No this is the big gun that goes to a paid job and does the business. It's a wedding or portrait photographers must have piece of glass and it will be the lens that allow a large number of DSLR shooters to jump ship to Fuji mirrorless. There will be some that need an equivalent to a 24-70mm f2.8 before that jump, but don't worry because there's a 16-55mm f2.8 coming early 2015.

Fuji_50-140mm_f2.8_Derek_Clark_Photo-9

Fuji_50-140mm_f2.8_Derek_Clark_Photo-16-17

DerekClarkPhotography.com-3Xcameras

So here is how the lens looks on three Different bodies. On the left is the X-T1, which with the battery grip, will be my preferred camera with this big lens. In the middle we have the X-Pro1 and on the right is the smallest of the three, the X-E1. As you will notice from this Triptych, Fuji have put some thought into this and included a removable square (see centre image) on the lens hood. This is to give access to a polarising filter so that it can be turned. I would recommend using the hood with the hole at the bottom to keep out sunlight.

I'm really pleased that Fuji has went with an aperture ring that has the f stops marked on it and has a dead stop at either side, rather than the un-marked continuous ones found on the other zooms. The zoom ring is nice and stiff and very grippy. And on the subject of zooming, as this is a professional lens, all zooming movement is internal, so there are no unwanted protrusions at the front end.


A metal tripod mount Is included and attached, which is essential if you shoot landscapes etc. The lens is heavy and it doesn't matter which of the X bodies you use it on, there would be too much strain on the cameras lens mount if attached to a tripod via the bottom of the camera. As I only use a tripod now and again, I prefer to remove the tripod mount until required. This is easily achieved by removing two screws (they stay attached to the mount, so no chance of loosing them). I found the best way to reattach the tripod mount is to hold it in place with a thumb and turn both screws simultaneously. When I tried to do them one at a time, the second one was always a bit reluctant to go in. The tripod mount is attached to a ring on the lens that allows the camera to rotate for upright portraits. This locks into position by a single thumbscrew. A small wish for the tripod mount would have been a quick release system similar to the Nikon 70-200mm rather than the two screws....but it's no big deal!

I often use a BlackRapid Yeti double strap and I really wish Fuji had included a threaded hole for a tripod on the base of the lens as well as the tripod mount (other 70-200mm's have this). I would feel better about hanging my camera upside down from a BlackRapid FastenR with the rubber bush, than the two thumb screws holding the tripod bracket to the lens. It may be absolutely safe, but I'll be keeping an eye on it for the first few shoots.

Fuji_50-140mm_f2.8_Derek_Clark_Photo-2

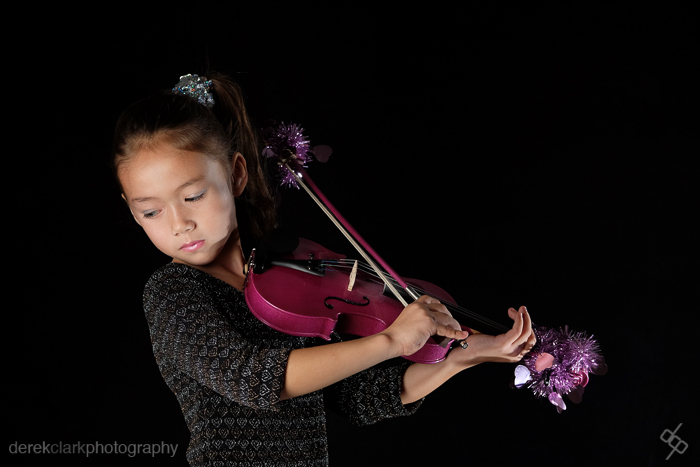
My seven year old daughter played her first two gigs at the weekend. So the real reason for taking some studio pictures was really to mark the occasion. It was just good timing that Fuji released this lens at the same time. Ho did they know?

The focusing ring is well suited to portraits as you can make really fine adjustments without overshooting the distance. This is due to the focusing ring having a longer travel, something welcome on this lens, but not so much on a shorter focal length prime.

Fuji_50-140mm_f2.8_Derek_Clark_Photo-16

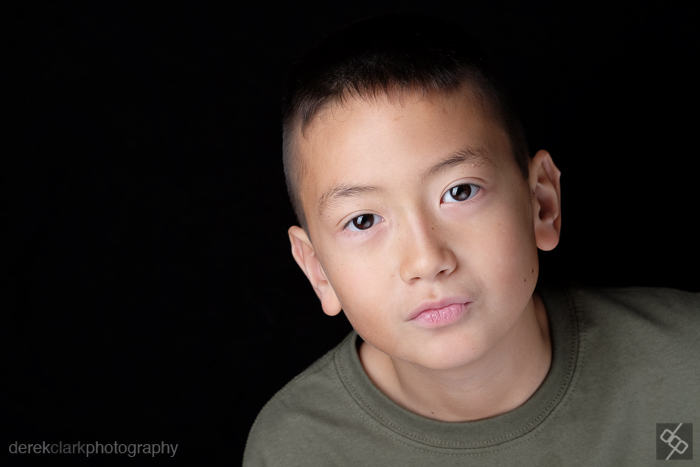
My time to shoot pictures of my son is limited, as he doesn't stop moving long enough. So I told him I would shoot 15 frames and he was done. This was the last shot and in response to me asking him to give me the James Bond look. As you can see from the catch lights in his eyes, the strip box is above and the reflector below.

DerekClarkPhotography.com-Fuji_v_Nikon_70-200mm So in conclusion: The Fujifilm 50-140mm is just outstanding! We've waited a while, but the wait was well worth it. I keep thinking that Fuji has peeked with the quality of their lenses, but as soon as I do, they bring out something that just blows me away! Sure it's a big lens on such small cameras, but it is smaller than the equivalent Nikon or Canon (see comparison pic to the left). Apart from wishing for a quick release on the tripod mount and a threaded hole to allow direct tripod/BlackRapid mounting, the only other thing I would have wished for would be a soft or hard case to have been included, rather than the usual cloth bag.

But those are in no way deal breakers. The XF 50-140mm f2.8 R LM OIS WR (to give it it's full title) is value for money when you consider the quality and comparison to the price of the big two's 70-200mm f2.8 glass. If Fuji can pull off the same feat with the upcoming 16-55mm f2.8, they will have arguably two of the best zooms for the working professional. It's amazing to think how little time has passed since the launch of the first interchangeable lens X camera. But in such a short time Fuji has produced an unbelievable system. Let's hope they're working on a great wireless flash system to go with it.

Click these links to see what the 50-140mm looks like in daylight and with shallow depth of field.

Out & About With The Fuji 50-140mm f2.8 And Now For Something Completely Different :: Street Photography With The Fuji 50-140mm f2.8

Hong Kong Diptychs In Lightroom

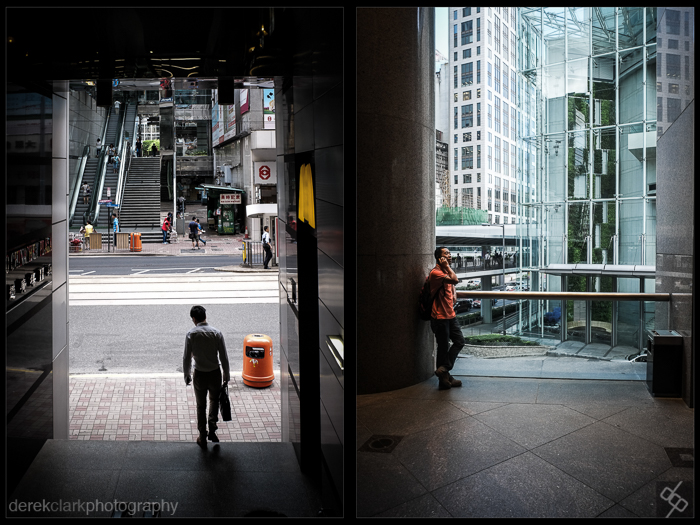
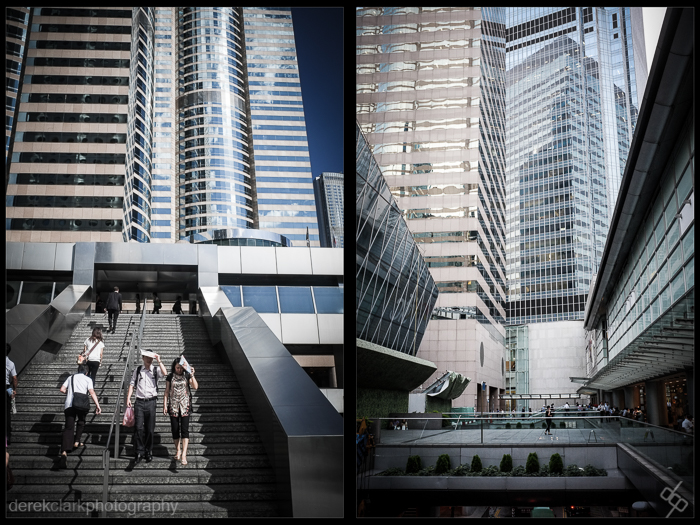
DerekClarkPhotography.com-HongKongDip01 I've been looking at maybe buying VSCO 6 and noticed that they have a 40% discount on all film packs at the moment. As I'm not sure how much I would use said film pack (as I tend to bake my own). So I started mucking around in Lightroom and made a new preset. It's a desaturated look, but with the reds and blues pushed back up. Add a bit of Contrast and Clarity, through in a vignette and bingo. I did add a bit of yellow to the shot with the trams, just to bring up the yellow grid on the road.

I'm pretty happy with the look of this preset, but working on these has made me miss Hong Kong. Maybe next year!

DerekClarkPhotography.com-HongKongDip02

DerekClarkPhotography.com-HongKongDip03 DerekClarkPhotography.com-HongKongDip04

Wide Angle Wizardry :: Fujifilm XF 10-24mm f4

DerekClarkPhoto_Fujifilm_10-24mm-XT1X5519 I have fond memories of shooting with a Sigma 10-20mm and 10mm fisheye a few years ago on DSLR's. Super wide angle lenses are great fun and sometimes it's the things they say you shouldn't do with a wide angle that turn out to be the most interesting and fun. I got that familiar, but at the same time forgotten tingle of excitement when I attached the Fuji 10-24mm f4 lens to the X-T1, similar to how a piece of music takes you back to a memory tucked away in the back of your mind. A super wide angle lens is an epic way to see the world!

10-24mm-XE1X7023

DerekClarkPhoto_Fujifilm_10-24mm-XT1X5557

In full frame speak, this would be a 15-36mm, so it can be a decent documentary lens, especially in tight spaces. It could be used for street photography too, but it's a bit too big compared to the 23mm f1.4 or 18mm f2. But if landscape or architecture work is your thing, then this is the lens for you. I haven't managed to get anywhere near the sea since having the 10-24mm, but I'm sure it would produce epic seascapes.

DerekClarkPhoto_Fujifilm_10-24mm-XT1X5563

At 87mm's long and with a filter size of 72mm, the 10-24mm can be a bit front heavy on most of the X-Series cameras. But with the battery grip attached to the X-T1 it feels about right and with the lens getting bigger toward the front, it feels both comfortable and secure when holding it in both hands. I'm so glad Fuji chose to make this a constant wide aperture of f4. Although 2.8 would have been nice, I much prefer a constant f4 to the variable f3.5-f5.6 of the 18-135mm. In my mind pro lenses don't have variable apertures.

DerekClarkPhoto_Fujifilm_10-24mm-XT1X6178

On the subject of Aperture, I don't know why Fuji chose to have an endless aperture ring without f numbers marked on the lens. I get that you need this on the 18-55mm or the 18-135mm because the widest aperture is variable as you move through the range of the zoom. But as the 10-24mm is a fixed widest aperture of F4 all the way through, I don't see the point. I'm so glad to see that the upcoming 50-140mm f2.8 has an aperture ring like the primes, with the f stops etched on the lens and a dead stop at either end. Because the 10-24mm has an endless aperture ring, it does note have an A for Auto. So like the 18-55mm, there is a seperate switch to select manual or automatic aperture.

DerekClarkPhoto_Fujifilm_10-24mm-XT1X6202

DerekClarkPhoto_Fujifilm_10-24mm-XT1X6197

One slight gripe I have (personally) is that the focus ring is so far forward that it makes manual focusing awkward when turning the focus ring to the left (focusing closer), if like me, you prefer to hold the lens from below, rather than above. This is only a problem with the battery grip attached to the X-T1 as the heal of your hand hits against it. That won't be a problem with any other body. DerekClarkPhoto_Fujifilm_10-24mm-XT1X5665-Edit

10-24mm-XP1X1831

Image stabilisation maybe not as crucial on a super wide angle lens as on a telephoto, but thanks for adding it Fuji. As on the 18-55mm, there's a constant (almost inaudible) hiss from the lens, with or without OIS switched on. Weight is spot on in my opinion for a lens of this type and size. Build quality, as on all Fuji XF lenses, is extreamly high and I couldn't wish for anything better.
 
The 10-24mm f4 is one of the quietest autofocus lenses I have ever used. It is practically silent! This will be great in conjunction with the Silent Shutter Mode available as part of a firmware update in Dec 2014.

DerekClarkPhoto_Fujifilm_10-24mm-XT1X5621 So it's another big thumbs up for Fuji glass. They make fantastic cameras, but the quality of their lenses is breathtaking. The original three X-Series lenses, the 18mm, 35mm and 60mm, were and still are sharp, compact and well made. the 35mm f1.4 is already a classic in my opinion. But since those early lenses, Fuji have  taken things to another level and produced lots of amazing glass, including my all time favourite, the 56mm f1.2.

Next on my shopping list is the 50-140 f2.8 (75-210mm in full frame), which will be perfect for my long term jazz project. I reckon this will be the lens that make a lot of DSLR users jump ship to mirrorless. Watch this space for a full review soon.

Disclaimer: I am an Official Fujifilm X-Photographer and have done some work for them. However, I am not paid to review gear or promote the Fuji brand. I have been talking and writing about the X-Series since the X100 found it's way into my hands and long before Fuji knew who I was. The X-Series changed the way I shoot and has opened many doors for me.


I'm Now An Official X-Photographer

DCP-X-TogBanner700I'm very happy to announce that Fujifilm has invited me to be an official X-Photographer. I've known about this for some time now, but kept it hush hush until I was added to Fuji's X-Tog site. You can see my bit HERE.

I've been a Fujifilm user since the X Series began and was lucky enough to get my hands on the original X100 as soon as it was available. Looking back at the pictures I've shot since then surprises me a bit. The time has flown and I'm pleased with what have produced so far. The cameras have come on leaps and bounds and with the firmware update coming this December, it looks like everything I've wished for is finally coming (to the X-T1 at least).

I'm looking forward to whatever comes next.

X-ManScreenshot700

WCL-X100 & TCL-X100 for Fuji X100 S & T

DerekClarkPhoto_TCL-X100-100S2776 The Fujifilm X100 was a real game changer in my photography. I was in need of something small, light and above all else, great in low light. But I got more than I bargained for and the X100 took me on a journey and made me realize the direction I really wanted to go. I still have my original X100, but after including many other X cameras to my kit, I've recently came full circle and rekindled my love of the X100 with the addition of an X100S. Although I have five X series cameras and many lenses, I have had an urge lately to carry less....much less. So I've limited my personal photography to the X100S (although not exclusively). But although I love the 35mm field of view (full frame wise), Sometimes I can be restricted in zooming with my feet and then have to take another body and lens(s).

main_01

Thankfully Fuji have answered the prayers of X100 shooters with the introduction of two great converter lenses. The WCL-X100 (wide angle version) came first, and then more recently the TCL-X100 (telephoto version). Both are built to the same high quality as the X100 and feel so good in use. They attach to the original fixed 35mm lens by screwing on to the (external) filter thread. If like me, you have the Fuji lens hood attached, you must remove both the hood and the adaptor before attaching each of the converter lenses.

WCL-X100 The WCL-X100 takes the 35mm field of view down to 28mm. This doesn't seem like a lot, but it can make all the difference in a lot of circumstances. I know there's a lot of street photographers that prefer a 28mm field of view to a 35mm and for cityscapes or landscapes this is just the ticket. The WCL is the smaller of the two and as slim as the X100's fixed lens. It also accepts the original Fuji lens hood (without the need for the adapter ring. The WCL looks 100% like it's part of the camera and although extends the length and weight, the camera still feels pretty well balanced and small.

DerekClarkPhoto_WCL-X100-100S1878-Edit

Even Leica Man couldn't take his eyes off the X100S with the WCL-X100

DerekClarkPhoto_WCL-X100-100S1872-Edit DerekClarkPhoto_WCL-X100-100S1900

Fuji have done a great job getting rid of distortion on a lens this wide.Even at the edges, it doesn't pull and flatten out as much as a lot of 28m lenses.DerekClarkPhoto_WCL-X100-100S2311

DerekClarkPhoto_WCL-X100-100S2324 TCL-X100 The TCL-X100 takes the X100/100S up to a 50mm and into the zone of portraits without distortion. Although it still looks like it's part of the camera, rather than a screw on converter, the size and weight ads quite a bit and makes the camera quite a bit more front heavy. But because of it's funnel shape and larger front end, it is really comfortable to hold both when shooting and holding. Sadly the TCL doesn't have a built in lens hood mount and the original lens hood would be much too small anyway. But it would have been great if Fuji had added a mount and included a larger version of the X100 hood. This request is not just for looks or even to prevent lens flare, but to protect the front element from scratches. The front of the TCL is large (68mm filter) and the front element is so close to the surface, that a UV filter is a must, even for a shooter like me that has no filters on any lenses and don't want any either. But after shooting for a day or two with the TCL, I bit the bullet and added a filter, even though this was a review copy sent to me by Fuji.

DerekClarkPhoto_TCL-X100-100S1664

DerekClarkPhoto_TCL-X100-100S1730 DerekClarkPhoto_TCL-X100-100S1742

DerekClarkPhoto_TCL-X100-100S1679-Edit CONCLUSION So from what you've read above, it looks like the WCL has no flaws, but the TCL has a few. But if I can only have one of these it would be the TCL. Some people saw the fixed 35mm lens on the X100 as a downside. I thought it was great to not have to think about focal length and just shoot. In a way these new converter lenses kill that idea slightly, but that is a small price to pay in exchange for opening up the capabilities of the X100/100S and I'm excited about that. After having the original X100 for a few months, I fantisized that Fuji would bring out a 50mm or 85mm version of the camera, which would be a perfect combination of a fixed 35mm on one shoulder and a 50mm or 85mm on the other. Fuji has done even better with giving us an option, even if we only own one camera.

WCL-X100 & Rob The Traveller by Millican THE FUTURE When I bought the X100S, I was a bit sad that my X100 would become redundant and stay in the box until my kids are old enough to use it. But I now have a reason to use my original X100 with the X100S and have a different focal length on each. My Fuji wish list now includes an 85mm conversion lens, but I'm not sure if that would even be possible? But I'm glad to see that the X100 and X100S not only live on, but have a new lease of life. Although these units are for review purposes, I've already made my mind up that I will be adding the WCL-X100 and the TCL-X100 to my Fuji arsenal as soon as possible. For the last few weeks I've been carrying my X100S and these two converters in the small but perfectly formed Rob The Traveller bag by Millican (read my review here). It's really easy on the shoulder and well worth checking out if you're planning a bit of travel photography.

UPDATE ****************

DerekClarkPhotography.com-100S2138

Stewart asked (in the comments below) if the TCL-X100 is suitable for portraits. I'm more than happy to shoot portraits with a 50mm lens. The TCL handles portraits well...as you can see from the handsome beast above :o) This was taken in a portacabin/dressing room backstage at a festival, with Florissant strip lights. X100S with the TCL, 1/125sec, f4 at ISO 2000.

GoPro Hero3+ Black Edition

The makers of the GoPro Hero range have carved out a nice niche with these nifty little cameras. Aimed mostly at the sporting world, but used in a huge variety of ways from street photography (POV videos) to big budget television production. I've had my eye on one for a long time, but, not being into sports much, I wasn't sure if it was something I would use. I kept being drawn back time after time with all those great videos of people jumping out of planes and scuba divers swimming with sharks (two things I have no intention of doing). Finally the stars aligned, the time was right and a nice new GoPro Hero3+ Black edition arrived curtesy of Clifton Cameras in the UK. I bought my Fuji X-E1 from Clifton, so I knew they were quick and the service is fantastic. The Black edition is the highest spec of the GoPro cameras, but if you're on a budget there is also the White or Silver edition. Surf and Music editions are also available if that's your thing. I opted for the standard black edition as it has a wireless remote included.

When it comes to accessories for your GoPro, there are many available with a wide range of possibilities. Being a musician, the first thing I bought was the Jaws Clamp. It consists of a clamp with a mount on top that can be used as is, or with the included GorillaPod style bendable arm. The Jaws Clamp is ideal for attaching the Hero camera to instruments like guitar, saxophone and drums. There's some fun footage on line that has the GoPro attached to the slide of a trombone with the camera zooming in and out of the players face every time the slide is moved.

The hardest part for me was finding the time to shoot and edit, but luckily a trip to Corfu was on the horizon. A quick shopping spree on the net and more accessories arrived at my door the day before leaving. A Tripod kit and Anti-mist patches were just what I needed, but shock horror, I forgot to get the all important extendible pole, but. Luckily there were GoPro accessories available at the airport duty free and a POV Pole by SP was bought for £35.

The video at the top of this post is my first attempt at putting together a a short film with the Hero3+ (Click on HD to watch it in better quality on Vimeo). Picture quality from the Hero3+ is amazing. It's hard to believe that something so sharp comes from a tiny little box that looks like a cheap kids toy. For the video above, I set the camera to 1080 at 60fps with the Wide setting. I knew that I wanted slow motion, but I also wanted to keep great picture quality, so I ruled out 120fps at 720 until I could test and compare the quality settings. I inserted two Anti-fog patches inside the waterproof housing and had zero problem with fogging in the water. The SP POV Pole performed fantastic and is probably the best accessory available for the GoPro. One of the great things about a GoPro is that a lot of the time your subject become the camera operator. Stick one on a guitar and let the player do their thing. Being aware of the camera usually means they will move around and make sure to include things around them. The same goes for this film of my kids, give them a pole with a GoPro and they perform brilliantly.

I edited the footage using the free GoPro Studio app (downloadable HERE) and although it was my first time using the software, it didn't take long to get the hang of it. I think there are a few clinches in the software, but it could be my inexperience with a new app, so I'll need to do more editing to find out. GoPro Studio outputs the finished film for Vimeo, youTube of even just a high resolution version to sit on your hard drive.
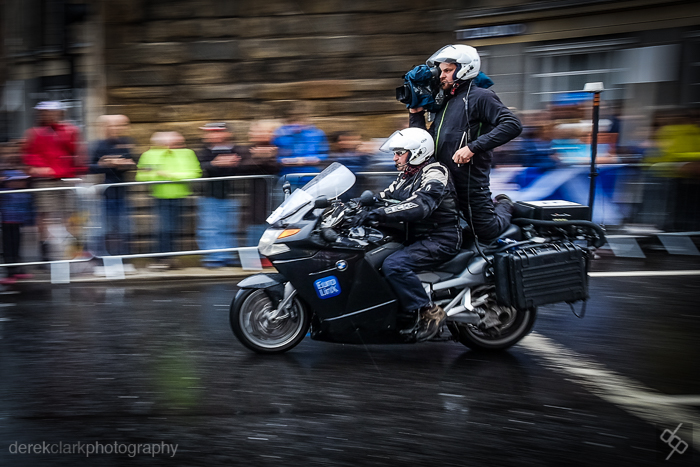

The short clip above is a quick test of the time-lapse feature (Click on HD to watch it in better quality on Vimeo). I set the camera to take one picture every two seconds and left it on the GorillaPod Focus for ten minutes. I'm happy with the results and I'm looking forward to shooting more time-lapse soon using an Ikea egg timer with my GoPro mounted on the top via one of the included self adhesive mounts. The egg timer allows the camera to rotate for up to an house when shooting time-lapse. So not only will it produce cool stop motion video, but it will pan smoothly at the same time.

The GoPro range of cameras and accessories are available from Clifton Cameras in the UK. Click HERE for the Hero3+ Black Edition that was used for this review. These things exceed expectations in quality and performance. The biggest limit is your own imagination.


VSCO Keys :: Pimp My Keyboard

VSCOkeys A recently wrote a first look review of VSCO Keys that you can find HERE if you missed it. I hadn't used VSCO Keys for long at that point, but I knew it was going to be a real time saver. But after using it for a couple of weeks, I started to notice that my original VSCO keys layout was close, but not quite where it needed to be. I was finding it wasn't as intuitive as I would have liked and as I was using it in banks across the keyboard (W up, E down. R up, T down...), I noticed that it was too easy to lose where my fingers were supposed to be as I got to the centre of the keyboard.

So I decided to pimp my Apple keyboard for a little visual help. I bought a sheet of Black (Non Transparent) Keyboard Stickers from Amazon and after adjusting the positions of my shortcut keys using the layout section of the VSCO website to a more intuitive system, I placed the stickers where I thought they would give me the best indication of where things were. The stickers are black with white lettering, which is the opposite from my white Apple keyboard. It was so successfulI that I now have a set of white stickers for my black Macbook Air keyboard.

VSCOkeyboard

Presets

As you can see from the photo, the first group of keys (from left to right) are black with the top two being Exposure - & + (Q & W) and then Shadows (A & S) and Blacks (Z & X) below. The next group are Contrast at the top (E & R) with Highlights (D & F) and Whites (C & V) below. So the dark stuff is (mostly) on black keys and the lights are (mostly) on white keys. Blacks and Whites also sit side by side. It's simple things like this that make me remember things easier, but whatever works for you. The next row of (black) keys are Temperature, Tint and Vibrance (from top to bottom). After that it's a mixture, but again the stickers are all placed to make it easier to remember individual keys, which can be as simple as placing a black sticker in the middle of three keys doing non related functions.

Modules

Screen Shot 2014-06-10 at 14.57.55

As you probably know, adding the Control, Alt, Shift, Command or Fn keys gives a completely different function to each key. I try to keep similar things mapped to keys, like Saturation is under Vibrance, sharpening is under Clarity...etc. Number keys 1-0 are left for star and colour ratings, but also apply presets when the Cmd Key is added.

So VSCO keys has dramatically speeded up my workflow and it's still on the increase. I still like to use the Logitech G13 for culling, but I find the two systems work well together. There is one thing I'd like in VSCO Keys that I cant find in the Layout software. In Survey Mode you add photos to the selection by pressing Shift and using the arrow keys. I'd love to have the < & > keys set to this function, but without the need for the Shift Key. Maybe it's in there, but I can't seem to find it. You can download a free 30 day trial of VSCO Keys HERE, so there is nothing to loose and everything to gain. You can buy keyboard stickers from Amazon, but make sure to get the Non Transparent ones or you will see double letters on each key.

Project Jazz :: Instrumental Interview

KurtElling-DerekClarkPhoto-15 I had the pleasure of being interviewed by Michael at INSTRUMENTAL recently. The interview was about Project Jazz, my long term project to document today's jazz scene. Michael asked a lot of great questions that forced me to think a little deeper than I had about this project. I also had to go through the jazz pictures that I've shoot in the last 12 months and look at them from more of a portfolio point of view, rather than during the editing phase. I'm very pleased with what I have so far and I can see a nice body of work coming together.

My aim with Project Jazz is to carry on the tradition of shooting black and white photographs of jazz musicians in the same way as the great players of the 40’s, 50's and 60's were captured. If you haven't had the chance to see some of these pictures, you can have a look HERE and the Instrumental interview is available HERE.