
BLOG
Domke F-5xb: Lightweight Street Bag

Over-filling camera bags is something I (and I would assume many others) have a problem with. If there’s a space for another camera I’ll throw one in. An empty front pocket? I’ll add more batteries, notebooks or who knows what. So the only way around this sad affliction is to use smaller bags if I want to travel light.
Street photography is one area where I like to travel light because of the large number of miles I end up walking, and The Domke F-5xb is an ideal little bag for that very reason. I have the brown RuggedWear wax canvas version. It’s one of five Domke bags I own (at the time of writing this). I bought this one-second hand for £22, it’s in great condition and has none of the waxiness that these RuggedWear bags can sometimes have.

The Domke F-5xb with a standard iPhone 7 for size comparison

These two Velcro patches sit too high to make contact with the narrow strip on the front flap
EXTERIOR
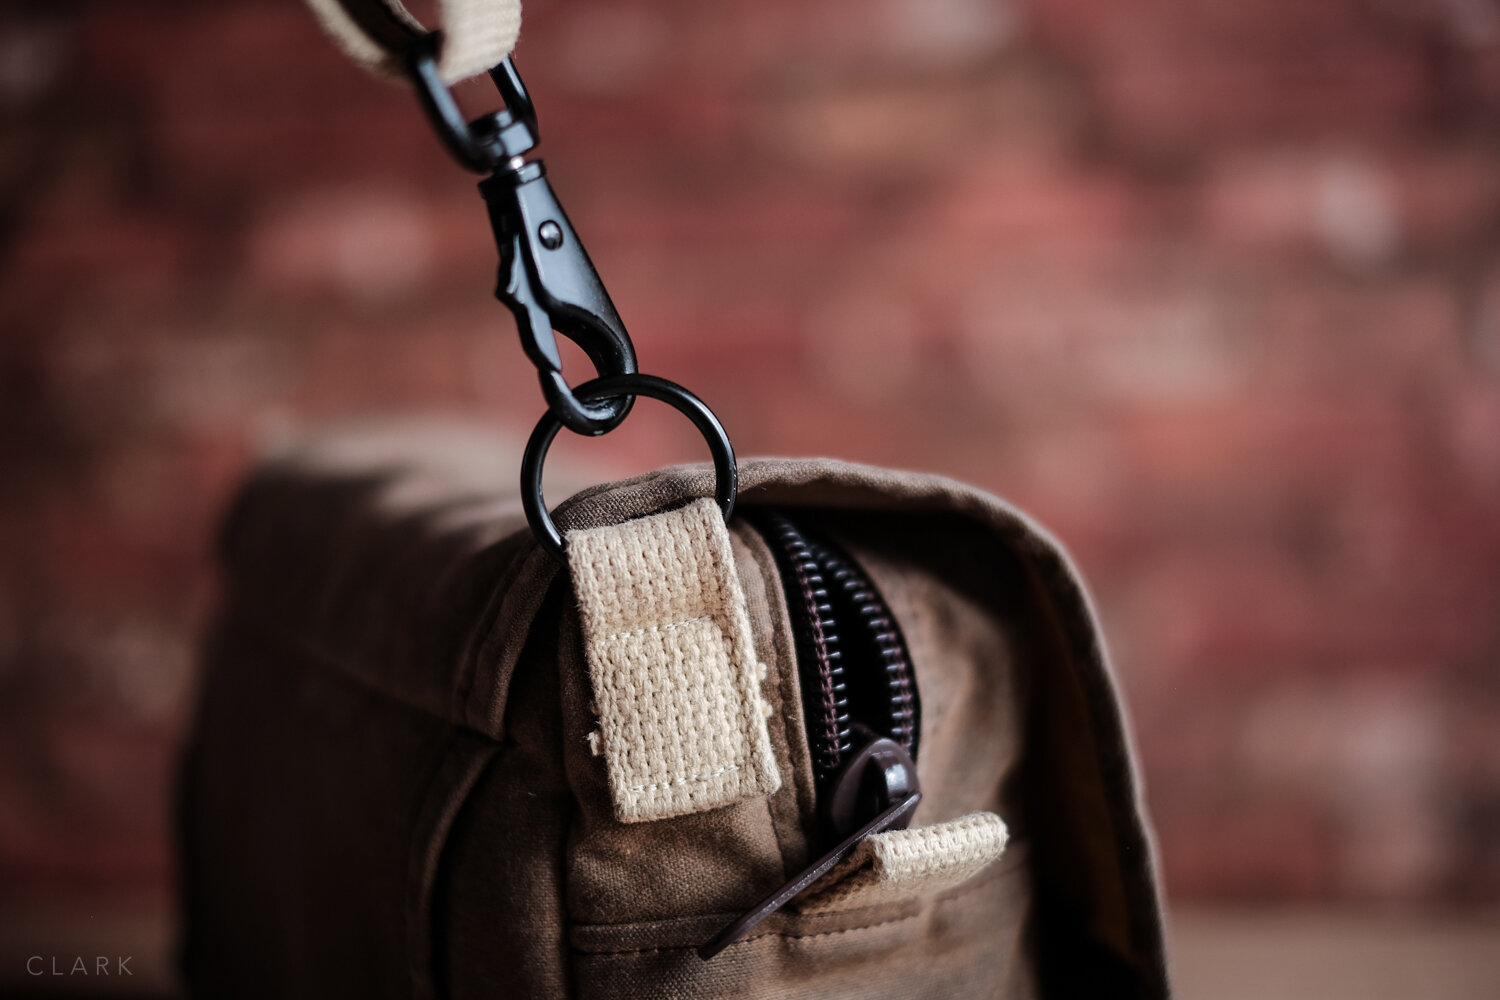
Unlike a lot of the larger Domke models, the strap on the F-5xb does not go all the way around the base. Instead, it attaches by oversized clips onto an O ring at either side, and these rings are attached using looped pieces of thick canvas sewn onto the side. The clips are extremely tough and do not unlatch accidentally (like ONA bags do). The strap is the standard Domke webbing version with the dual non-slip rubber strips to hold it in place on your shoulder. Another oversized thing is the YKK zipper. It’s chunky and both the tabs used to close the zip are massive. This zip will probably last longer than I will.
I do wish Tiffin would change the straps to a dark brown on these brown Rugged Wear bags as these light ones get so dirty during day to day use.


The zip on the main compartment is covered by a flap. This flap acts as an extra layer to keep the rain out, to keep thieves from opening the zip, and also to cover the front pocket. The pocket is a single compartment, with no zip or velcro, for holding small accessories. I have my wallet, a tiny Moleskine notebook, two spare Fuji batteries, and my Apple AirPods. I probably shouldn’t keep my wallet in here as it’s not that thief-proof! The bottom of the pocket is oddly sewn an inch and a half up from the base of the bag making it a little too shallow, even though there doesn’t seem to be a reason for this.
One downside to this front flap is that the pieces of velcro that hold it closed are positioned in such a way that they only connect if the bag is stuffed full. Each piece should be taller in my opinion.

The oversized belt loop at the back
Domke says this is a small bag or belt pack, meaning you can unclip the strap and use the sewn-in loop at the back of the bag to attach it to your belt. This might work if you use a separate belt and don’t overstuff the bag with too much kit, but I wouldn’t recommend putting it onto the belt that’s holding up your trousers/pants or you might find the photographer becomes the photographed.

There’s enough room inside the main compartment for 3 mirrorless cameras and an iPad Mini
INTERIOR
Inside the main compartment of the F-5xb, you will find two dividers that allow for three compartments for cameras and lenses. I have three Fuji cameras in here, an X100F, X70 and an X-Pro2 in the centre compartment with one of the smaller Fujicron lenses attached (16/2.8, 18/2, 35/2, or 35/1.4). I mostly have the 35/2, which gives me 28mm, 35mm, and 50mm (in full-frame terms) across my three cameras. If I want to carry one or two other lenses, I have to leave a camera at home. The F-5xb is always a compromise but it keeps the weight down. For the past few weeks, I’ve had the manual focus Meike 25mm f1.8 attached to the X-Pro2. More on that lens in a future blog post (or two).


The interior padded section is sewn into the bag, but there is a compartment between the padded section and the inside front of the bag. This compartment is exactly the right size for an iPad mini with a low profile case. Obviously, this adds more weight, so a choice has to be made.
One downside of the interior is the lack of padding on the ends of the bag. Domke has many bags that lean toward being smaller and better for working out of rather than being heavily padded. But the F-5xb is well padded at the front, rear and base, so why miss out on padding the sides? The bag is tiny so a couple of extra centimetres in length wouldn’t have made that much difference. My X70 and X100F lenses both face outward (toward the sides) so I have added a couple of dividers from other bags to help pad the sides a bit, even though it does make the inside of the bag a little tight.

The front pocket doesn’t have a zip or Velcro to hold it shut and is only covered by the front flap
CONCLUSION
The Domke F-5xb is a fantastic little bag that is super comfortable to carry for a full day street shooting. When I’m using a camera on the street the 5xb feels so lightweight and the rubber grip strips embedded into the strap keeps it from sliding off my shoulder. This bag is equally good for using the strap crossbody style. Like all Domke bags, they are very well made, plus they look and feel better with age.
PROS
Small & lightweight.
Extremely tough.
Rubber grip strips embedded into the strap.
Over-engineered parts, especially the zipper.
Doesn’t look expensive (and isn’t).
An internal base plate that keeps water out.
Can be re-waxed to make water-resistant (can of wax supplied).
CONS
The front pocket is not very secure.
Front pocket could easily have been deeper.
Velcro for the front flap is positioned badly.
No padding on the ends of the bag.
Difficult to fit a pen.
Fujifilm XF16mm F2.8
AND THEN THERE WERE 4 (or is it 5?)
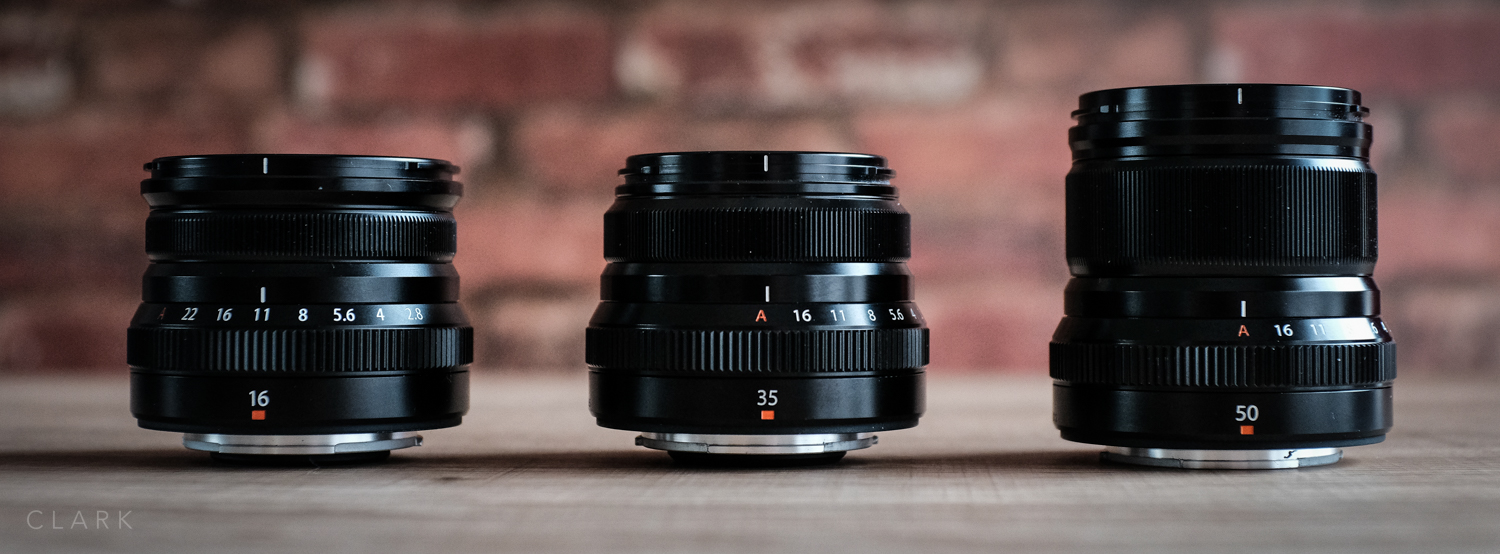
So the 16/2.8 has arrived and it joins the Fujicron trio of 35, 23 & 50mm f2's (that's if we don't count the original small 18/2. More on that lens later). These three lenses were a runaway success for Fujifilm and the quality is stunning. They are small, well priced and so much easier to carry around than the larger f1.4 or f1.2 versions. People often question whether you should buy the f1.4 over the f2, shallow depth of field over size and weight, or even why Fuji should make two versions of the same focal length blah blah blah blah blah. But I think the great thing about these small lenses are that not everybody can afford to shell out loads of money on the bigger faster glass. These Fujicron lenses might be the only way someone on a tighter budget can own the equivalent to a wide angle 24mm or a decent 75mm portrait lens, and that's good enough reason for their existence in my book.
WHY BUY THE 16/2.8 IF I ALREADY OWN THE 16/1.4 VERSION?
I have a couple of setups. One is all about widest apertures and quality over size, which has my X-T3 & X-T2 bodies, plus all the best glass. There'e the 50-14/2.8, 16-55/2.8, 90/2, 56/1.2, 35/1.4, 23/1.4 and of course the 16/1.4. My other setup is my everyday carry around and street photography bag, which is my favourite because it's the one that is all about personal photography, rather than work. This small setup can change now and then, but it's basically an X100F, X70 and X-Pro2 with the Fujicron lenses. I have the 35/2 and the 50/2. I don't own a 23/2 because my X100F is pretty much always with me. So by adding the 16/2.8, I will have a full frame range from 24mm to 75mm. Or to break it down, with the 1.5 crop on the Fuji X sensor, my 16, 18.5 (X70), 23 (X100F), 35, and 50mm lenses will give me 24, 28, 35, 50, & 75mm in full frame terms. All of this fits in a Billingham Hadley Small Pro or an ONA Bowery. Not only am I keeping this setup as small and lightweight as possible; I also know that when I grab my backpack for a shoot that all my working lenses are in there and not in some other bag.
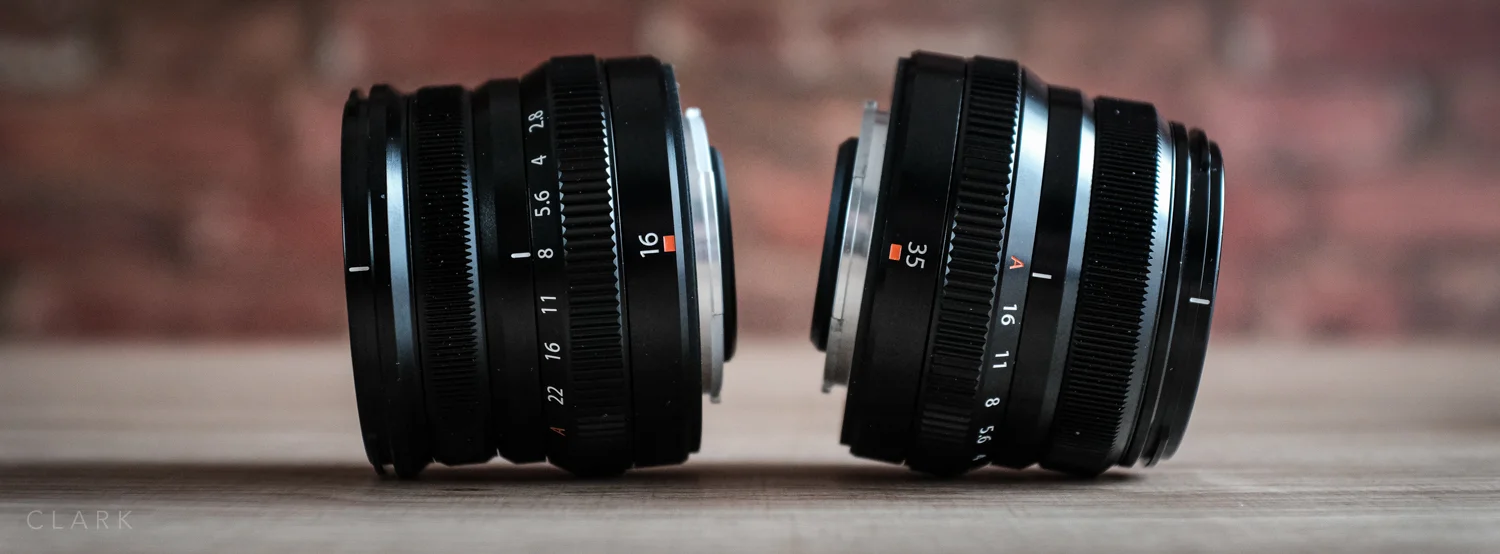
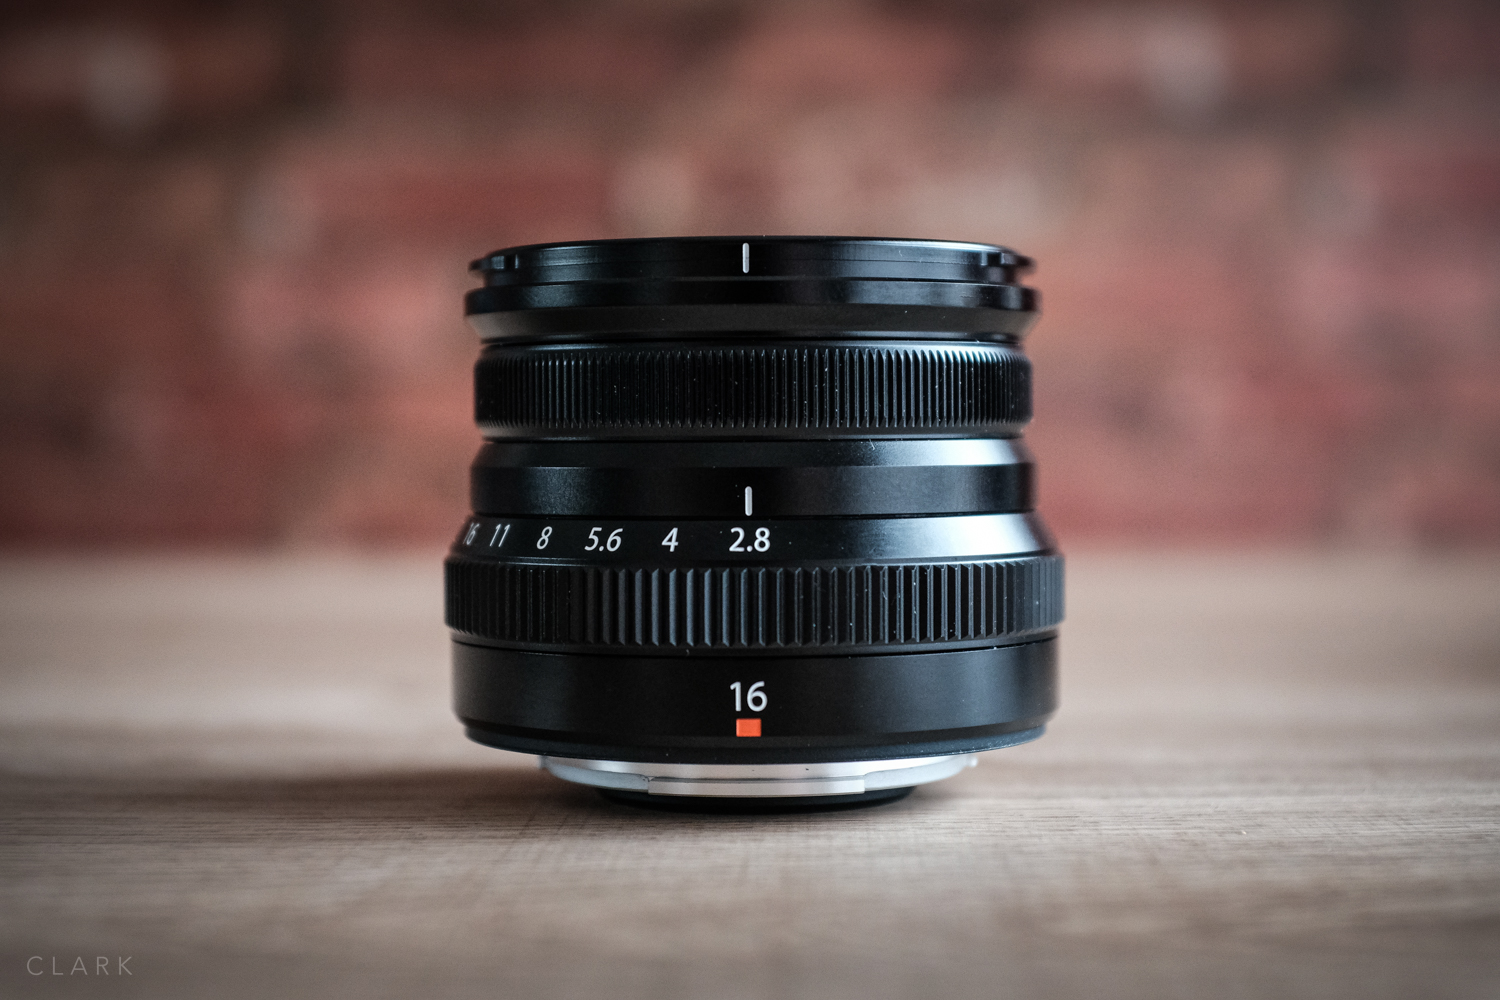
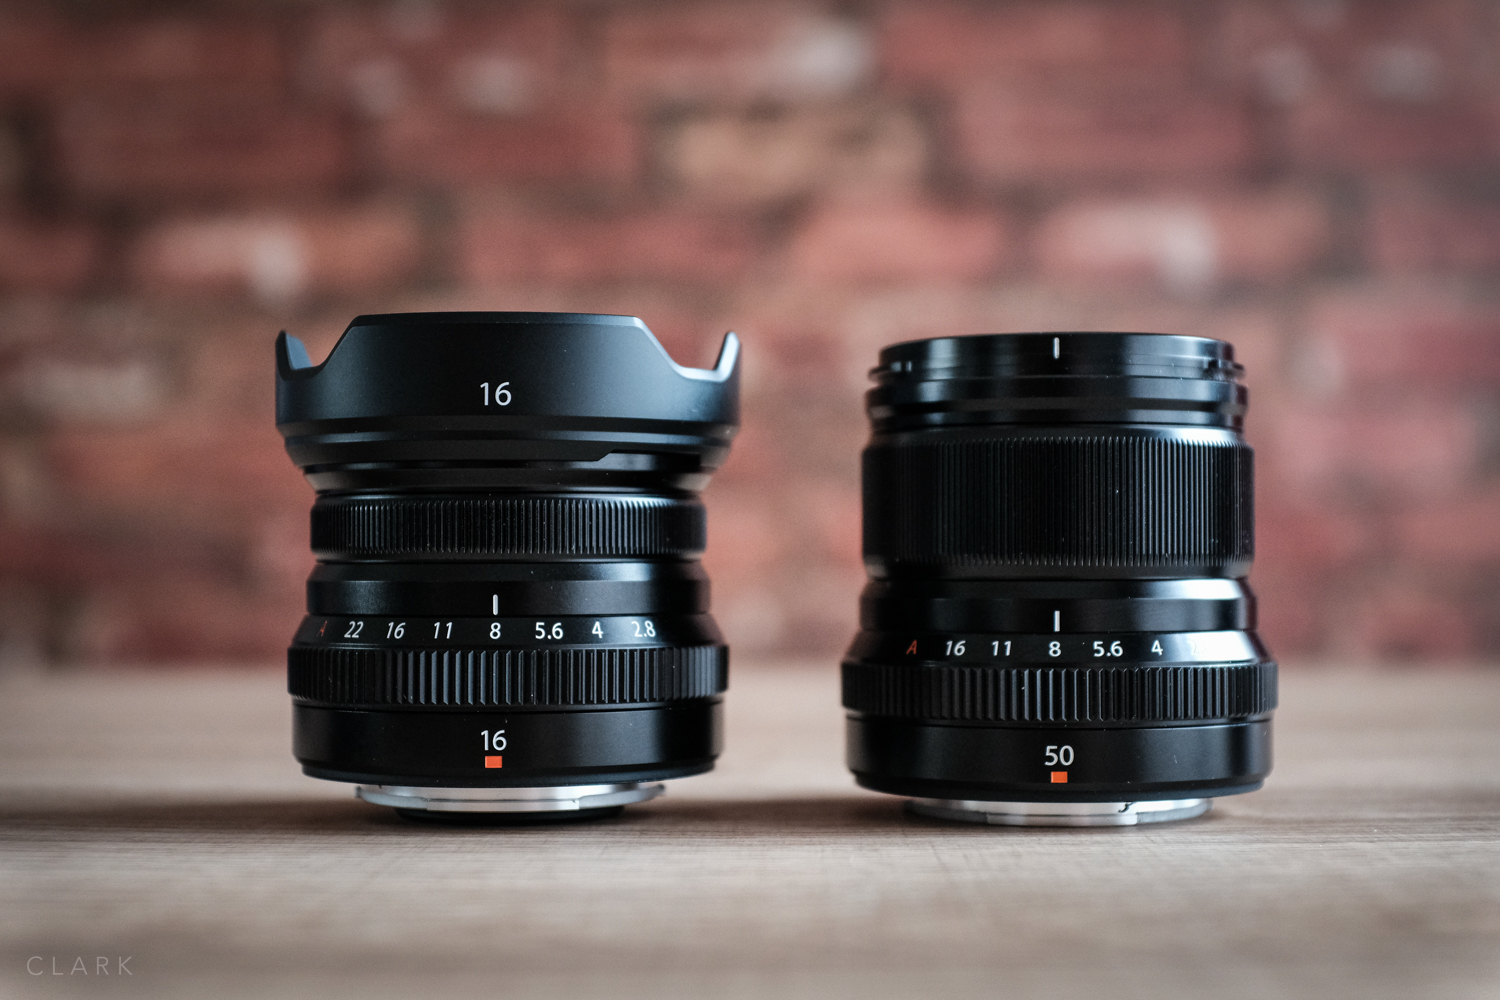
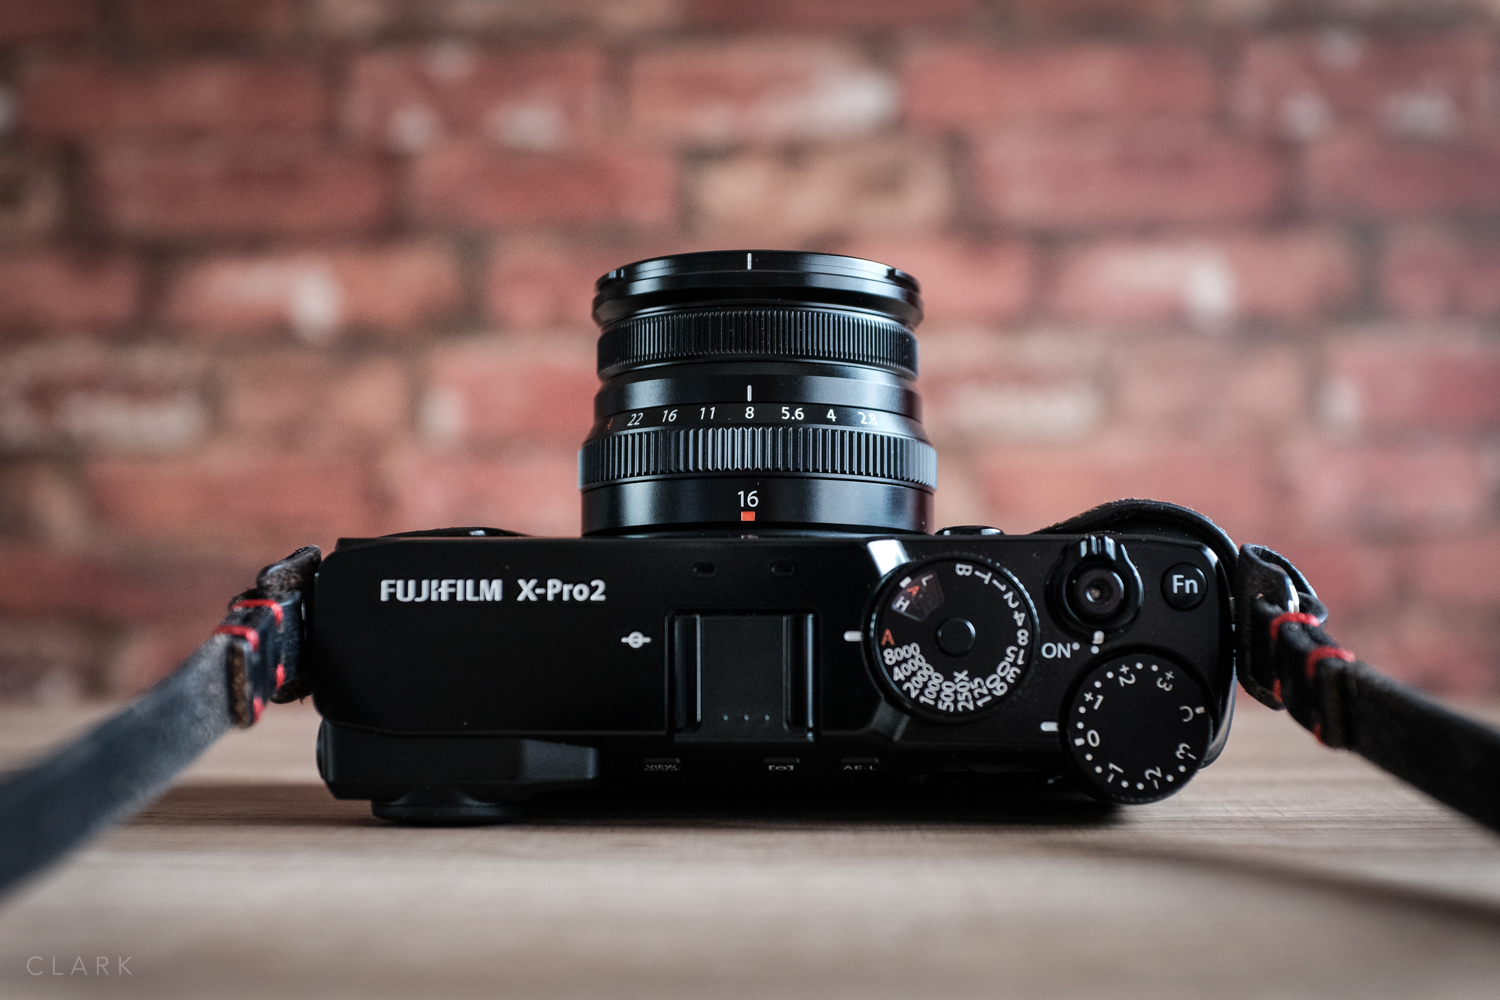
PHYSICAL SIZE OF THIS LENS
The 16/2.8 is tiny, even (slightly) smaller in height than the 35/2. But compared to the 35/2's 43mm filter size, the 16/2.8 has a 49mm. This makes the front end wider than all the other Fujicron's, and in my opinion, the best looking of this range of inexpensive primes. Let's face it, they are not the best looking bunch, mostly due to that weird tapered design (which helps not to obstruct the optical view finder of the X-Pro2). The 35/2 is passable, the 23/2 is fugly, the 50/2 would be just as ugly, but gets saved by the wider lens hood. But the 16/2.8 is actually quite attractive due to it's dumpy design with a wide front, which means less taper.

BUT WHAT ABOUT THE 18/2?
So the 18/2 was one of the three original XF lenses back when the first Fuji ICLC (the X-Pro1) came out. Some people knock it, but it's actually a great little lens, even though it's getting a bit long in the tooth. The 18/2 is as near as damn it a 28mm lens in full frame speak. 28mm is fantastic for street photography, and I think Fuji should take this opportunity to go full Tonto. Get right off the reservation by making an all metal, non fly-by-wire lens with a proper depth of field scale that is easy to read. So basically a small lens that has hard stops at either end of the focus range (not a continuous wheel).
A focus ring that has hard stops at either end of the focus range (preferably not fly-by-wire.
a focus tab to allow guessing focus without looking at the lens or through the viewfinder.
A proper depth of field scale that is wide enough to read (the 14, 16 & 23mm lenses DOF scale is too cramped).
Depth of field scale would be nice in orange
A clutch would be nice for selecting AF or manual focus, but not if it makes the lens too large.
I suppose what I’m looking for is something as close to a Leica Summicron 28mm f2.


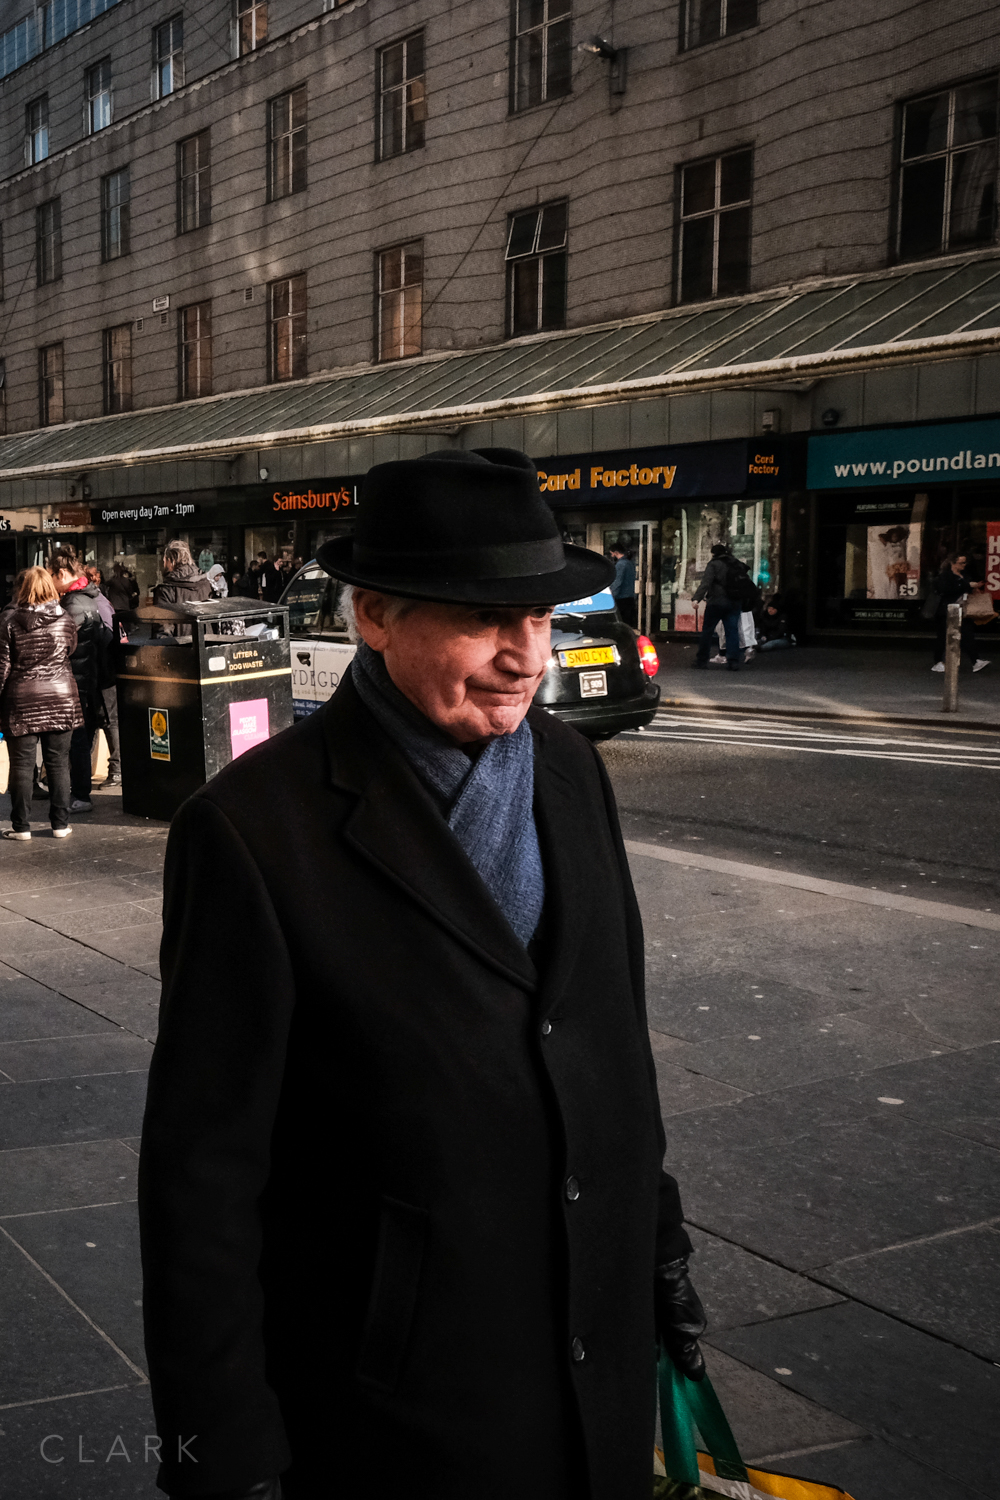
I haven’t had a lot of time to use the 16/2.8 due to shoots over the weekend that needed much longer lenses. But I managed a little bit at a jazz gig and a little bit of street photography. But I can say that this lens is not the sharpest wide open at 2.8 (especially at close focus) but is definitely sharp at f4. That’s how the 23/2 was when I had one from Fuji for a couple of weeks too. There is also a bit of chromatic aberration, but nothing major an it’s usually an easy fix in post. There is also a bit of distortion at the edges, but you would expect that on a 24mm focal length. If these few things are a deal breaker for you, you should definitely get the 16/1.4 instead. However; If you are looking for a small, lightweight and sharp (f4 and beyond) lens with super fast focusing and is water resistant, then the 16/2.8 is for you.

Just like the other Fujicron lenses, the 16/2.8 is extremely well built and has just the right of resistance on the focus ring and aperture ring. I’m really happy with it and look forward to using it on a few trips abroad this year. If you own any of the other lenses in this range, you already know what to expect. As long as this focal length is not too wide for you, I would highly recommend the XF16mm f2.8.
Check out my post Fujifilm 16mm f2.8: Too Wide? on my street photography blog for more pictures using the 16/2.8, but here are a few examples to wet your whistle.
You can buy the Fujifilm 16mm f2.8 at Amazon UK


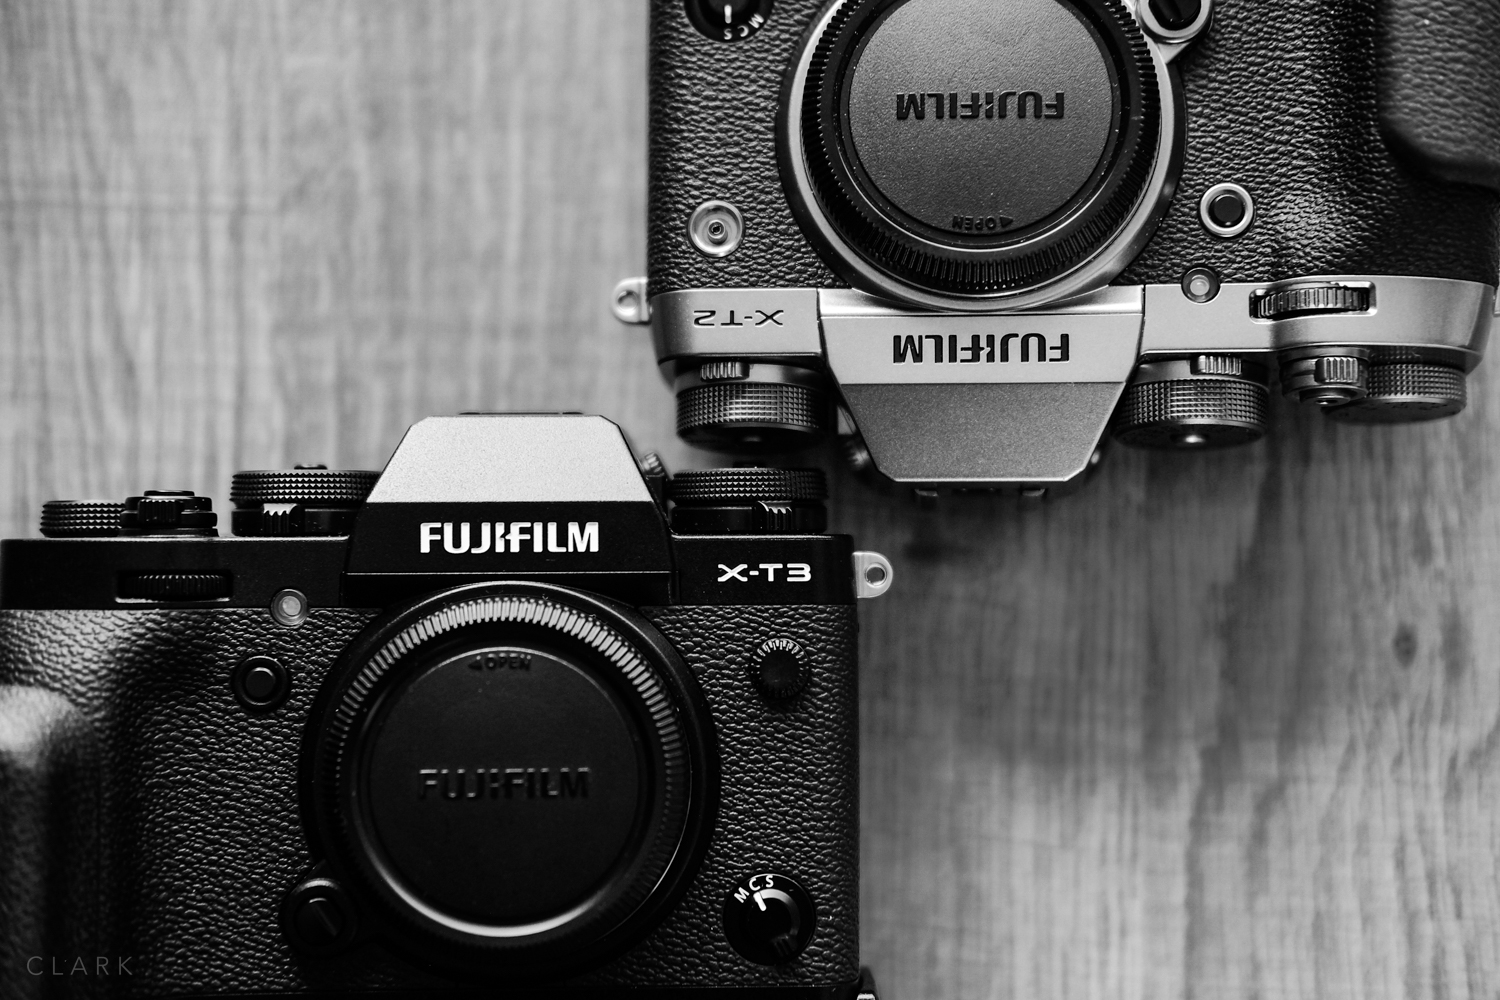
Tip For Shooting X-T3 And X-T2 Together

EV Dials
Set them like this
I was just packing for a two day shoot and was reminded how I have to set my X-T2 and X-T3 differently to make them operate the same. I thought it might be of interest to anybody else that uses these two cameras as a pair.
This only applies if you use the front command dials to control ISO and set shutter speed and aperture manually. In other words, the cameras are in full manual and the front command dial is being used to adjust exposure. This works well for me in concert photography as I need as much light as possible, so shoot wide open. I also know I can’t go lower than 1/125th second when I’m zoomed all the way in with the 50-140mm f2.8 (OIS on). So my variable is ISO and I want to be able to adjust it with the front command dial and then press it to lock ISO. One more press and ISO can be adjusted again. This prevents me from moving ISO unintentionally.
The X-T3 works this way when the ISO dial is set to C. Each press of the front command dial cycles through ISO - EV. But when the X-T2 is set to C it cycles through F - EV - ISO. If The X-T3 is set to 0 on the ISO dial, ISO is always live on the front command dial and can’t be locked. This might be sounding a bit complicated at this point. So in short:
Settings Menu - Buttons and Dials - ISO Dial Setting - COMMAND (on both cameras).
Set X-T2 ISO Dial to 0 (zero)
Set X-T3 ISO Dial to C
Use the front command dial to adjust ISO and press it to lock/unlock the wheel (both cameras).
Fujifilm X100F: Auto Detect WCL & TCL Lenses
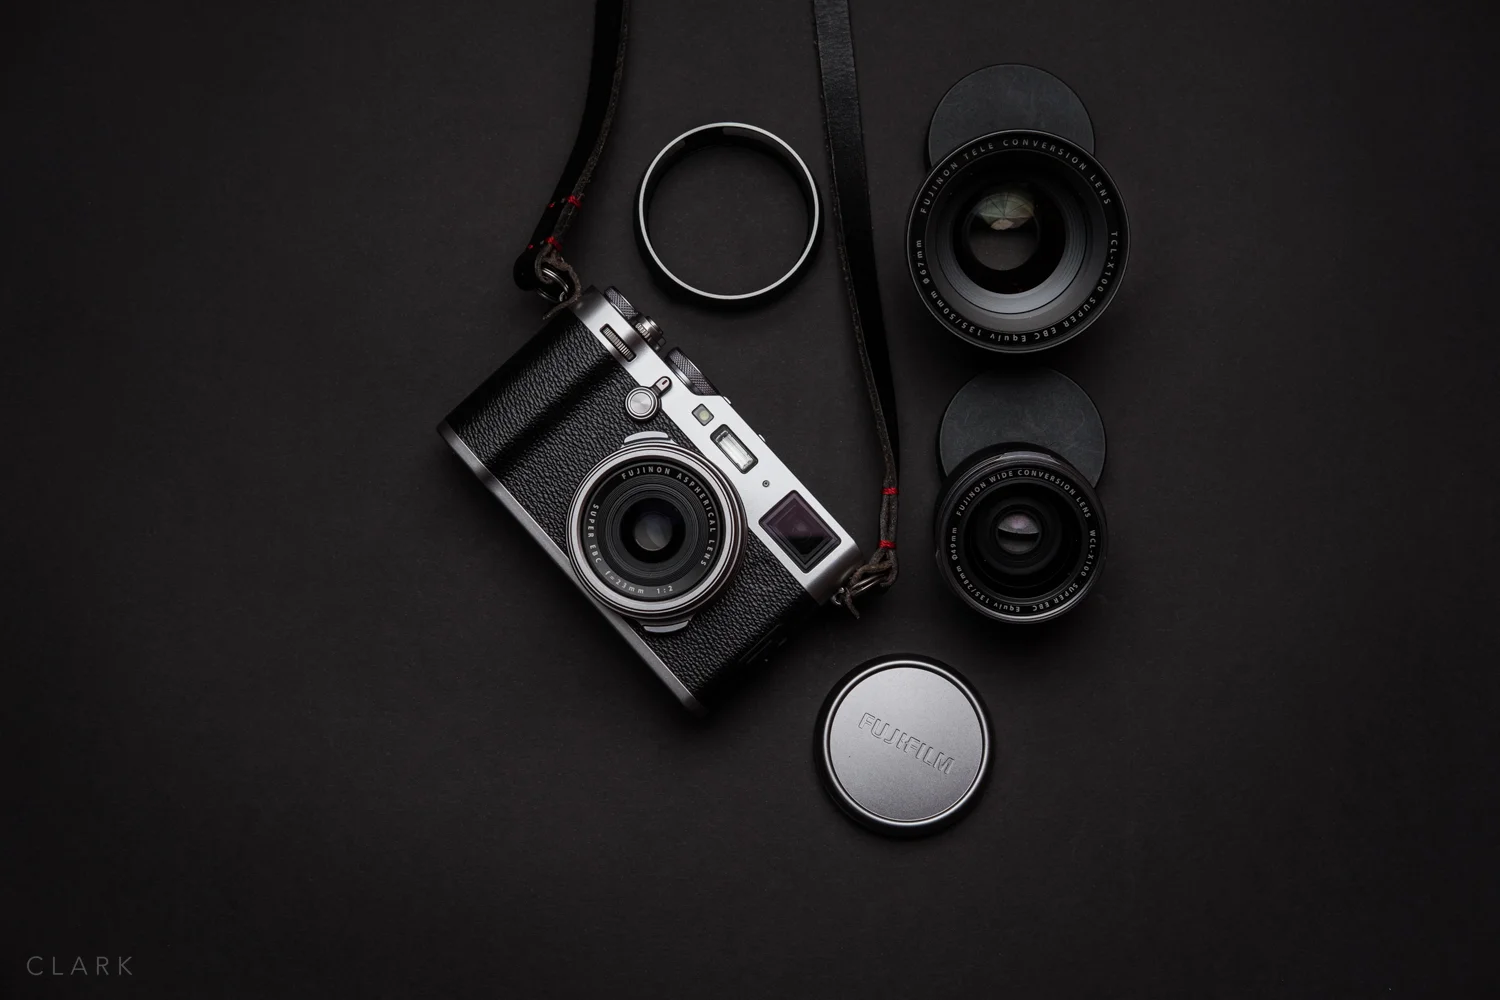
If you have a Fujifilm X100F (update: or X100V) and the older mk1 WCL-X100 wide angle, and/or the TCL-X100 teleconverter lenses, and you’re still diving into the menus or using up an Fn button to tell the camera when any of these are attached…read on.
The X100F has a magnet next to the front element of the lens (under the surface), as does each of the newer mkII lenses. So when the WCL or TCL are screwed on to the font of the camera, these two magnets react to each other and the camera automatically switches to whichever lens is attached and corrects for barrel distortion. How does the X100F know which of the two lenses are attached I here you say? Simple; The polarity of the magnets are reversed on each lens. So the magnet on one lens pulls and the other pushes. But the original two conversion lenses don’t have magnets on them.
I bought a packet of really small magnets on Amazon UK and I crudely attached them using gaffe tape inside of the lenses next to the rear element. But they were either not strong enough or too slim. So I attached a second magnet on to each of them, this time just held by their own magnetic strength. They then worked as they should and although I meant to go back an do a neater job, I’ve never got round to it and the magnets have never moved at all. I might go back and use one magnet on each, with a bit of black Sugru to stick them down and raise them up at the same time.
The boxes that come with each of the conversion lenses actually have magnets inside the lids. If you don’t mind destroying your boxes you can cut these out with a sharp knife and use them.

INSTRUCTIONS
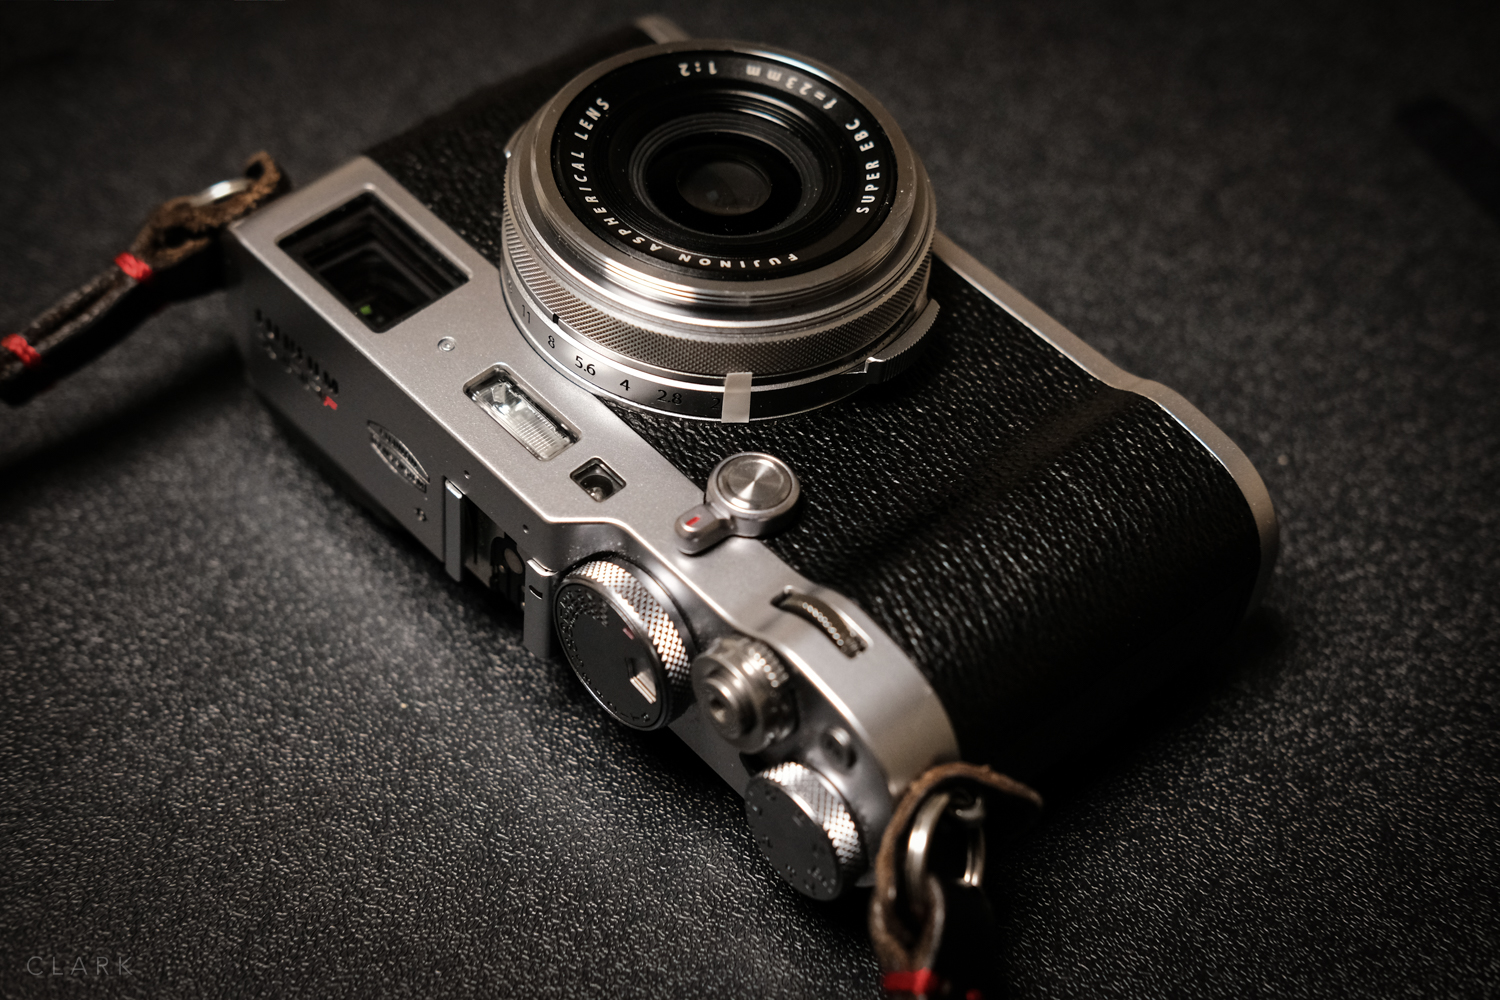
Move the magnet over the front of the lens (close to the FUJINON logo).
Check the viewfinder to see the point where the W or T symbol appears.
Make a note if it was W or T and keep the magnet facing in the same direction (polarity).
Place a piece of tape on the aperture dial where the magnet reacted (don’t move the dial).
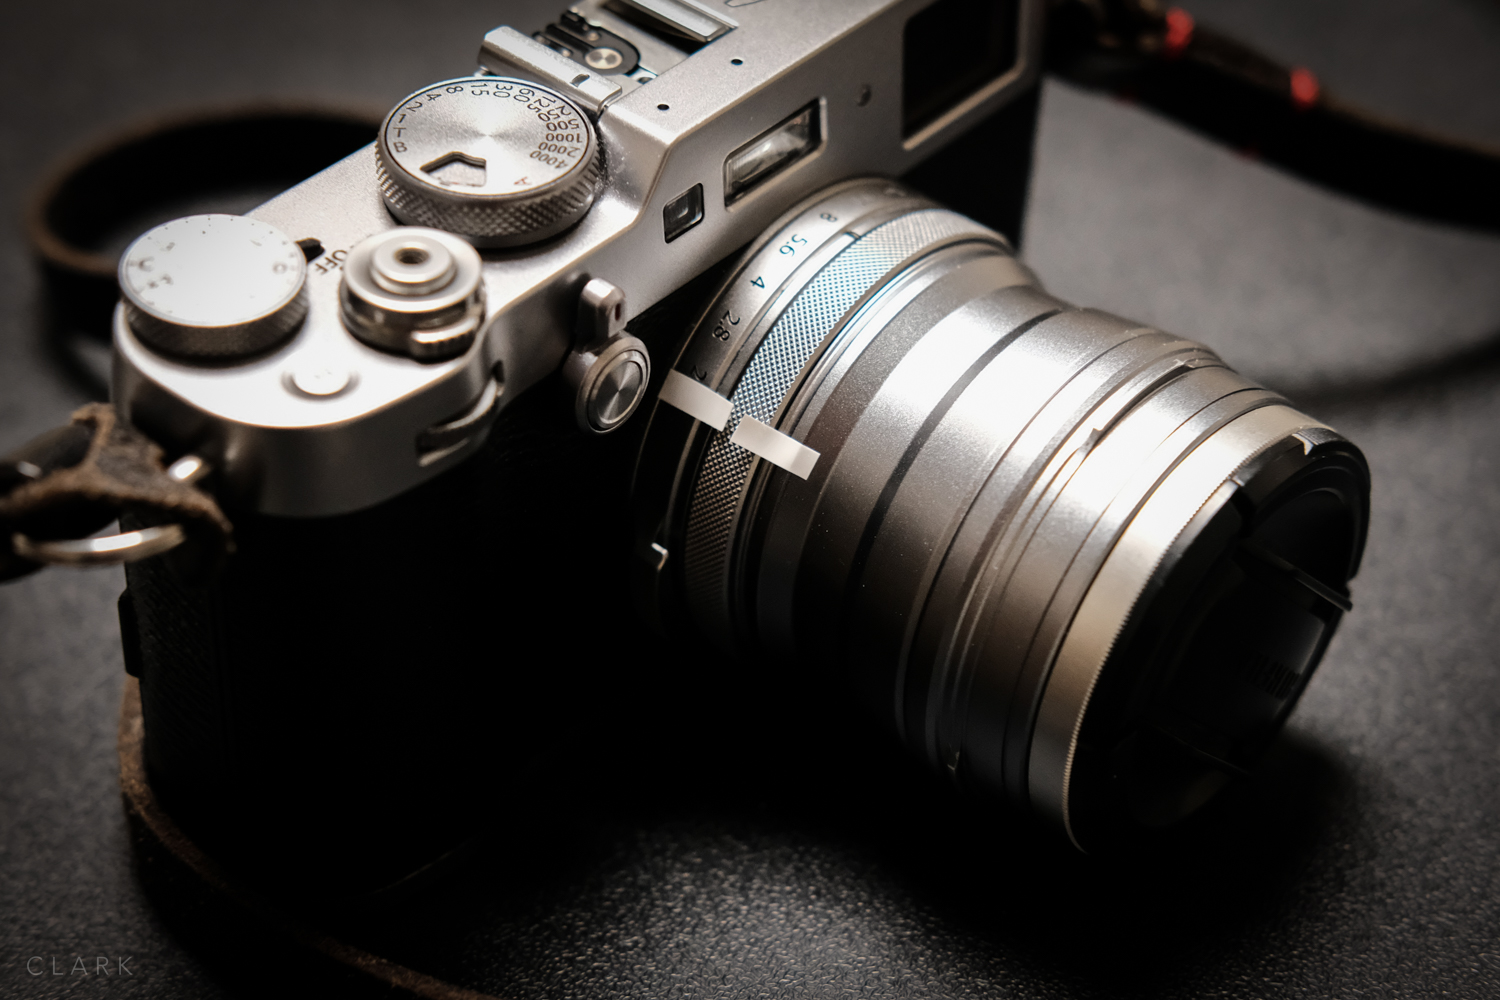
Now screw each lens and place a piece of tape on them at the same point as the camera’s
Remove the lenses & attach a magnet using tape inside the back of the lens (see picture).
You might need to re-check the polarity to make sure it’s correct for each lens.
Screw the lenses on and check that the camera automatically switches to WCL or TCL.
If the camera doesn’t automatically adjust, add another magnet on top of the first one
That’s it. No more menu diving or using up an Fn button. Plus, you’ve just saved a load of money buying the WCL or TCL mkII’s.
Good luck.
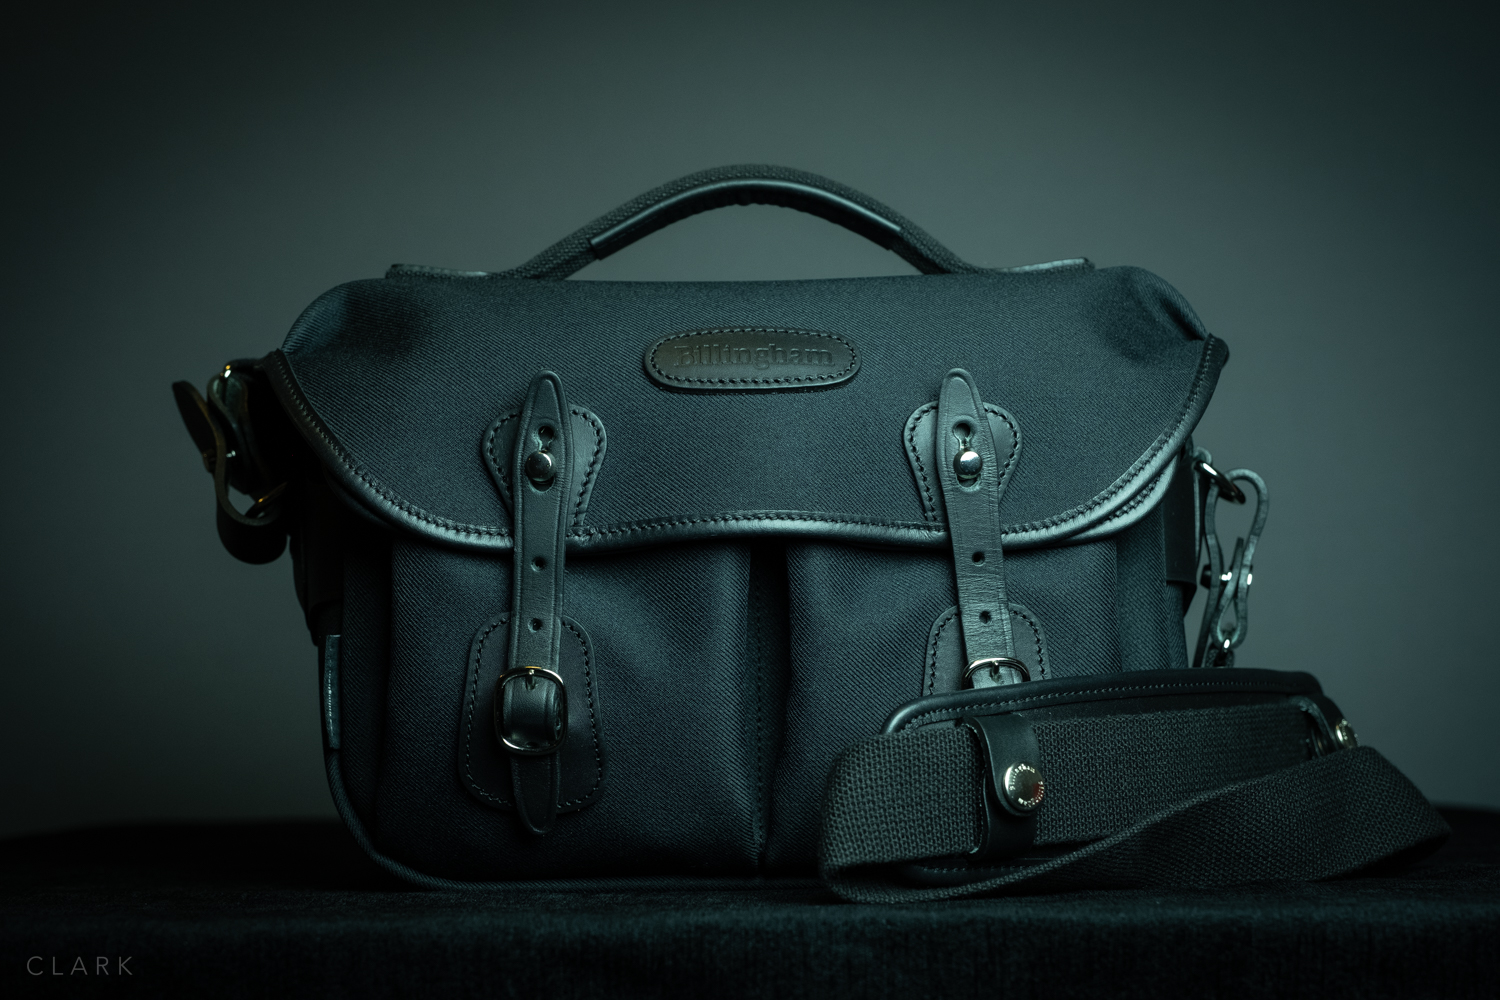
Billingham Hadley Small Pro Review
My day to day small walk around camera bag for the past two years has been the ONA Bowery in Dark Truffle leather. I also have the ONO Prince Street (also in Dark truffle) but my Hasselblad stuff lives in that one. I still really love the Bowery for the amount of gear I can fit in such a small space, but I felt like trying something new.
My friend John Summers had given me an insert for a Hadley Small a while back and I’ve used it in various bags, including the Christopher by Millican and recently in the F-3x by Domke. The size of that insert is perfect and almost identical to the Bowery. So after looking at various small bags from many different manufacturers, I kept coming back to the fact that I was looking for something that would either take the Hadley Small insert or have the same interior size. So being the genius that I am, I finally realised the bag I was looking for might just be a Billingham.
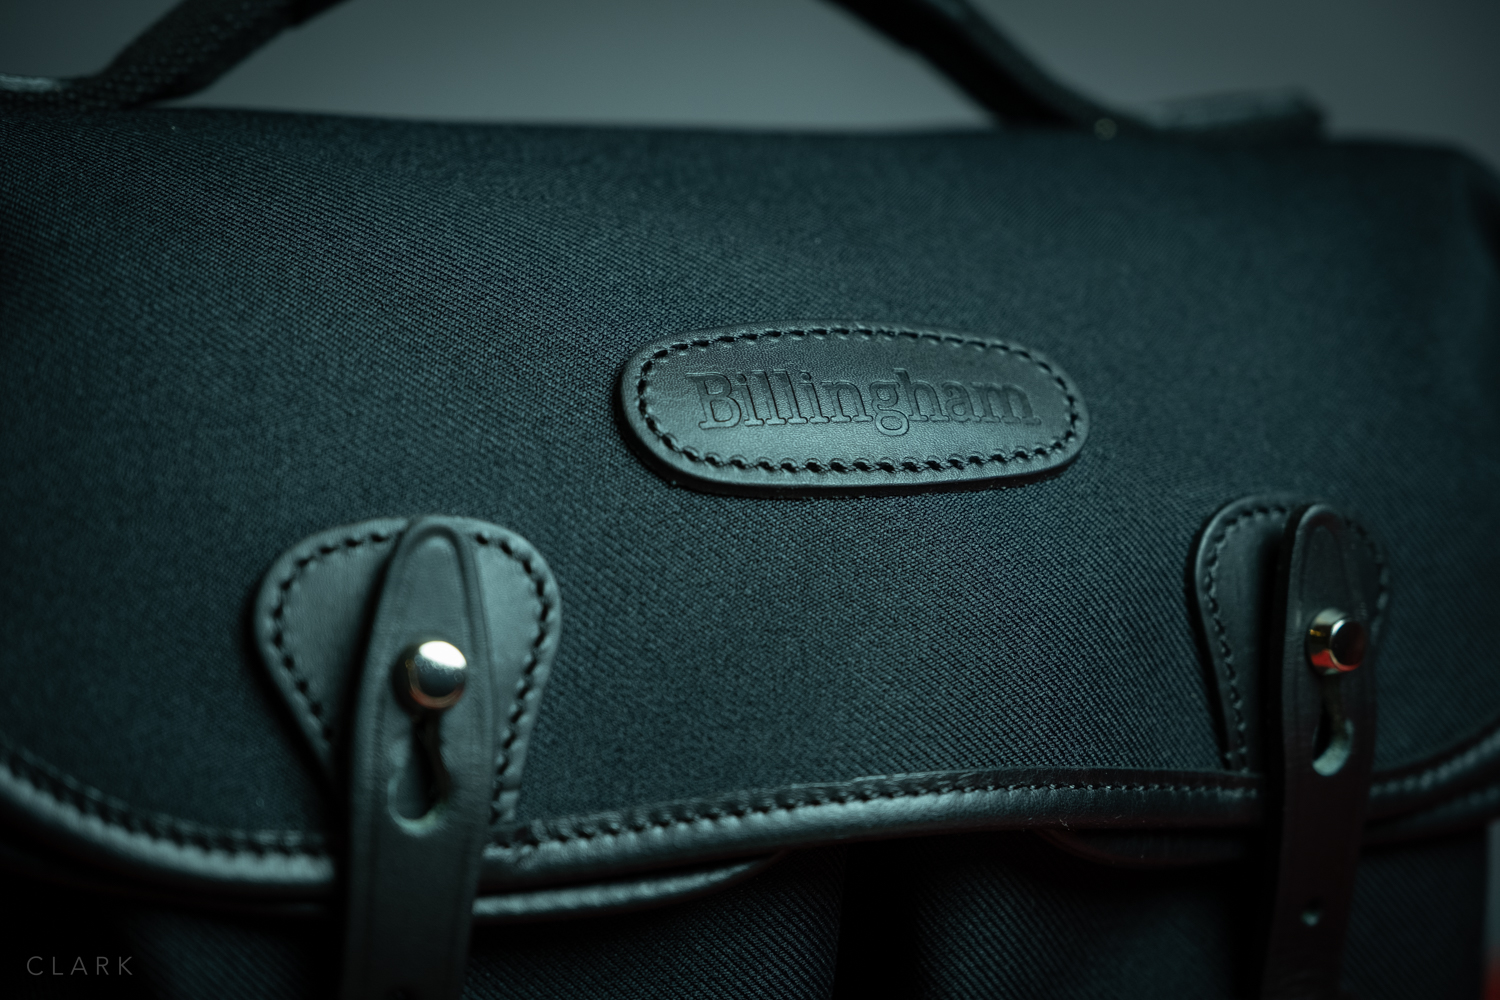


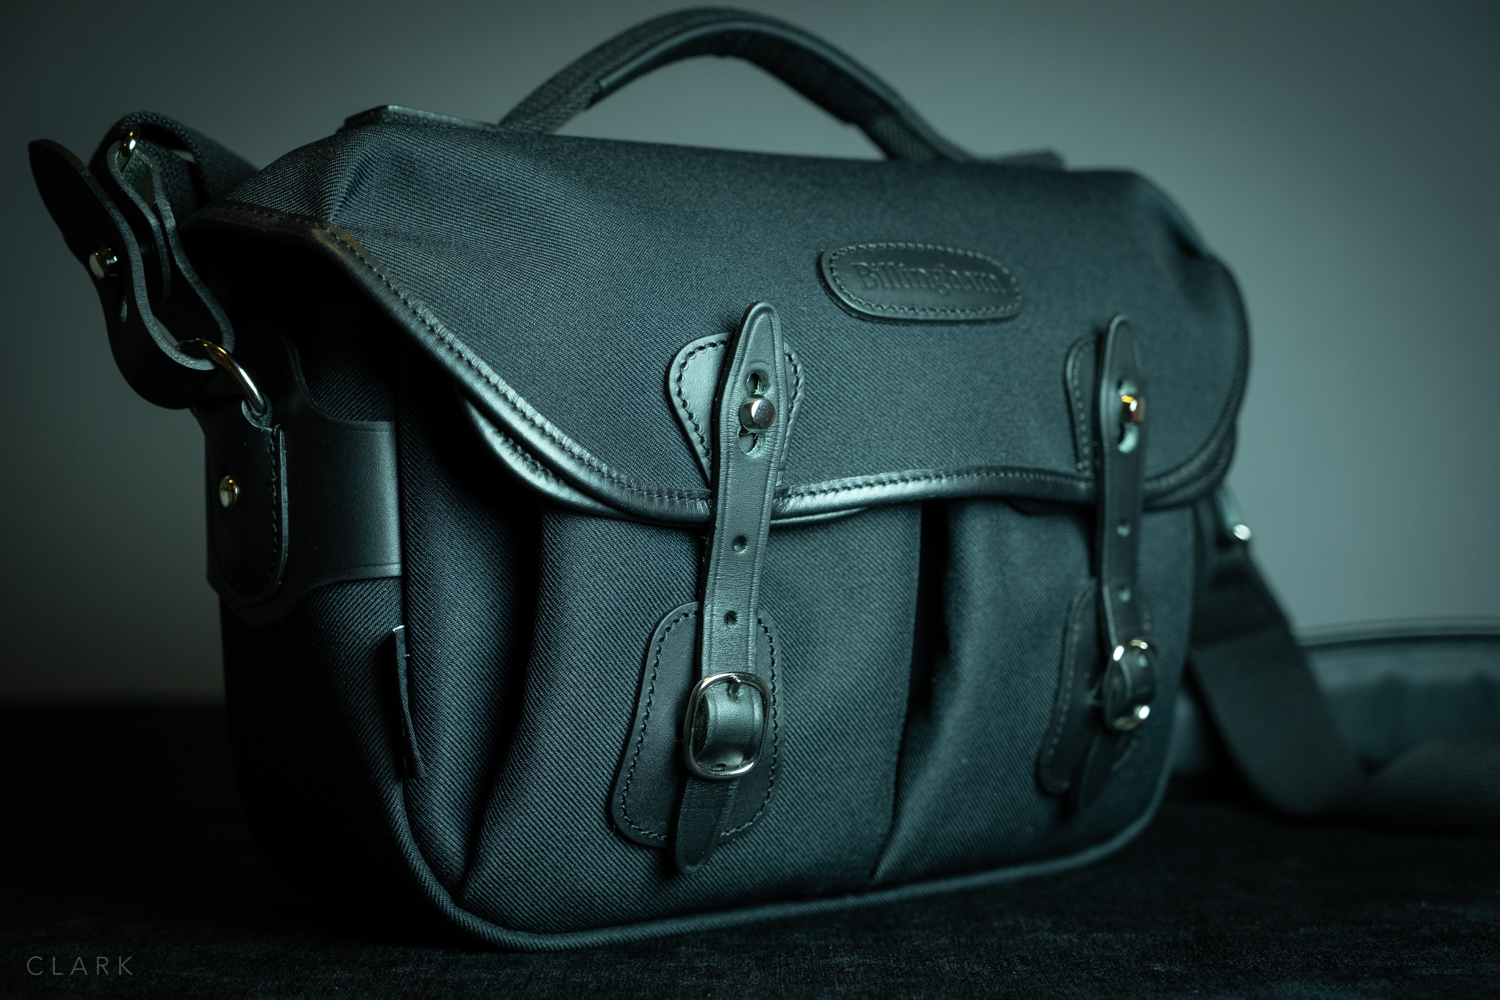
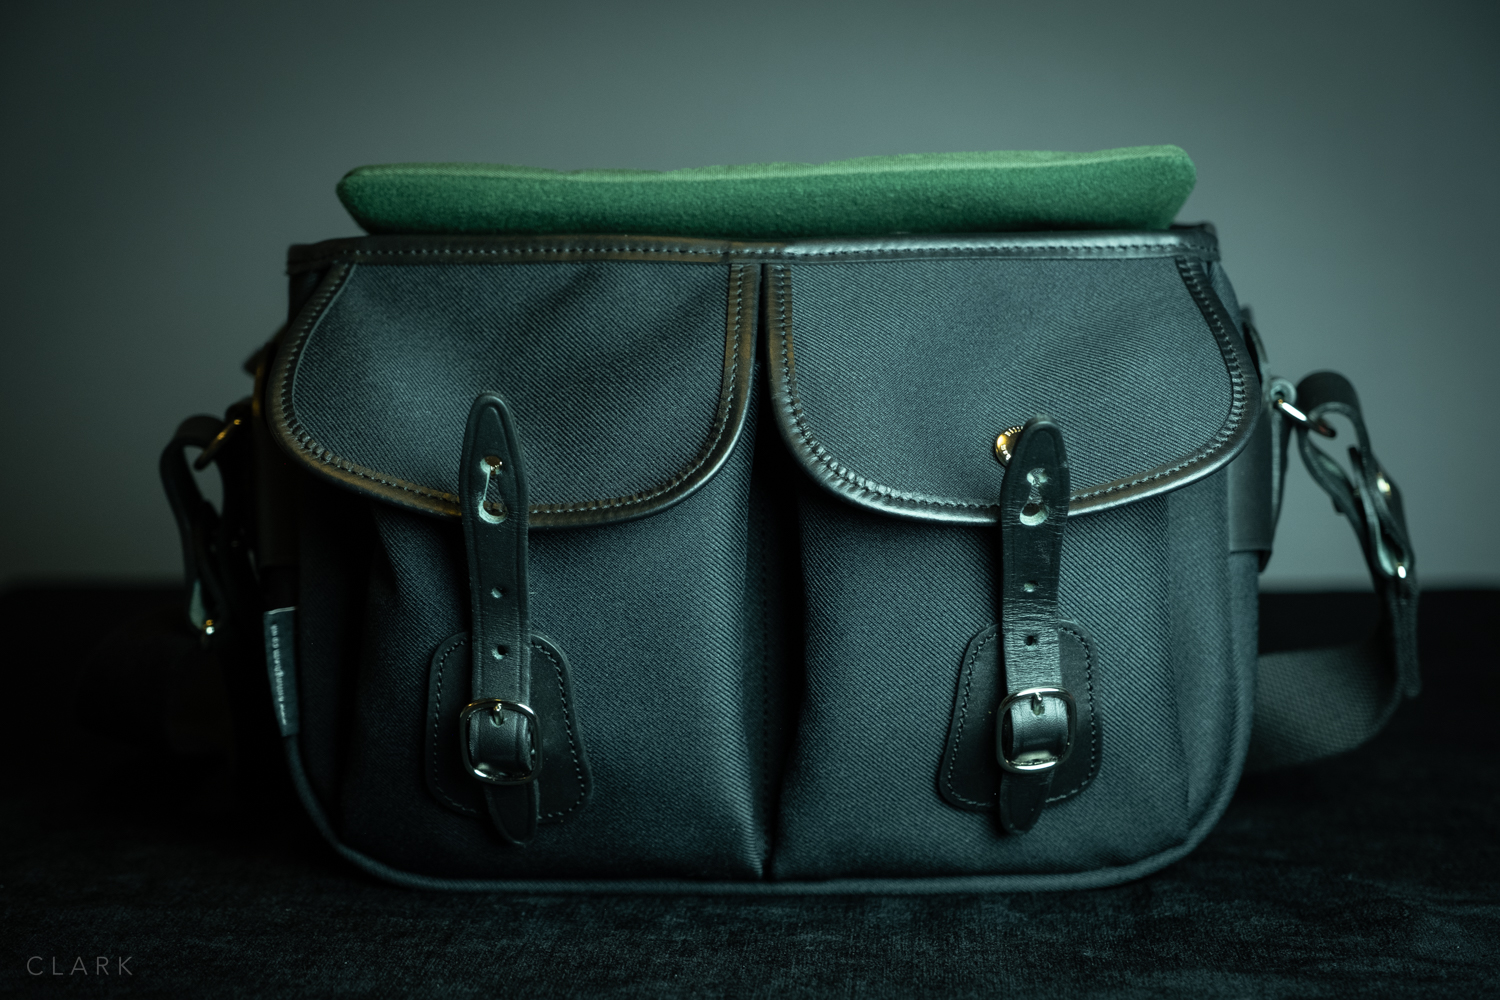
Not being too into the beige thing and wanting to be a lot more stealth; I opted for the black bag with black leather details. The original Hadley Small is still available (£159 in the UK), but the new Hadley Small Pro was released last year (£199 UK) and has some really worthwhile additions to the original bag (more on this later).
The Hadley Small Pro is made from Billinghams FiberNyte material, which has a layer of rubber sandwiched in the middle of its three-ply makeup. This makes the Hadley range permanently shower proof, no need to apply wax or use an additional rain cover when out in the rain. My bags always get soaked at some point, so this will be a really handy feature. The strap on the original Hadley Small was stitched to the side of the bag, but the Pro has a removable strap via leather fasteners. I would rather have the older method as I don’t trust straps that are removable. This is mostly due to the ONA Bowery strap coming undone loads of times as I lifted it from the passenger seat of my car. This resulted in the destruction of a Fuji X100F when the Bowery hit the deck. My Bowery now has zip ties holding the clasps on the strap permanently shut. Time will tell if the Billingham is more secure than the ONA, but it is absolutely solid right now and should stay that way as I won't be removing them, causing the leather to soften.

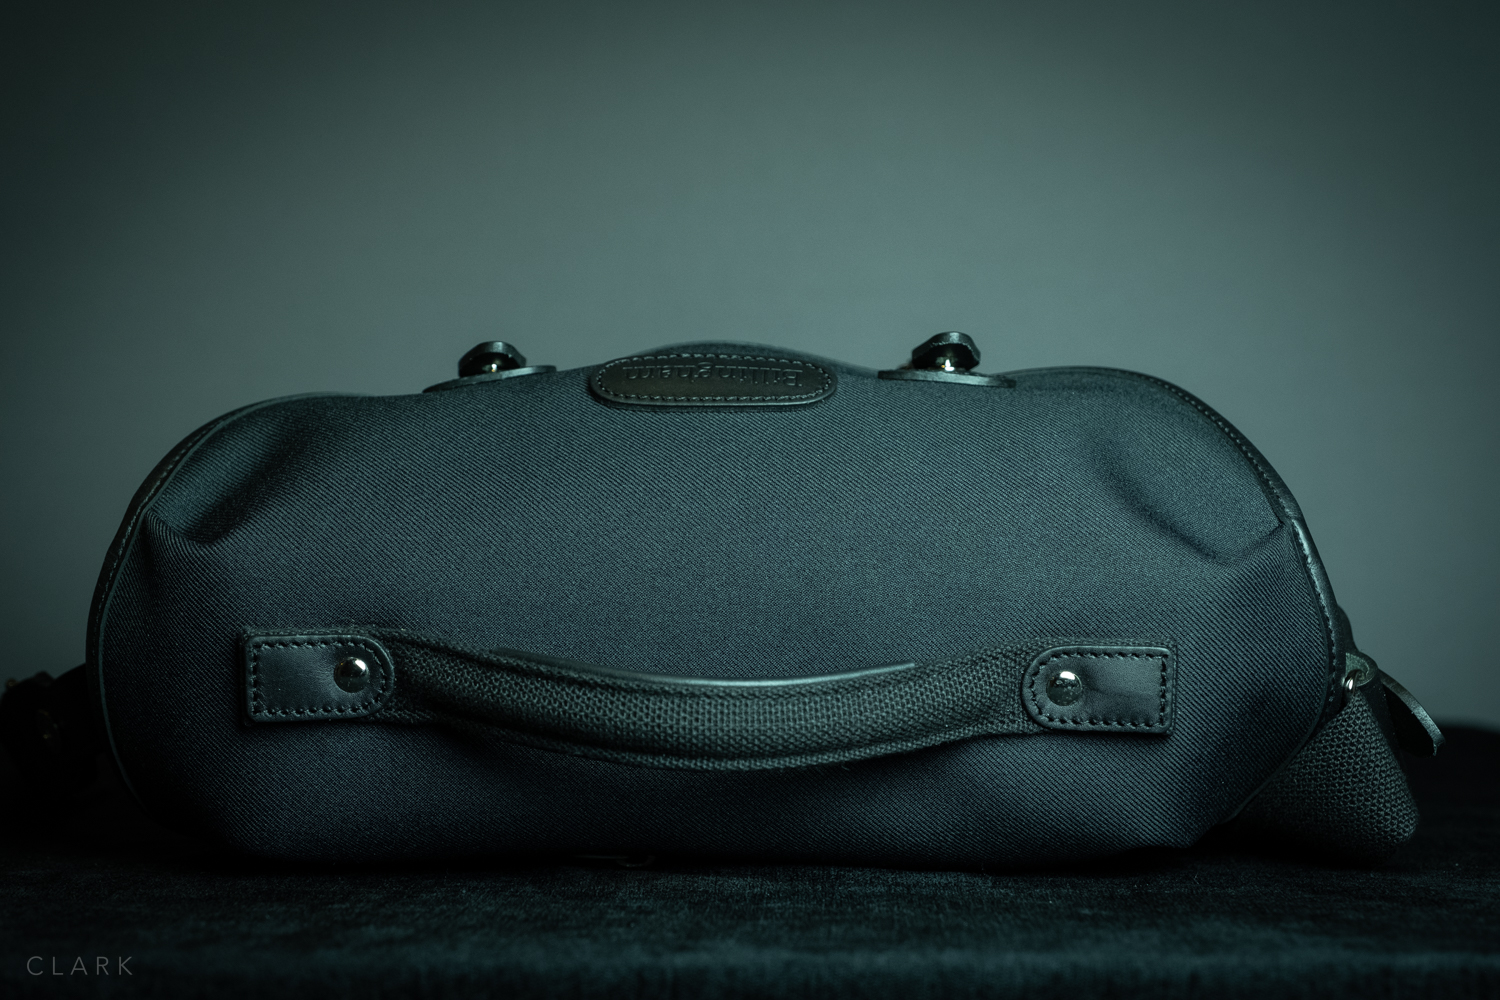
The handle is fairly rigid and easy to grab. It’s riveted and stitched to the top of the bag which has an internal support
Another new feature on the Pro is the addition of a handle on the top. This is ideal for that passenger seat scenario and a great feature to have. I would make sure the lid is secure before using the handle, but at least the Hadley Small Pro doesn’t tip over, spilling everything onto the ground. .
Two more new features on the Pro are found around the back. The first is the welcomed addition of a luggage strap so that it can be slid over the handle of a rolling suitcase. All bags should have this in my opinion.

Waterproof zip keeps iPads or documents dry and the luggage strap is really useful
Just above the luggage strap, you will find the waterproof zip for the rear document pocket. This is a super handy pocket that will keep documents or iPad Mini 100% dry. Well worth the price difference between the Pro and the older model.


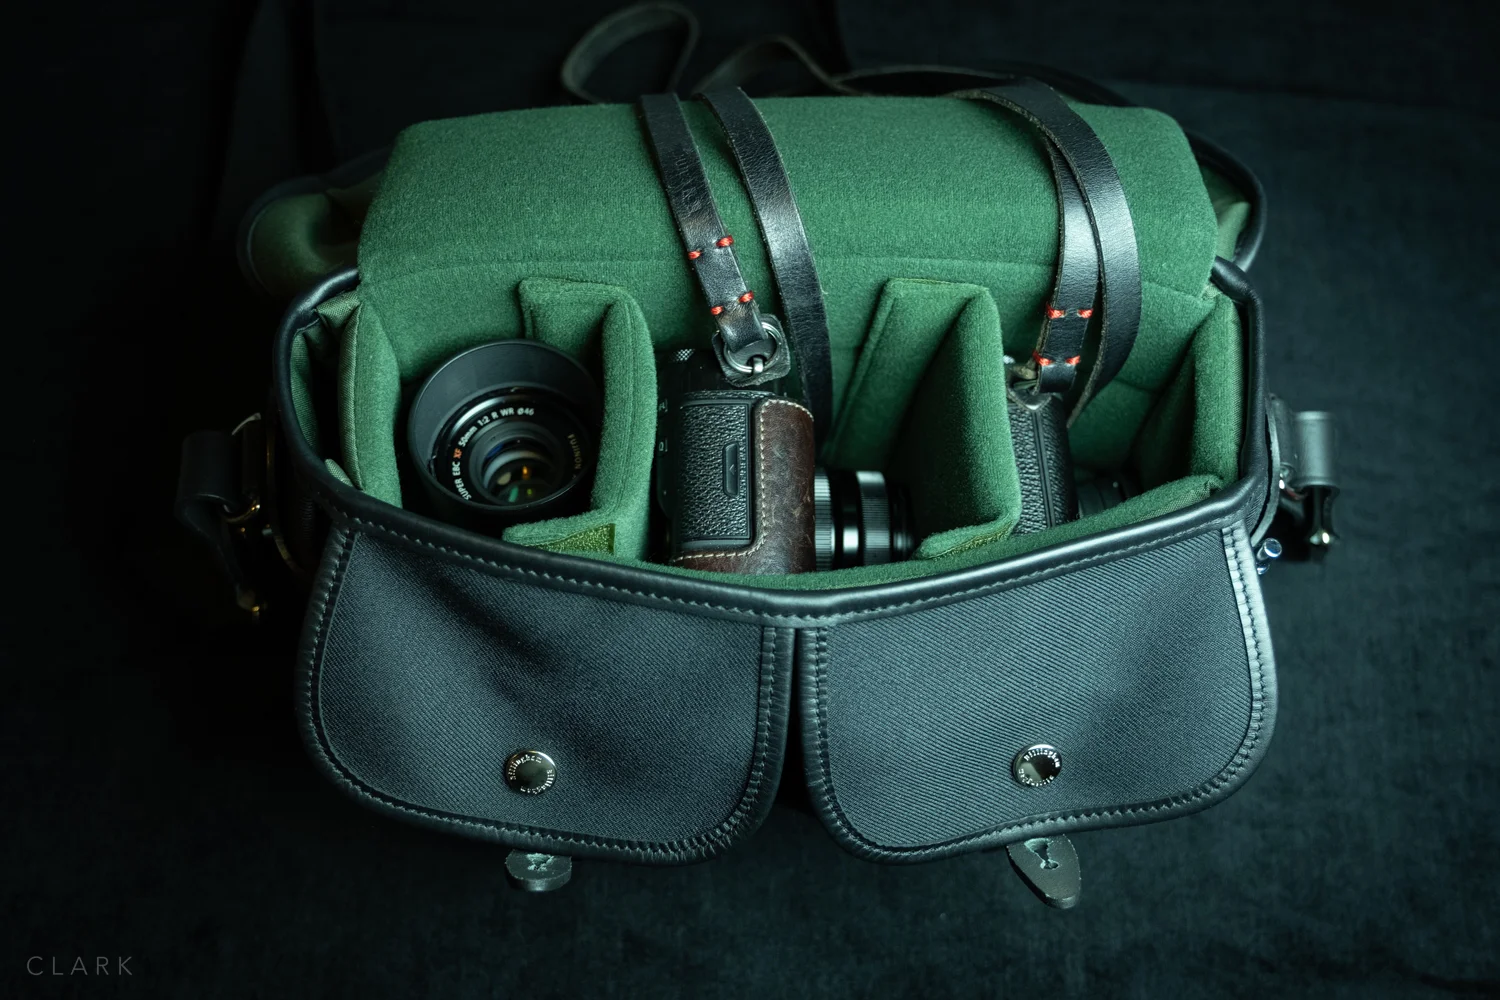
The main compartment of the Hadley Small Pro (and also the original Small) is one open space that can be used as it is, or with the included insert. This is one of those bags that feels bigger on the inside than it is on the outside. I can easily fit my X-Pro2 with the 35mm f2 attached, X100F with lens hood, and two lenses stacked in the third partition (I have the 50mm f2 and the WCLX100 wide angle converter lens). Two cameras and four focal lengths (28, 35, 50 & 75mm in FF terms) is fantastic in such a small bag and there’s even enough room in there to include the pancake 27mm too. Or I can leave the 50/2 at home and take my X70 for a bit of shooting from the hip. The insert is held inside the bag using a single stud fastener at the front. It has a padded hinged lid to protect gear from things falling on top..

This is everything I have in the Hadley Small Pro. The Fuji X70 gets swapped for the 50mm f2 sometimes


The front pockets are held shut with stud fasteners and are really great for a bag this size. Both are roomy and can be expanded or reduced in size by fastening a stud at the outer side. This also creates a makeshift pen holder. I can put my passport sized Midori Travellers Notebook, pens, wallet, memory card holder, phone, spare batteries, and Apple Airpods in there with space to spare.
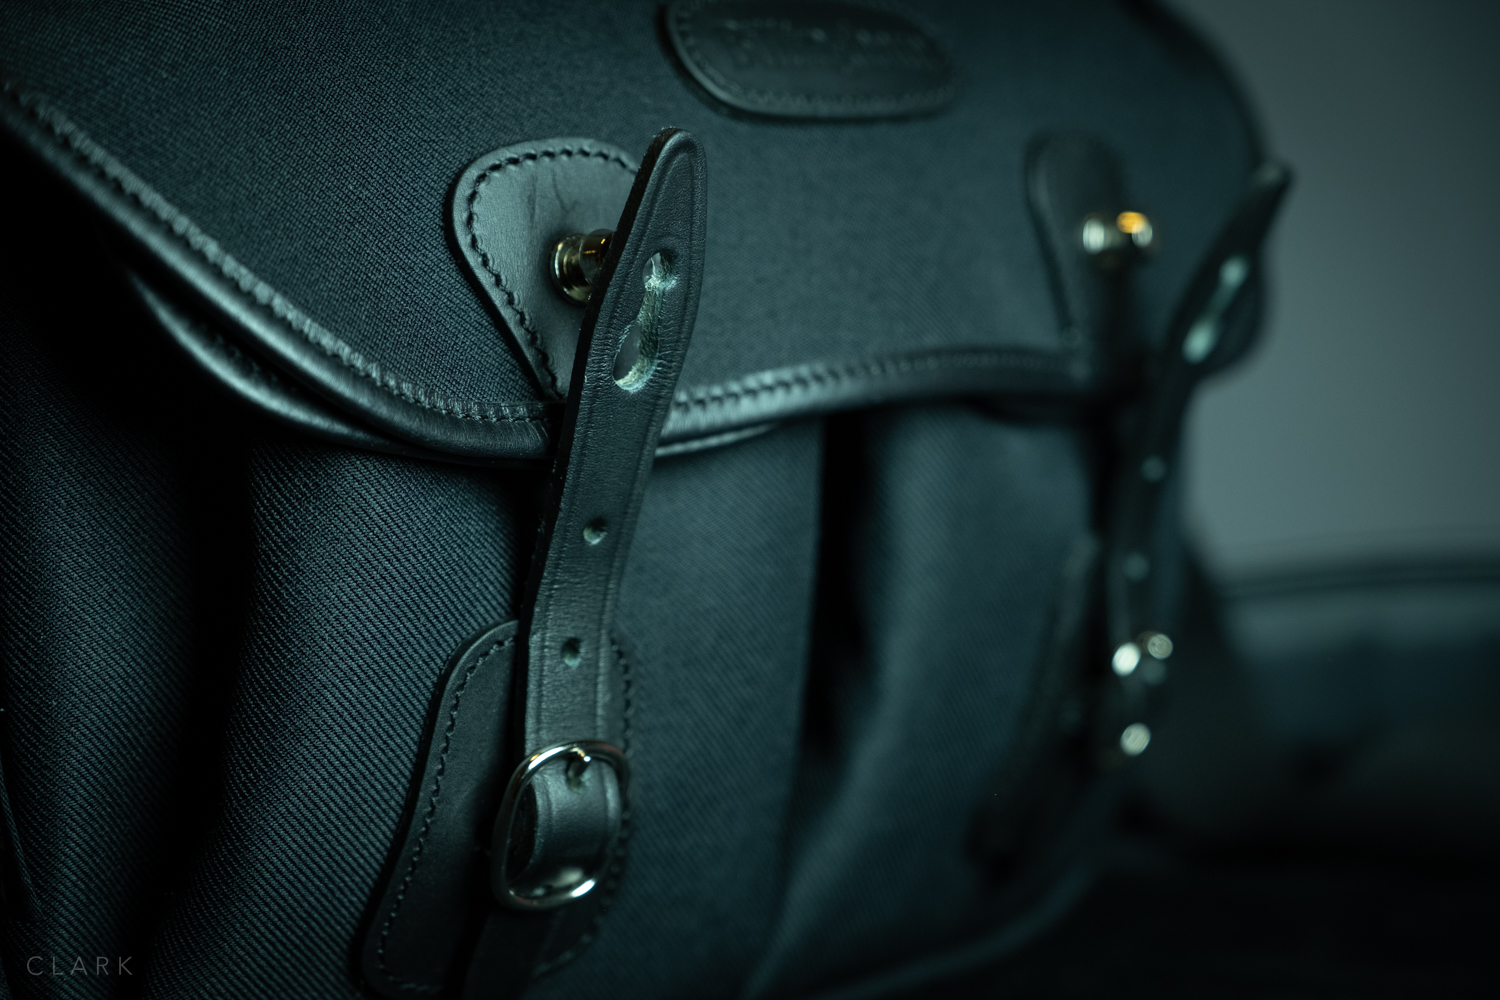
The leather and brass fixings ooze quality and should last a lifetime. I opted for the black leather on a black bag, so the fixings are also nickel plated. It’s almost criminal to not show off the leather like on some of the two-tone bags, but I need something that doesn’t draw attention. I was almost tempted by the green version though as they always look really nice on the web.
The front fasteners as extremely stiff due to the excellent quality of leather and can be awkward and time-consuming to open, but it should just take a short amount of time to loosen up to the point of opening the bag one-handed.


OPTIONAL ACCESSORIES
I opted to buy the SP40 leather shoulder pad at the same time as the bag. Not having tried the bag before, I wasn’t sure if I would even need a shoulder pad, but I thought it was better to be over prepared than have a sore shoulder. The pad is as well made as the bags and is easily attached or removed by two heavy-duty stud fasteners. The underside of the pad is grippy and curves around your shoulder perfectly due to grooves that allow it to bend without kinking.
CONCLUSION
The Hadley Small Pro is an ideal bag for smaller kits. Leica owners or mirrorless shooters alike will love it. I have a backpack for my more demanding shoots, which is where my X-T3, X-T2 and most of my other lenses live (including the bigger red label f2.8 zooms). But for day to day walking around documentary and street shooting, this is an ideal bag. It’s waterproof and versatile and I'm looking forward to using it on a few trips abroad this year.
I also have a Tenba Cooper 13 Slim that I use when I need to carry my 13” MacBook Pro with me. The Cooper has been a fantastic bag, but I might try a Hadley Pro or a Hadley One to see if it would work as my mid-sized bag. Life would probably be a bit easier using different sizes of the same bag...I think.
Pros.
Top Handle.
Luggage Strap.
Rear waterproof pocket.
Removable camera insert.
Good amount of padding.
A generous amount of dividers (unlike ONA).
Good sized and expandable front pockets.
Comfortable to wear on long walks.
Cons
I would have preferred leather on the base or some sort of wipe clean material.
Leather tabs are a bit short to get a proper grip when opening the bag.
Difficult to open one-handed (this might change as the leather softens).
Find out more at www.billingham.co.uk
But the Hadley Small Pro at Amazon UK