
BLOG
What's In A Music Photographers Bag
I sort of fell into the genre of music and over the last seven years, I’ve shot more than 300 artists and taken more than 50,000 pictures as a music photographer. I shoot all types of music, but mostly jazz. I am currently the official photographer for the Scottish National Jazz Orchestra (SNJO) and my pictures have been featured on album covers, tour posters and magazine publications. At the time of writing this post, I am putting the finishing touches on a book featuring the last 7 years with the SNJO.
THAT WAS THEN
There was a time when I shot Nikon alongside my Fuji’s, but with the release of the Fujifilm XF50-140mm f2.8 my D800 (amazing camera) ended up staying at home, and after six months or so of no use my full Nikon kit was sold. I also used a Lowepro backpack for a long time, but as I often have to pull my camera back out of the bag just as I am about to leave a venue, a shoulder bag is the way I go these days (mostly).
THIS IS NOW
These days I am using a Domke F2 (black canvas) bag. It’s not a massive bag, but it’s not small either. What I can fit inside the F2 is about as much weight as I want to carry and as it is packed full, I have to take out a lens if I want to include a different one. This works well for me as I would end up carrying way to much gear otherwise. If I know I’ll be shooting a lot of backstage pictures I might wear my belt-pack to the gig and put an X-Pro2 body in one of the side pockets as I prefer a rangefinder-style body for that sort of shooting.


SIDE POCKETS
Starting at the F2’s side pockets. I have a BlackRapid Yeti double harness strap, a Manfrotto Pixie mini tripod and a Spider Holster in one pocket, and a small pouch that attaches to my belt in the other pocket.
BLACK RAPID YETI
The BlackRapid strap takes up a lot of room and I have thought of getting rid of it and using regular straps many times, but this harness works well and is easy to adjust quickly for one camera or two.
SPIDER HOLSTER
The Spider Holster is rarely used but can be handy when using a third camera. I keep the spall spanner/wrench in my belt pouch for attaching the little stud to the bottom of the camera.


BELT POUCH
These tactical pouches are available on Amazon for very little money and are essential for what I do. I put this on my belt as soon as I arrive at the venue and it saves me from having to get to my bag (which can be at the side of the stage) for essentials. I keep a notebook, pens, spare batteries, SD cards, business cards and a lens cleaner in this. It also has a section on the outside for my iPhone, which I insert upside down, face inward (and muted) so that it doesn’t light up on its own.
LOWEPRO PADDED WRAP
I have had this green Lowepro padded wrap, that came with another bag, for years. It is folded like an envelope and mostly just lies on top of my gear as the F2 doesn’t have any padding. I keep an iPad mini in the zippered pocket on the lid of the F2, which protects the screen on the back of my camera, but the wrap is just added protection. It can also come in handy for kneeling on or a number of other uses.
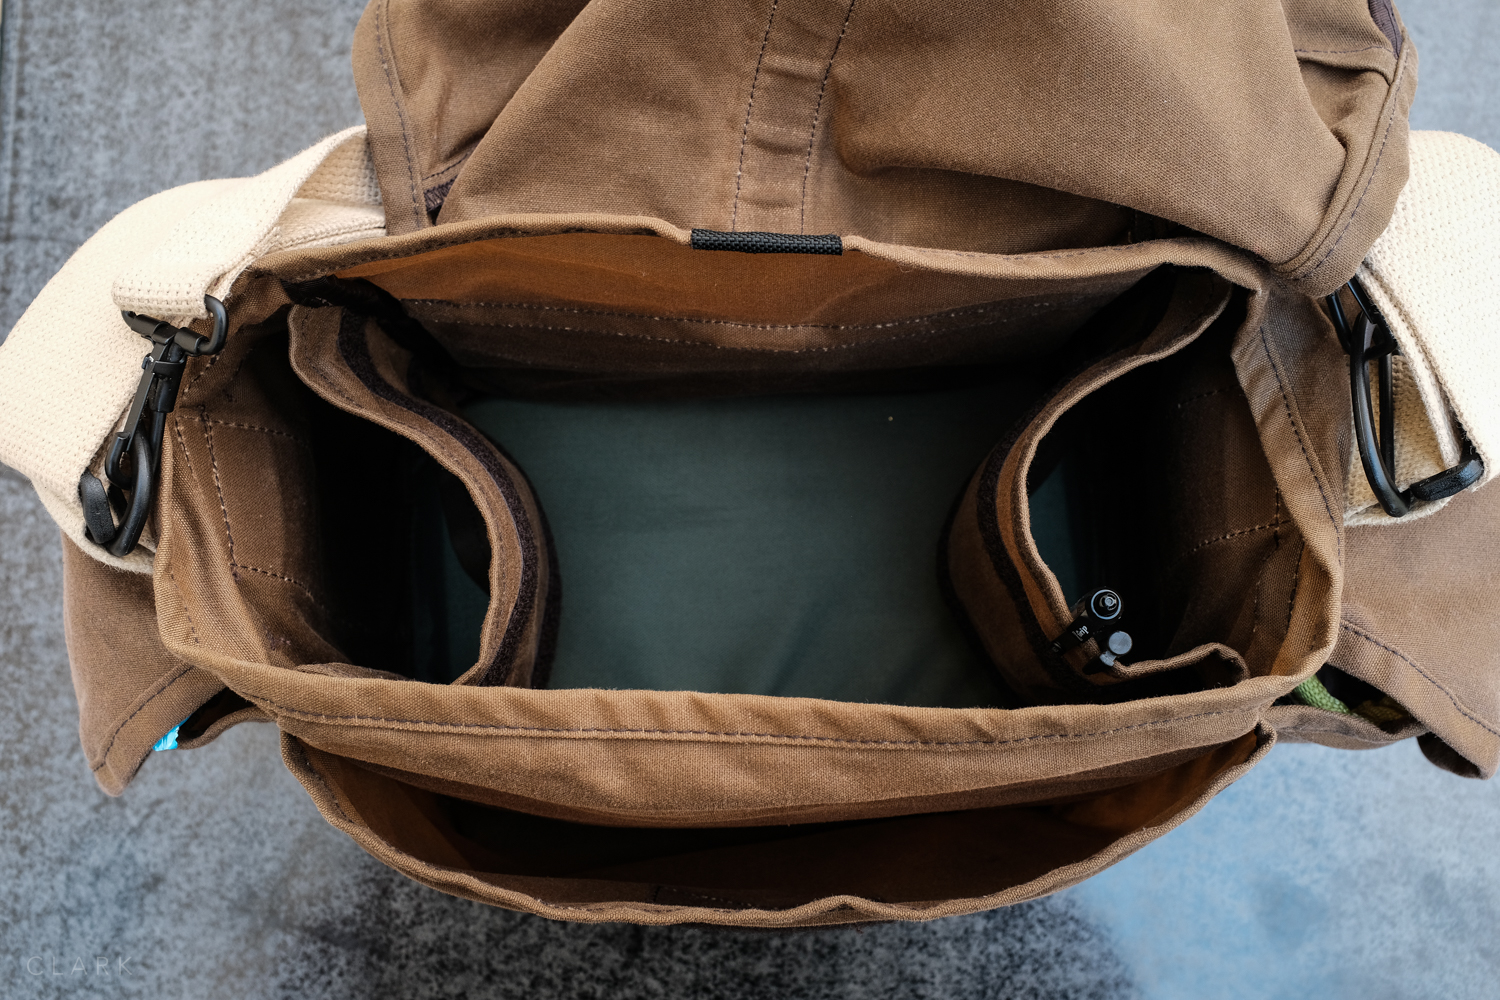
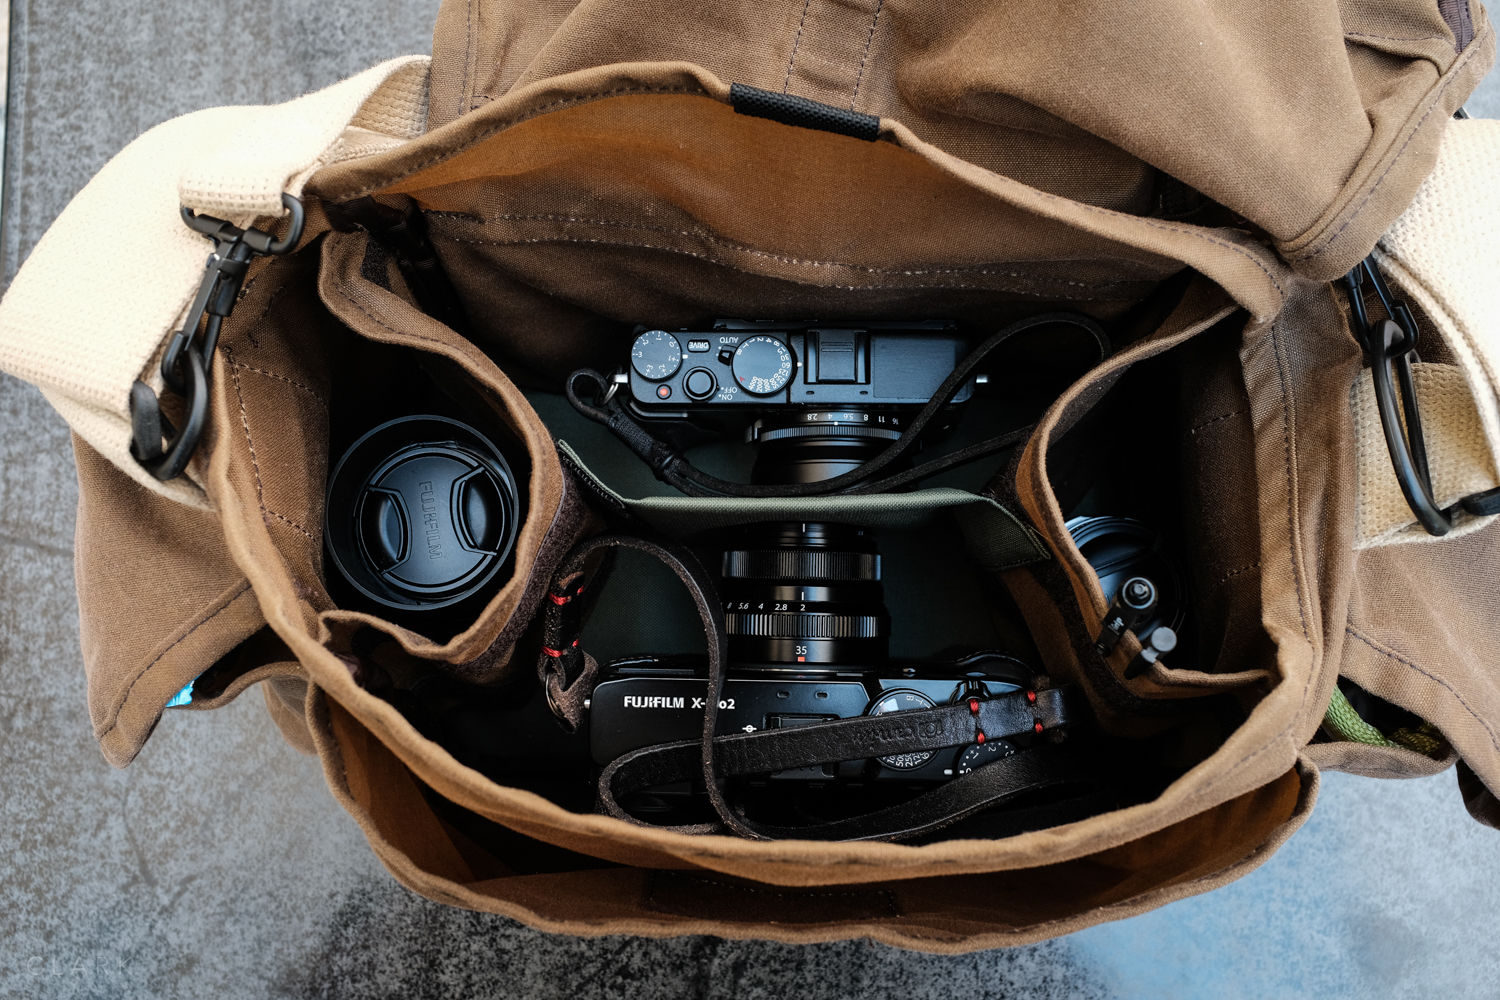
INSIDE THE BAG
FUJIFILM X-T2 AND XF 16-55mm F2.8 WR
The Fujifilm XF 16-55 f2.8 lens is attached to my X-T2 most of the time and this the camera and lens combo that I keep handy at the top of my bag so that I can pull it out or put it back in the F2 easily. It sits in the bag with the lens facing down. This comes in handy when leaving a venue as I often have to pull a camera out for a few shots, or if I keep it out it means I can slip it back in at the venue door without needing to remove the bag from my shoulder. Something the backpacks are not functional for.
THE FUJIFILM X-T3
The amazing 50-140 f2.8 lens is my concert workhorse. It can’t fit in the Domke attached to my X-T3, so the camera body fits inside the F2 square insert. These inserts are divided into 4 sections for lenses, but unlike the older versions that were sewn, the newer ones have Velcro so the section can be adjusted to take the X-T3 with the battery grip attached. This also creates a space for my Zoom H1 audio recorder (more on that later). I attached a spare Billingham Velcro insert above the X-T3 that acts as a hinge and folds over to protect the X-T3 and X-T2 from bumping into each other.


SWITCHABLE LENS
Still on that square Domke insert (this one is included with the F2). I have the 23mm f1.4 lens in the photo above, but this is where I keep my switchable lens. By switchable, I mean that if I need to bring another lens, it will go in here and the 23mm will stay at home. This stops me from carrying too much equipment and weight (more on these extra lenses later).
Front pocket contain audio equipment (left) and white balance tools & business cards (right)


LENSES
I have a 16mm f1.4 and a 56mm f1.2 stacked in a tall square Domke insert I bought on Ebay. I use the JJC square metal lens hood on both these lenses (and the 23/1.4), so they can be stacked safely as they have flat plastic caps. I highly recommend these lens hoods. They are equal in quality to the Fuji optional ones, but less expensive.
The 50-140mm f2.8 workhorse lens sits inside a Domke insert that comes with an F-4AF bag. This insert is a bit wider and has the space required to include the tripod mount on the lens. I attach the BlackRapid strap to the tripod mount instead of the camera as the weight of this heavy lens would put too much strain on the camera’s lens mount.
NISSIN i40 FLASH
I rarely use flash for music photography (never ever for shooting during a concert), but sometimes I might need to use it for a backstage portrait if the light is really bad. The Nissin i40 is small and slips in the F2 between the sidewall of the bag and the smaller of the lens inserts. It sits in there and I forget about it until I need to remember. The i40 runs on 4 AA batteries and has enough power for anything I need on a music shoot. If I am required to shoot promotional portraits or promo shots, I will take a bag full of Yongnuo YN560 IV’s, stands and modifiers. But that’s another story.


AUDIO EQUIPMENT
After being asked to shoot some after-show video clips and interviews without any notice, then having to cobble a less than ideal setup to get by with, I now always keep a small audio kit with me. You have already seen where I keep the Zoom H1 inside the main compartment of the F2, and the Manfrotto Pixie that can be used as a tabletop tripod for shooting video. I use one of the front pockets to store a Rode lav microphone and extension cable (including an adaptor to allow it to fit the X-T3 or my iPhone). I also have a set of Apple earbuds for monitoring sound and a spare 3.5mm to 3.5mm cable that can be used to attach the Zoom H1 to the X-T3’s headphone socket. So I can record audio in camera, lav mic to Zoom H1 or both at the same time.
WHITE BALANCE
The other front pocket of the F2 is used for business cards and white balance tools. I have a Color Checker Passport, ExpoDisc and a set of white balance cards on a lanyard. Overkill? Perhaps. I also use this bag for portrait shoots so the Color Checker is invaluable.


OPTIONAL LENSES
The three lenses that I often swap out when needed are the 12mm f2.8 Samyang, the Fuji 10-24mm f4, and the awesome Fuji 90mm f2. These lenses all have their use, but it can often depend on the venue or the job. For instance, The 12mm Samyang is useful if I can get on stage behind a band or orchestra and shoot toward the audience.
CARDS AND CLEANING
I also take a JJC SD card holder (stored in with the white balance tools) and both the RocketBlower (F2 side pocket) and a Lens Pen. I also have a lens cloth in my belt pouch. I don’t use lens caps so like to clean my lenses before a show.
iPAD
It’s not shown in the photos, but I also keep an iPad Mini inside the zipped pocket in the top lid. I often send a couple of pictures during the interval from a camera to the iPad using the built-in wifi feature. I edit these using Snapseed and then send them to the client so they can be used on Facebook to promote the following night’s performance. It saves me having to do it when I get home.
Lowepro CompuTrekker 350 backpack, Domke F2 and the Domke F-1x
OPTIONAL BAGS
If I really must take extra gear I can use the larger F-1x (bottom right in the picture above) which can hold a massive amount of gear but can get too heavy. Or I might opt for the LowePro Computrekker 350 backpack if I’m travelling by train and have a long walk to the venue.
A FEW LAST TIPS
Always have more than one camera.
Always have at least one camera with a lens attached in your bag.
Always keep spare batteries and cards on your body.
Use a belt bag or pouch to carry your spares and phone.
Make sure you get a photo pass from the venue or the client.
Lock in your white balance, it will save you hours of editing time later.
Shoot completely manual. I tend to shoot at f2.8, /125th of a second and adjust my ISO using the front command wheel.
Clean lenses before a show.
Sync camera clocks before the show (see below if you forget).
Make sure you have enough space on SD cards for the full show.
SYNCHRONISING CAMERA CLOCKS AFTER THE SHOOT
It is crucial to synchronise the clocks on all cameras used on a shoot. It’s always better to do this before the gig, but it’s very easy to forget. So here is a method I use when I get home. I use a world clock app called ClockZ which constantly updates the time and is extremely accurate.
Shoot a photo on each camera of your phone while it displays the world clock time.
Ingest all the pictures from your shoot into Lightroom.
Press G on your keyboard to enter Library Module Grid Mode.
Click on Metadata above your pictures.
In the camera section, choose one of your cameras.
Now go to the last picture you shot (which should be the one of your phone).
Click on that picture.
Hold down Command (Ctrl on Windows) and press A on your keyboard to select all.
Now ho to the Metadata menu at the top of your screen and choose Edit Capture Time.
Make sure ‘Adjust to a specific time and date’ is checked.
Input the time & date from the picture of your phone into the ‘Corrected Time’ section.
Click ‘Change’. It will warn that this can’t be undone but don’t worry about that.
Now repeat the process for your other cameras and all your pictures will be in sync.
If you have found this post helpful and you are thinking of buying any of the gear I use? You could help me out (at no cost to yourself) by buying from Amazon UK using the links below. Thanks.
Domke F-5xb: Lightweight Street Bag

Over-filling camera bags is something I (and I would assume many others) have a problem with. If there’s a space for another camera I’ll throw one in. An empty front pocket? I’ll add more batteries, notebooks or who knows what. So the only way around this sad affliction is to use smaller bags if I want to travel light.
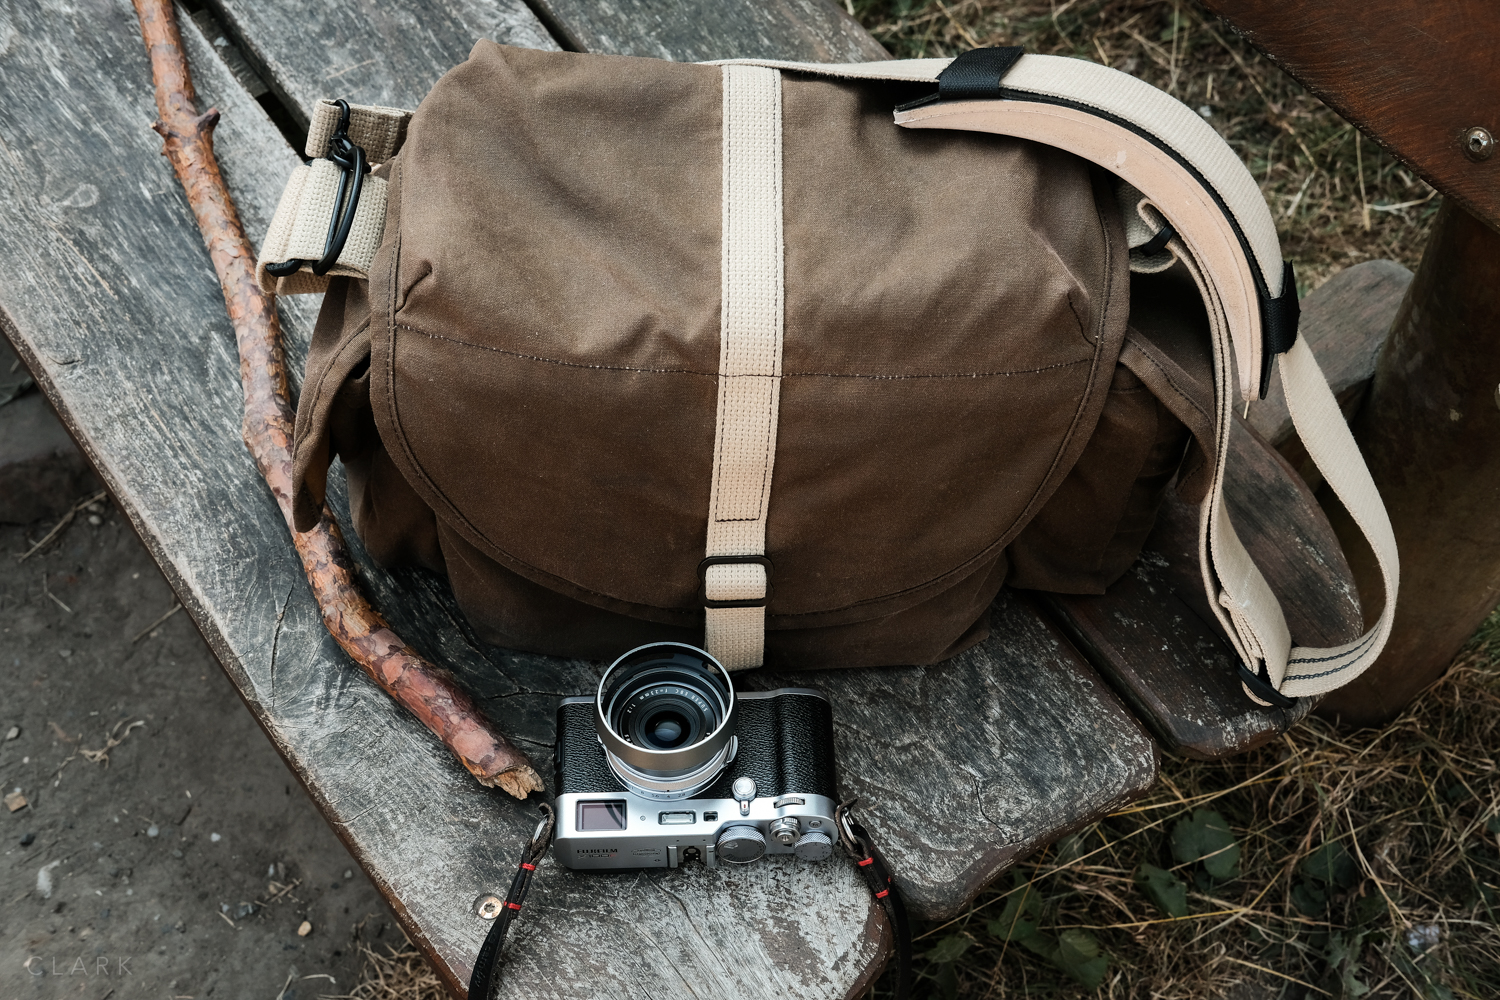
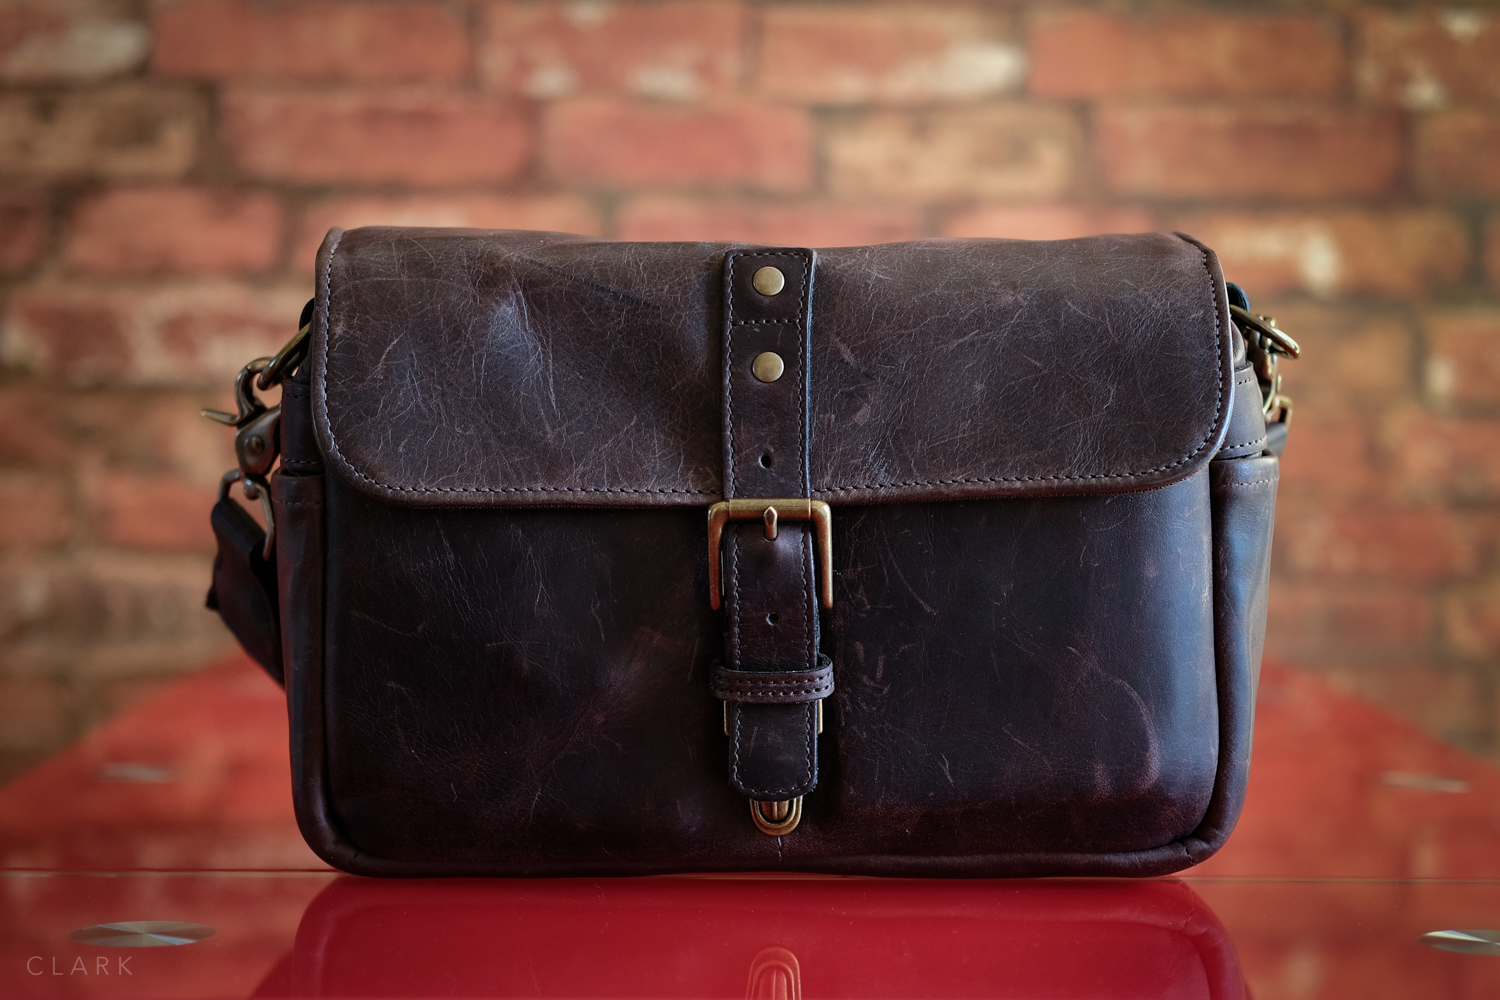
Street photography is one area where I like to travel light because of the large number of miles I end up walking, and The Domke F-5xb is an ideal little bag for that very reason. I have the brown RuggedWear wax canvas version. It’s one of five Domke bags I own (at the time of writing this). I bought this one-second hand for £22, it’s in great condition and has none of the waxiness that these RuggedWear bags can sometimes have.

The Domke F-5xb with a standard iPhone 7 for size comparison

These two Velcro patches sit too high to make contact with the narrow strip on the front flap
EXTERIOR
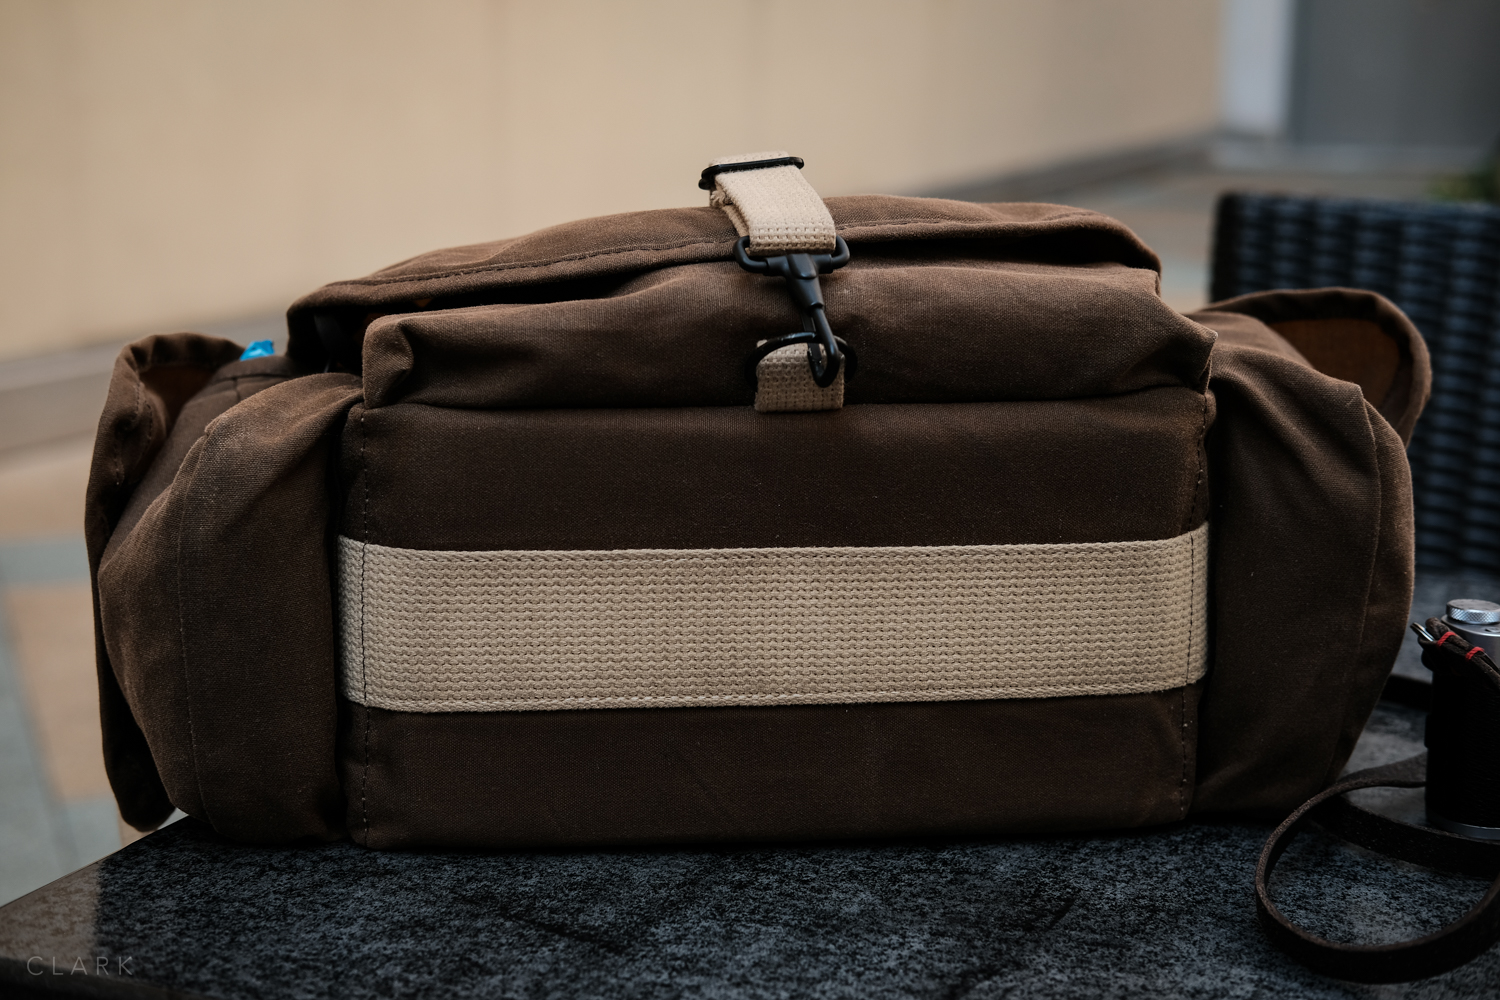
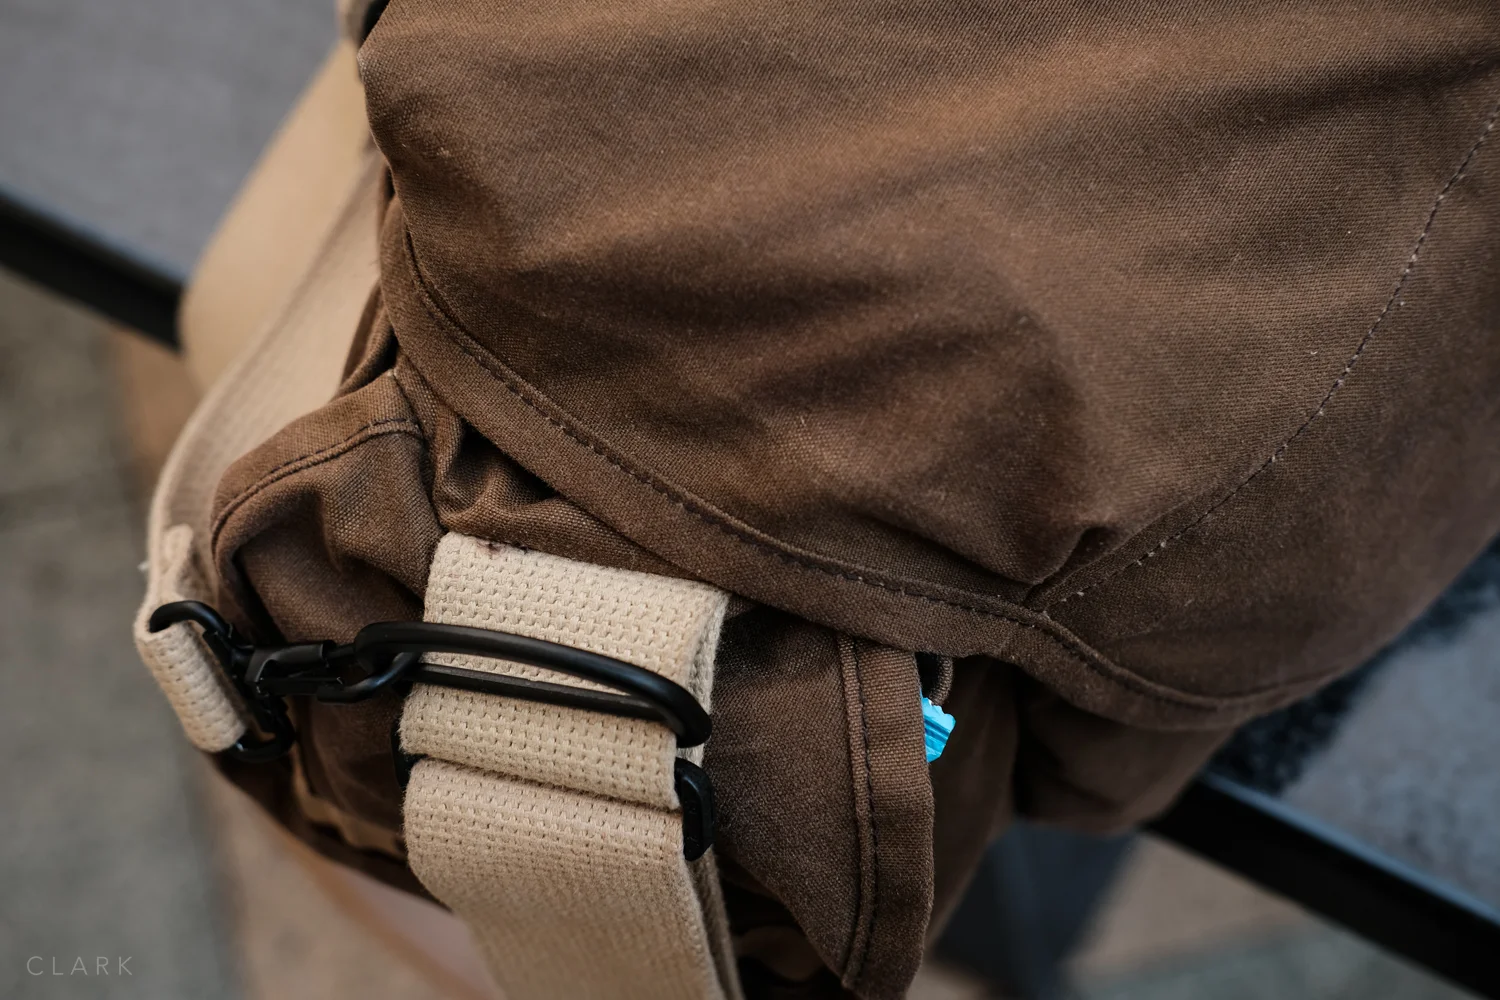
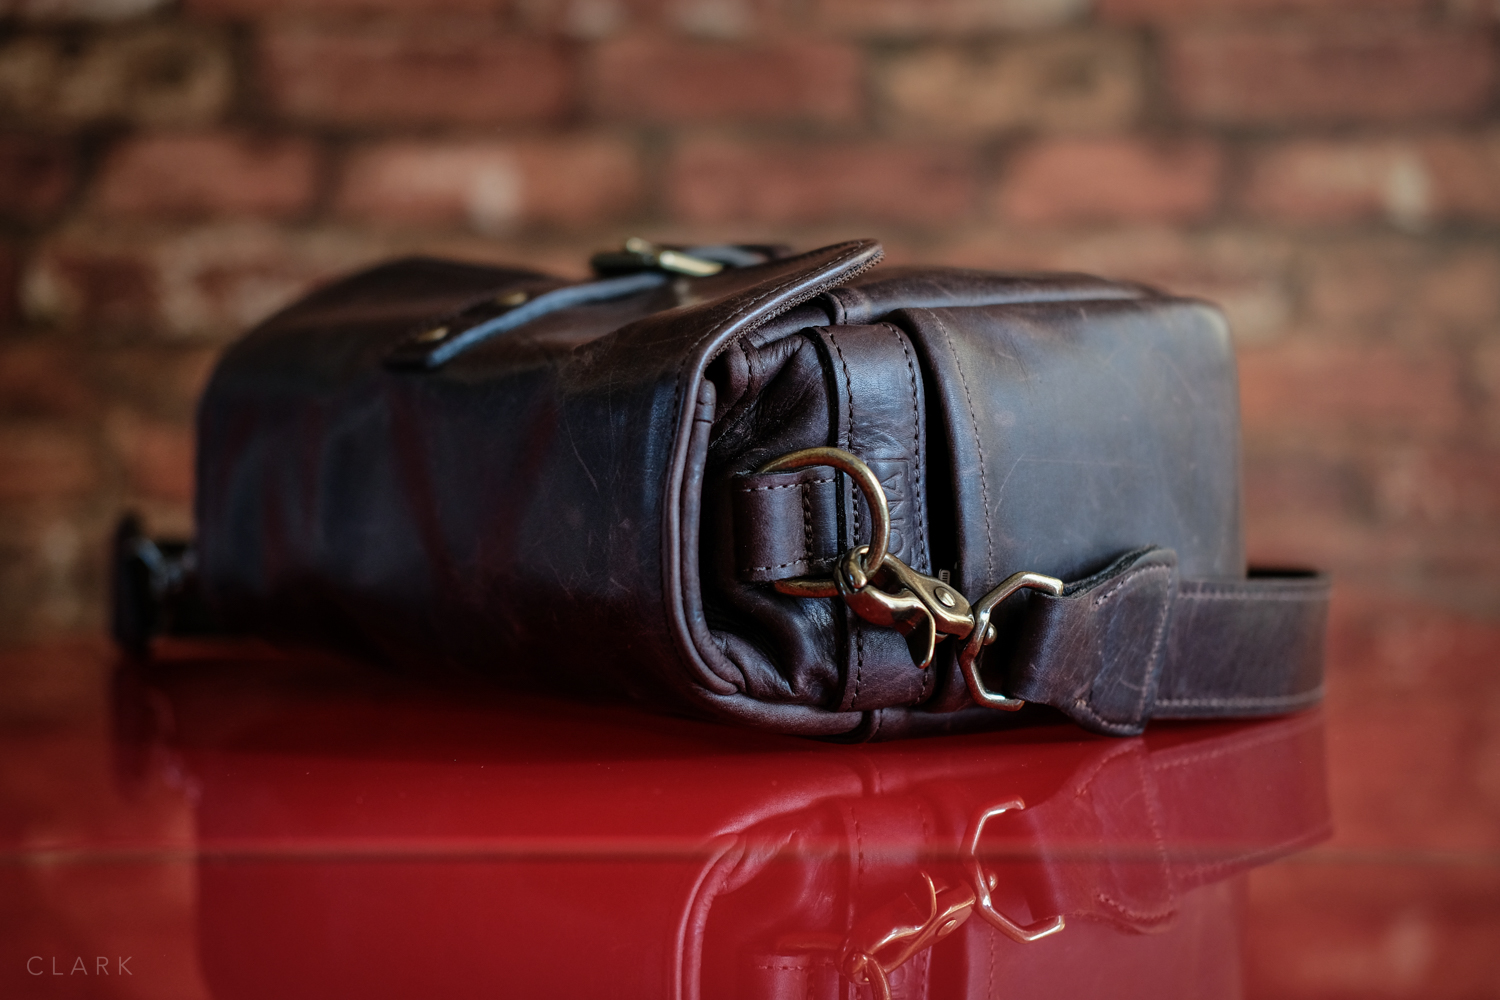
Unlike a lot of the larger Domke models, the strap on the F-5xb does not go all the way around the base. Instead, it attaches by oversized clips onto an O ring at either side, and these rings are attached using looped pieces of thick canvas sewn onto the side. The clips are extremely tough and do not unlatch accidentally (like ONA bags do). The strap is the standard Domke webbing version with the dual non-slip rubber strips to hold it in place on your shoulder. Another oversized thing is the YKK zipper. It’s chunky and both the tabs used to close the zip are massive. This zip will probably last longer than I will.
I do wish Tiffin would change the straps to a dark brown on these brown Rugged Wear bags as these light ones get so dirty during day to day use.


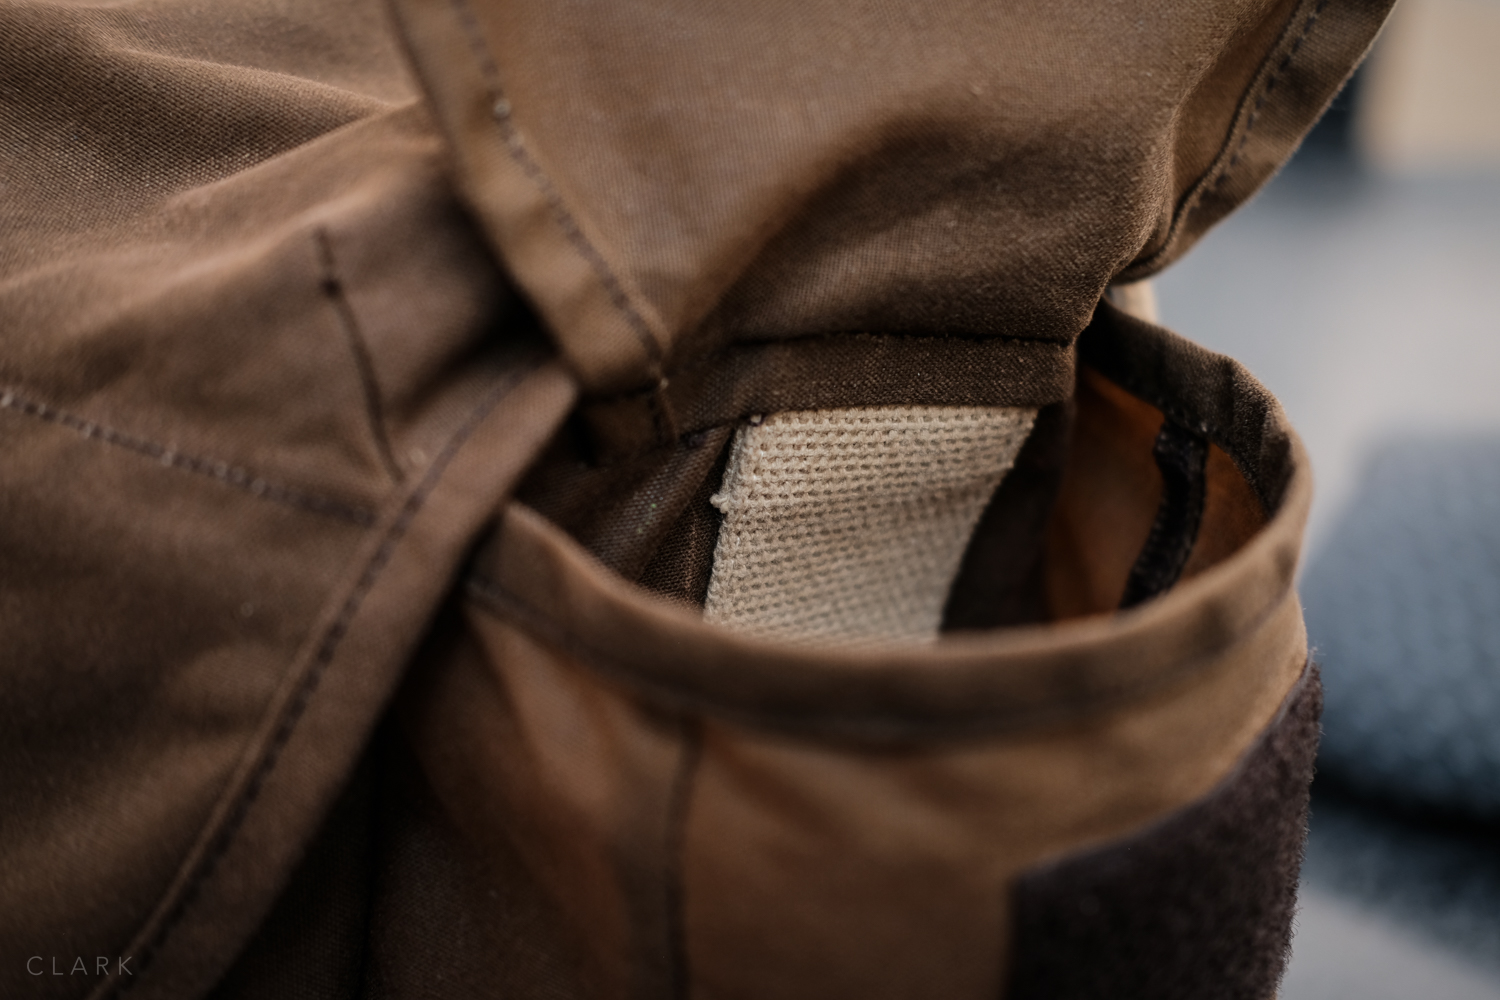
The zip on the main compartment is covered by a flap. This flap acts as an extra layer to keep the rain out, to keep thieves from opening the zip, and also to cover the front pocket. The pocket is a single compartment, with no zip or velcro, for holding small accessories. I have my wallet, a tiny Moleskine notebook, two spare Fuji batteries, and my Apple AirPods. I probably shouldn’t keep my wallet in here as it’s not that thief-proof! The bottom of the pocket is oddly sewn an inch and a half up from the base of the bag making it a little too shallow, even though there doesn’t seem to be a reason for this.
One downside to this front flap is that the pieces of velcro that hold it closed are positioned in such a way that they only connect if the bag is stuffed full. Each piece should be taller in my opinion.

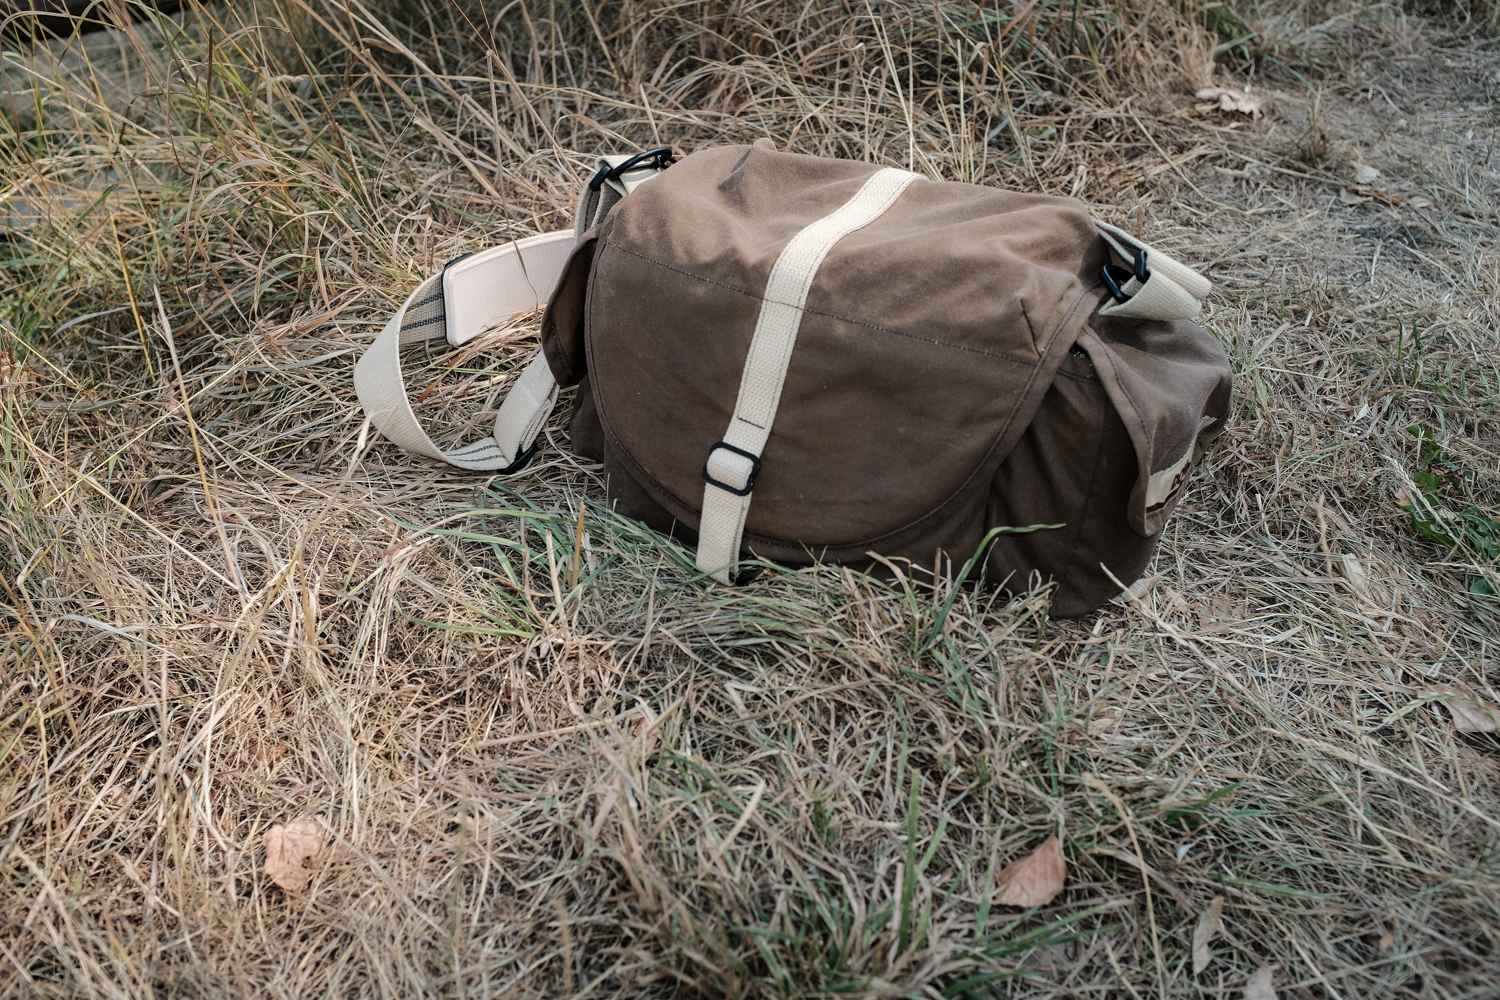
The oversized belt loop at the back
Domke says this is a small bag or belt pack, meaning you can unclip the strap and use the sewn-in loop at the back of the bag to attach it to your belt. This might work if you use a separate belt and don’t overstuff the bag with too much kit, but I wouldn’t recommend putting it onto the belt that’s holding up your trousers/pants or you might find the photographer becomes the photographed.

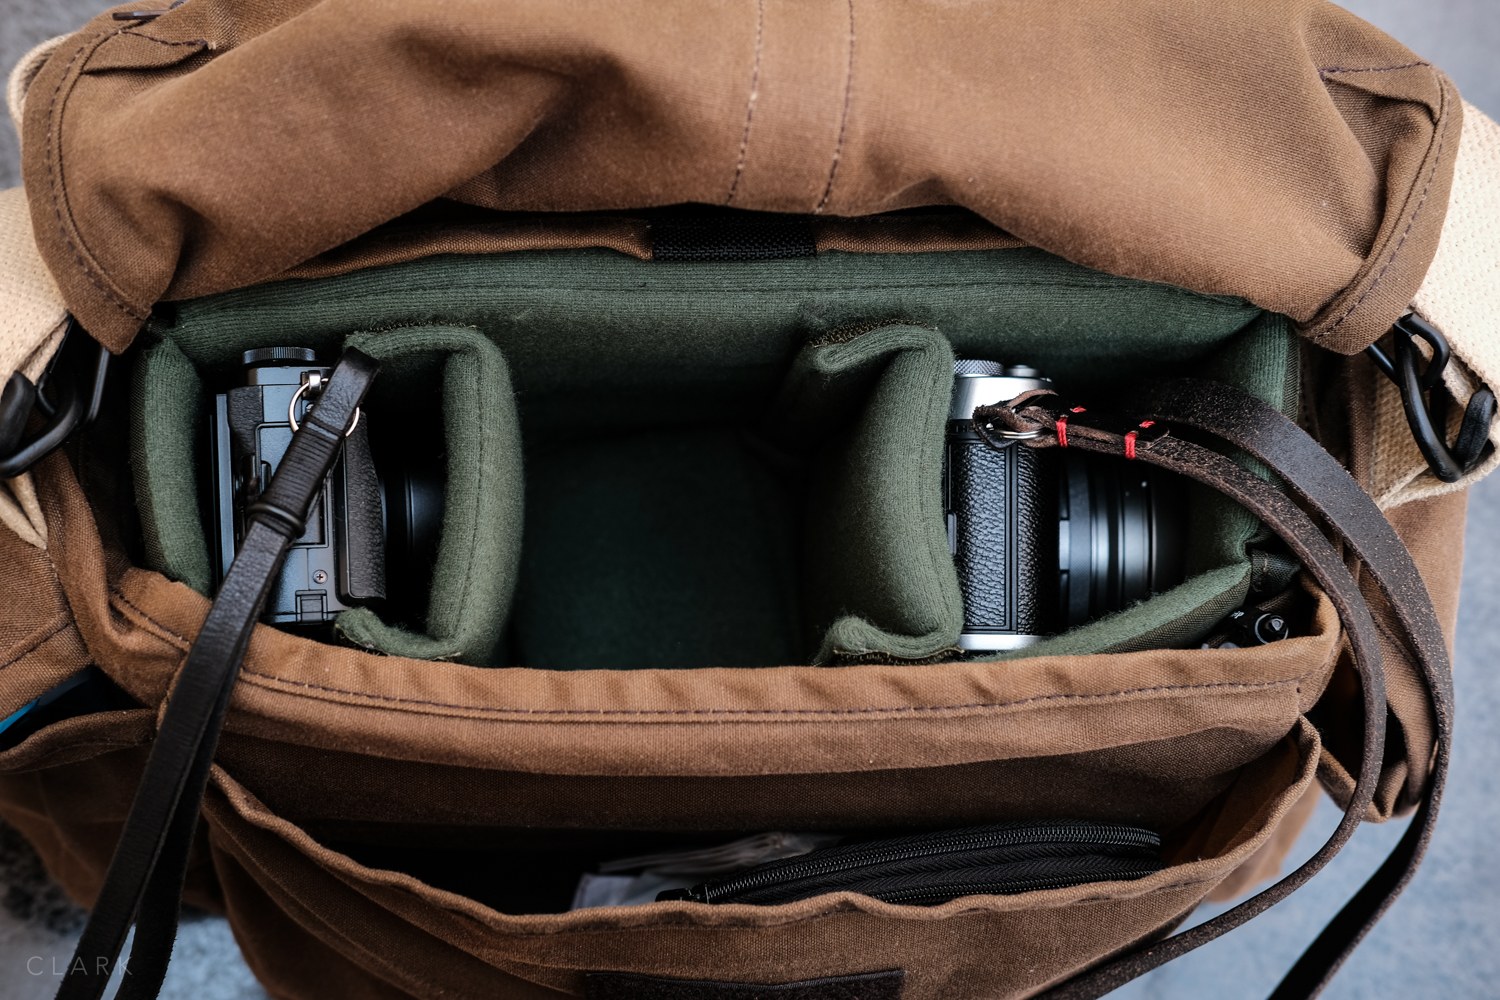
There’s enough room inside the main compartment for 3 mirrorless cameras and an iPad Mini
INTERIOR
Inside the main compartment of the F-5xb, you will find two dividers that allow for three compartments for cameras and lenses. I have three Fuji cameras in here, an X100F, X70 and an X-Pro2 in the centre compartment with one of the smaller Fujicron lenses attached (16/2.8, 18/2, 35/2, or 35/1.4). I mostly have the 35/2, which gives me 28mm, 35mm, and 50mm (in full-frame terms) across my three cameras. If I want to carry one or two other lenses, I have to leave a camera at home. The F-5xb is always a compromise but it keeps the weight down. For the past few weeks, I’ve had the manual focus Meike 25mm f1.8 attached to the X-Pro2. More on that lens in a future blog post (or two).


The interior padded section is sewn into the bag, but there is a compartment between the padded section and the inside front of the bag. This compartment is exactly the right size for an iPad mini with a low profile case. Obviously, this adds more weight, so a choice has to be made.
One downside of the interior is the lack of padding on the ends of the bag. Domke has many bags that lean toward being smaller and better for working out of rather than being heavily padded. But the F-5xb is well padded at the front, rear and base, so why miss out on padding the sides? The bag is tiny so a couple of extra centimetres in length wouldn’t have made that much difference. My X70 and X100F lenses both face outward (toward the sides) so I have added a couple of dividers from other bags to help pad the sides a bit, even though it does make the inside of the bag a little tight.

The front pocket doesn’t have a zip or Velcro to hold it shut and is only covered by the front flap
CONCLUSION
The Domke F-5xb is a fantastic little bag that is super comfortable to carry for a full day street shooting. When I’m using a camera on the street the 5xb feels so lightweight and the rubber grip strips embedded into the strap keeps it from sliding off my shoulder. This bag is equally good for using the strap crossbody style. Like all Domke bags, they are very well made, plus they look and feel better with age.
PROS
Small & lightweight.
Extremely tough.
Rubber grip strips embedded into the strap.
Over-engineered parts, especially the zipper.
Doesn’t look expensive (and isn’t).
An internal base plate that keeps water out.
Can be re-waxed to make water-resistant (can of wax supplied).
CONS
The front pocket is not very secure.
Front pocket could easily have been deeper.
Velcro for the front flap is positioned badly.
No padding on the ends of the bag.
Difficult to fit a pen.
Billingham Hadley Small Pro Review
My day to day small walk around camera bag for the past two years has been the ONA Bowery in Dark Truffle leather. I also have the ONO Prince Street (also in Dark truffle) but my Hasselblad stuff lives in that one. I still really love the Bowery for the amount of gear I can fit in such a small space, but I felt like trying something new.
My friend John Summers had given me an insert for a Hadley Small a while back and I’ve used it in various bags, including the Christopher by Millican and recently in the F-3x by Domke. The size of that insert is perfect and almost identical to the Bowery. So after looking at various small bags from many different manufacturers, I kept coming back to the fact that I was looking for something that would either take the Hadley Small insert or have the same interior size. So being the genius that I am, I finally realised the bag I was looking for might just be a Billingham.


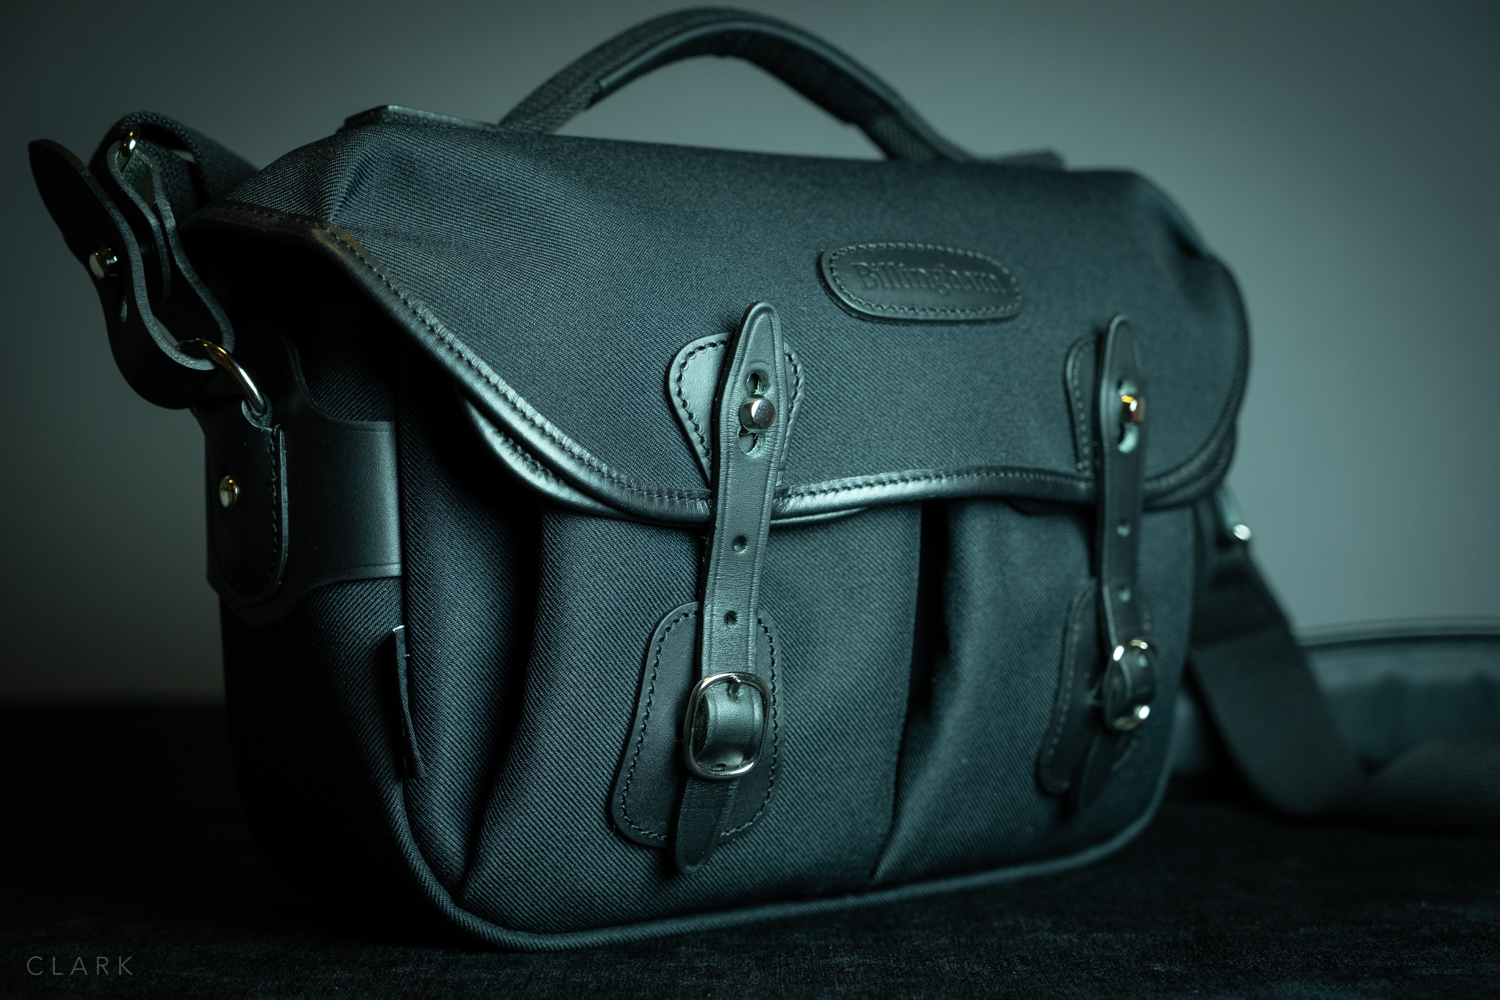
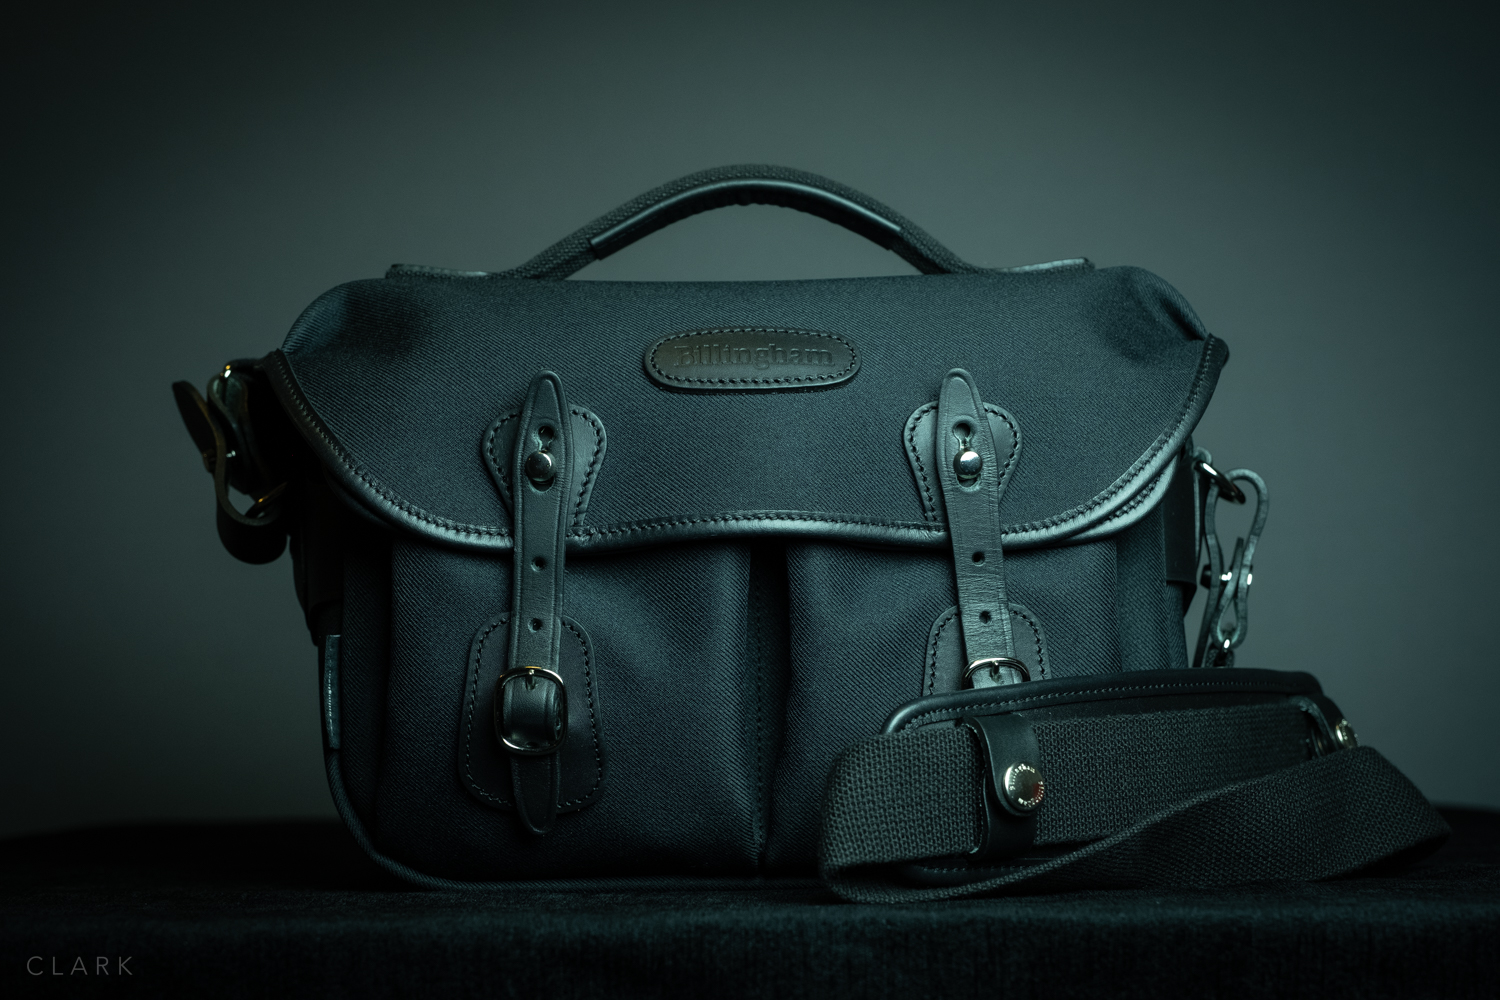
Not being too into the beige thing and wanting to be a lot more stealth; I opted for the black bag with black leather details. The original Hadley Small is still available (£159 in the UK), but the new Hadley Small Pro was released last year (£199 UK) and has some really worthwhile additions to the original bag (more on this later).
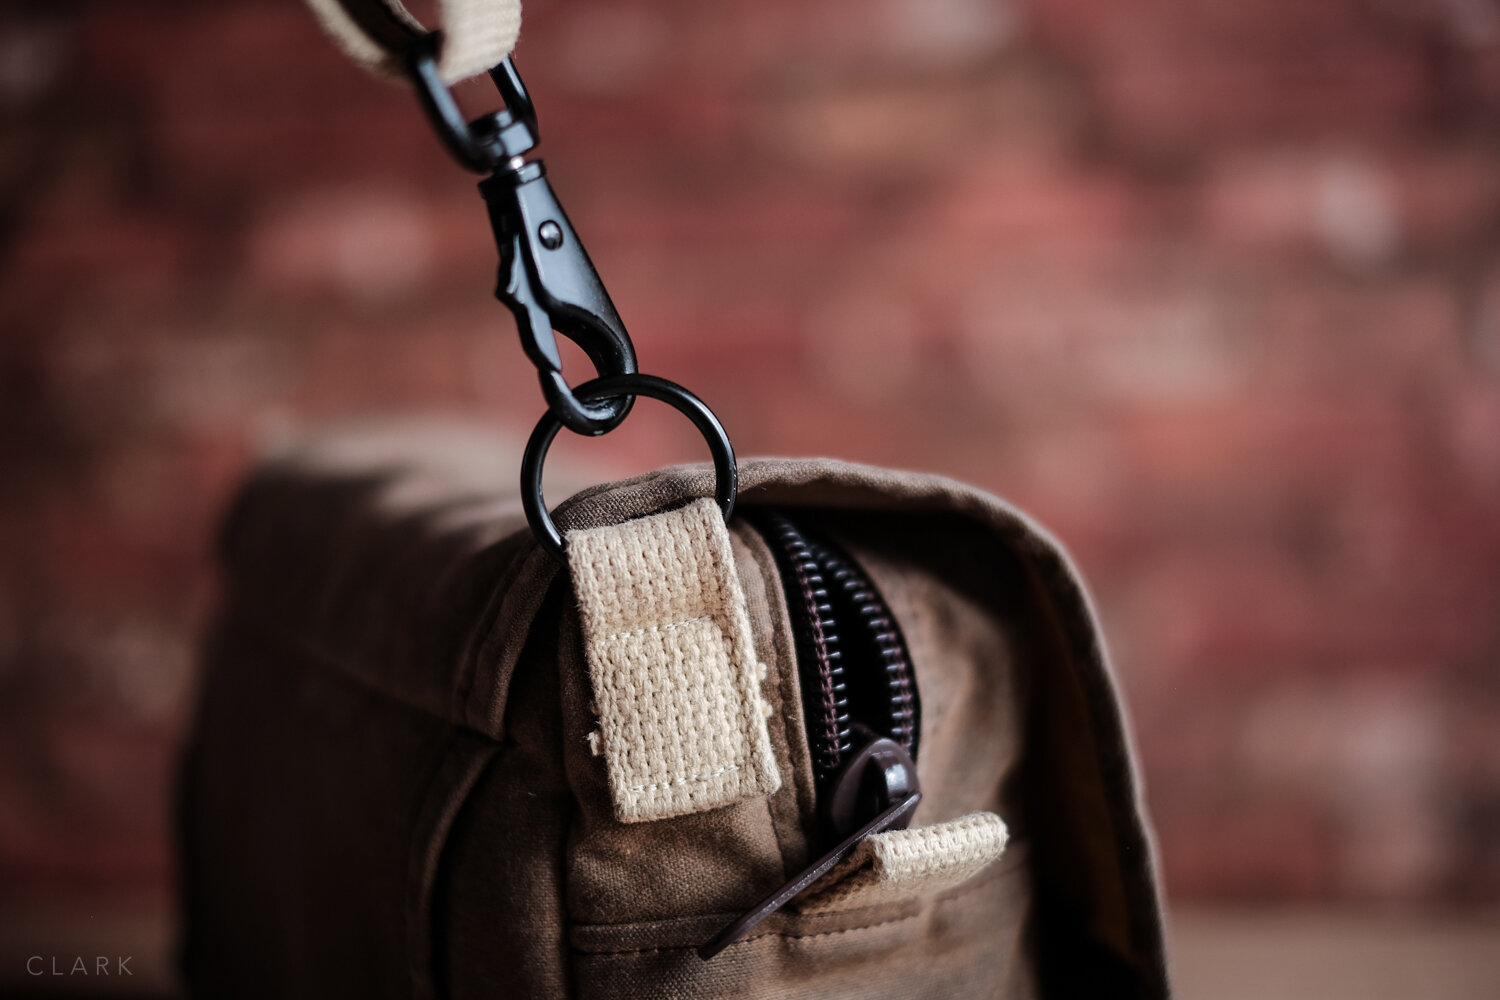
The Hadley Small Pro is made from Billinghams FiberNyte material, which has a layer of rubber sandwiched in the middle of its three-ply makeup. This makes the Hadley range permanently shower proof, no need to apply wax or use an additional rain cover when out in the rain. My bags always get soaked at some point, so this will be a really handy feature. The strap on the original Hadley Small was stitched to the side of the bag, but the Pro has a removable strap via leather fasteners. I would rather have the older method as I don’t trust straps that are removable. This is mostly due to the ONA Bowery strap coming undone loads of times as I lifted it from the passenger seat of my car. This resulted in the destruction of a Fuji X100F when the Bowery hit the deck. My Bowery now has zip ties holding the clasps on the strap permanently shut. Time will tell if the Billingham is more secure than the ONA, but it is absolutely solid right now and should stay that way as I won't be removing them, causing the leather to soften.

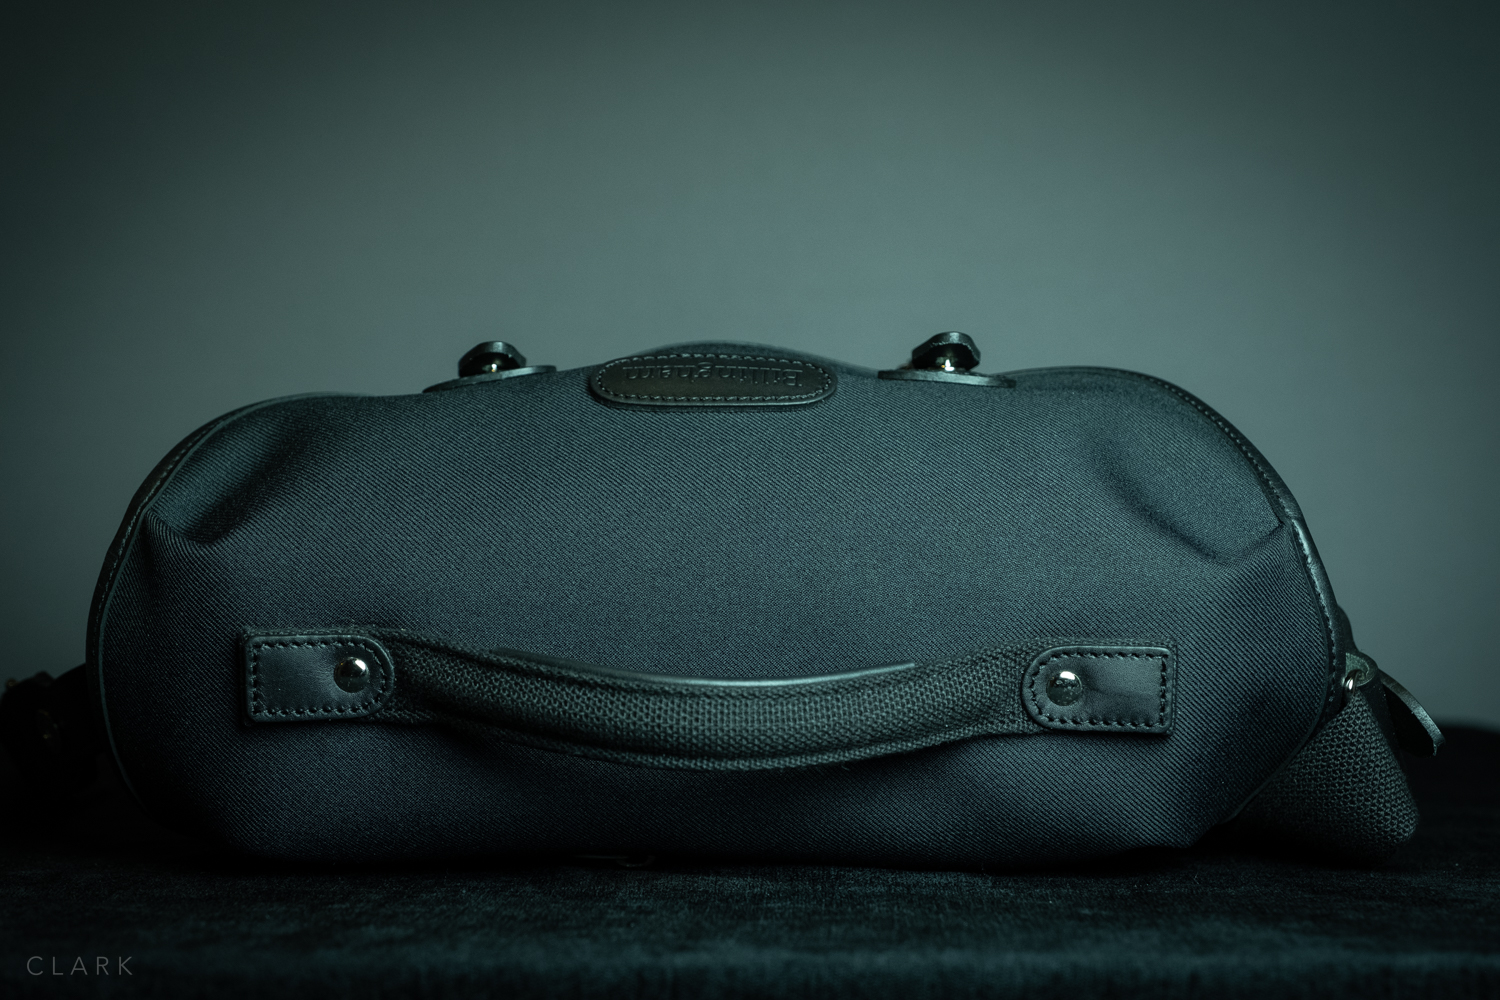
The handle is fairly rigid and easy to grab. It’s riveted and stitched to the top of the bag which has an internal support
Another new feature on the Pro is the addition of a handle on the top. This is ideal for that passenger seat scenario and a great feature to have. I would make sure the lid is secure before using the handle, but at least the Hadley Small Pro doesn’t tip over, spilling everything onto the ground. .
Two more new features on the Pro are found around the back. The first is the welcomed addition of a luggage strap so that it can be slid over the handle of a rolling suitcase. All bags should have this in my opinion.

Waterproof zip keeps iPads or documents dry and the luggage strap is really useful
Just above the luggage strap, you will find the waterproof zip for the rear document pocket. This is a super handy pocket that will keep documents or iPad Mini 100% dry. Well worth the price difference between the Pro and the older model.


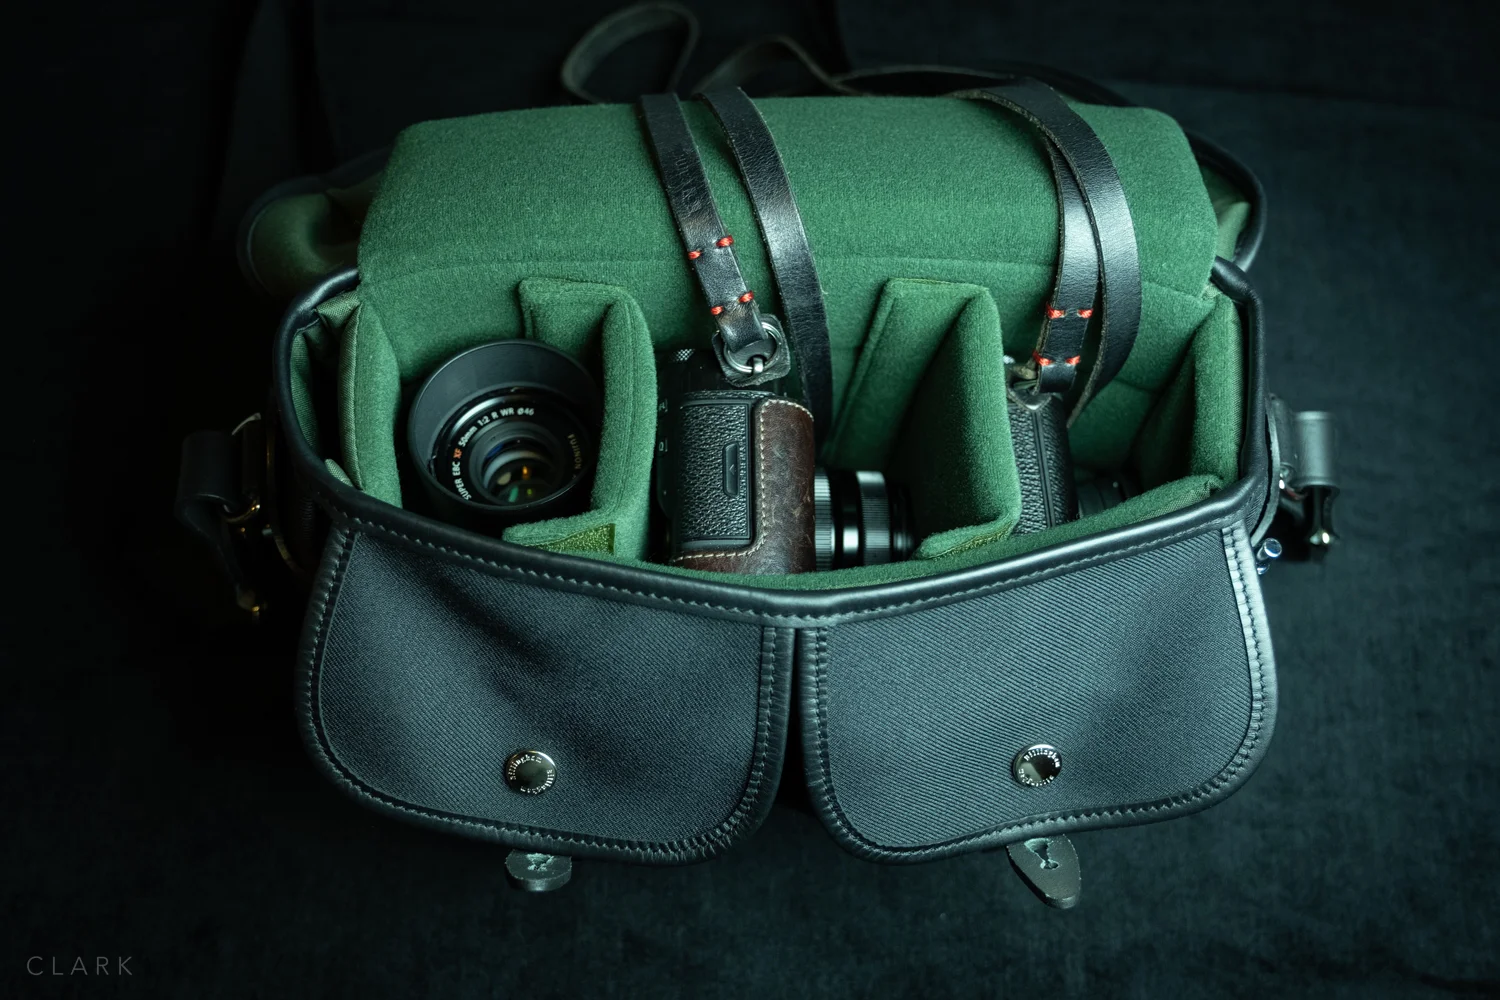
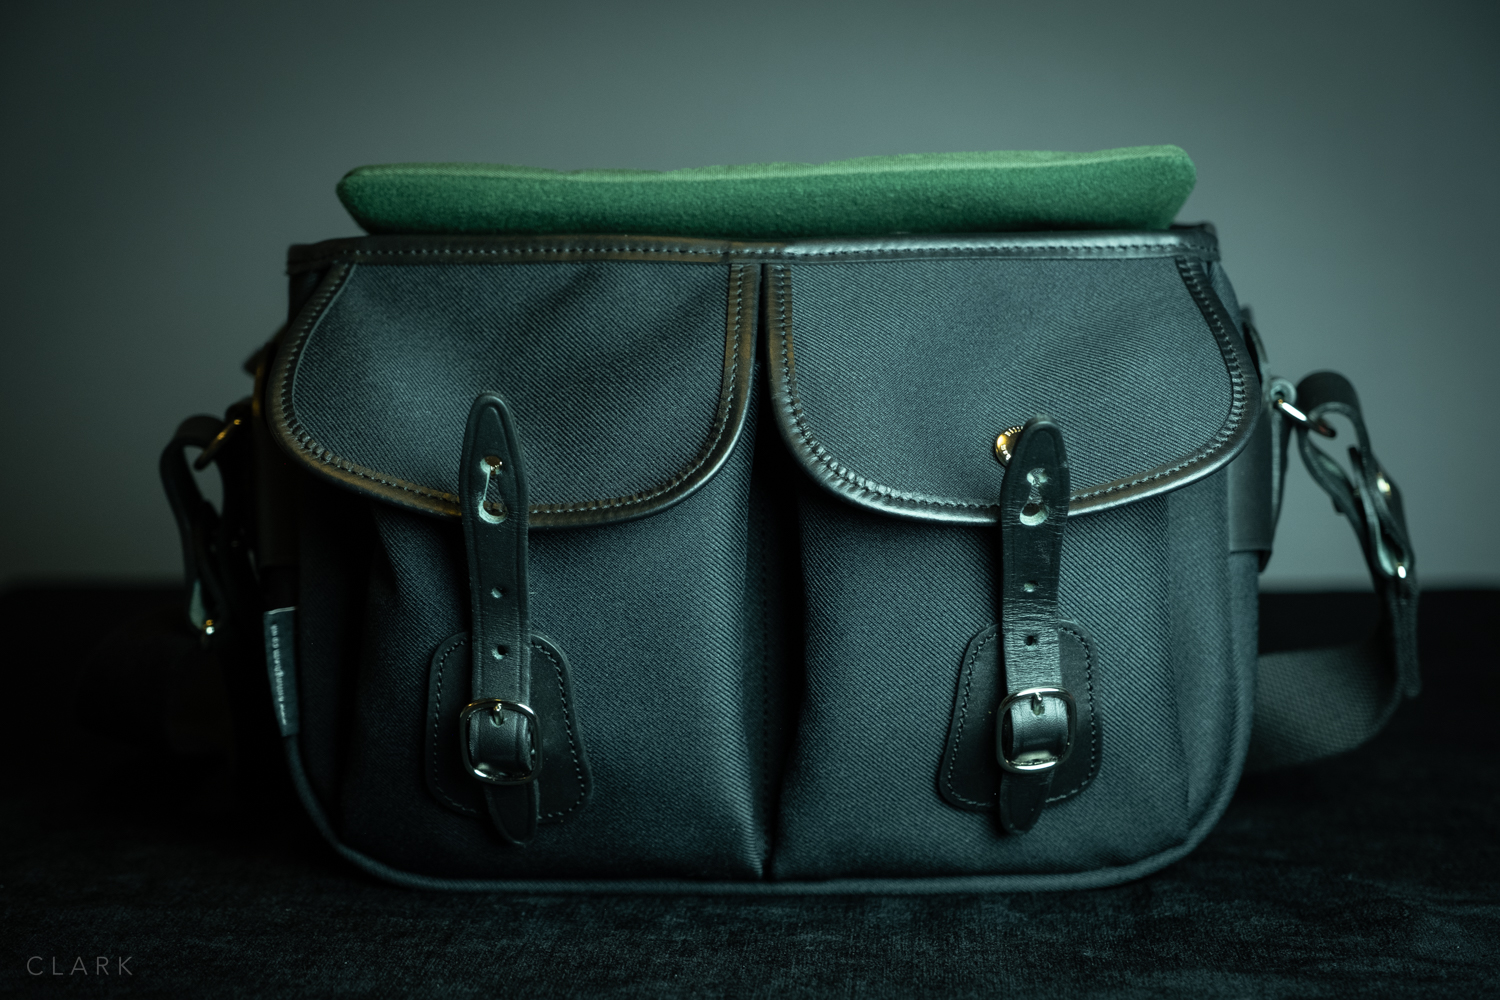
The main compartment of the Hadley Small Pro (and also the original Small) is one open space that can be used as it is, or with the included insert. This is one of those bags that feels bigger on the inside than it is on the outside. I can easily fit my X-Pro2 with the 35mm f2 attached, X100F with lens hood, and two lenses stacked in the third partition (I have the 50mm f2 and the WCLX100 wide angle converter lens). Two cameras and four focal lengths (28, 35, 50 & 75mm in FF terms) is fantastic in such a small bag and there’s even enough room in there to include the pancake 27mm too. Or I can leave the 50/2 at home and take my X70 for a bit of shooting from the hip. The insert is held inside the bag using a single stud fastener at the front. It has a padded hinged lid to protect gear from things falling on top..

This is everything I have in the Hadley Small Pro. The Fuji X70 gets swapped for the 50mm f2 sometimes


The front pockets are held shut with stud fasteners and are really great for a bag this size. Both are roomy and can be expanded or reduced in size by fastening a stud at the outer side. This also creates a makeshift pen holder. I can put my passport sized Midori Travellers Notebook, pens, wallet, memory card holder, phone, spare batteries, and Apple Airpods in there with space to spare.
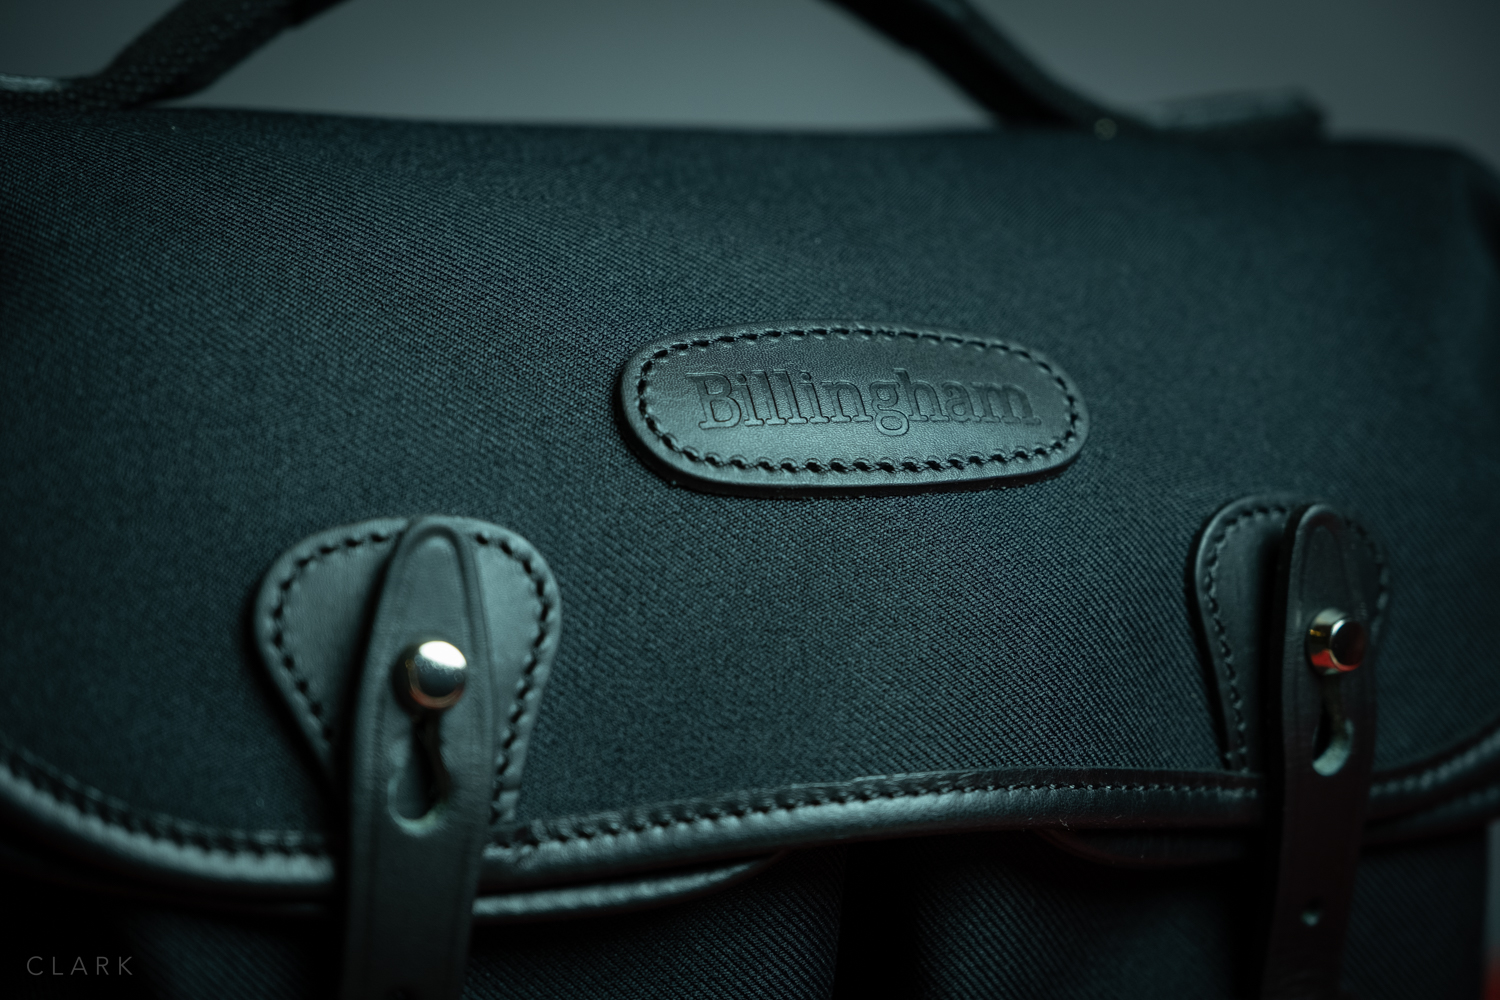
The leather and brass fixings ooze quality and should last a lifetime. I opted for the black leather on a black bag, so the fixings are also nickel plated. It’s almost criminal to not show off the leather like on some of the two-tone bags, but I need something that doesn’t draw attention. I was almost tempted by the green version though as they always look really nice on the web.
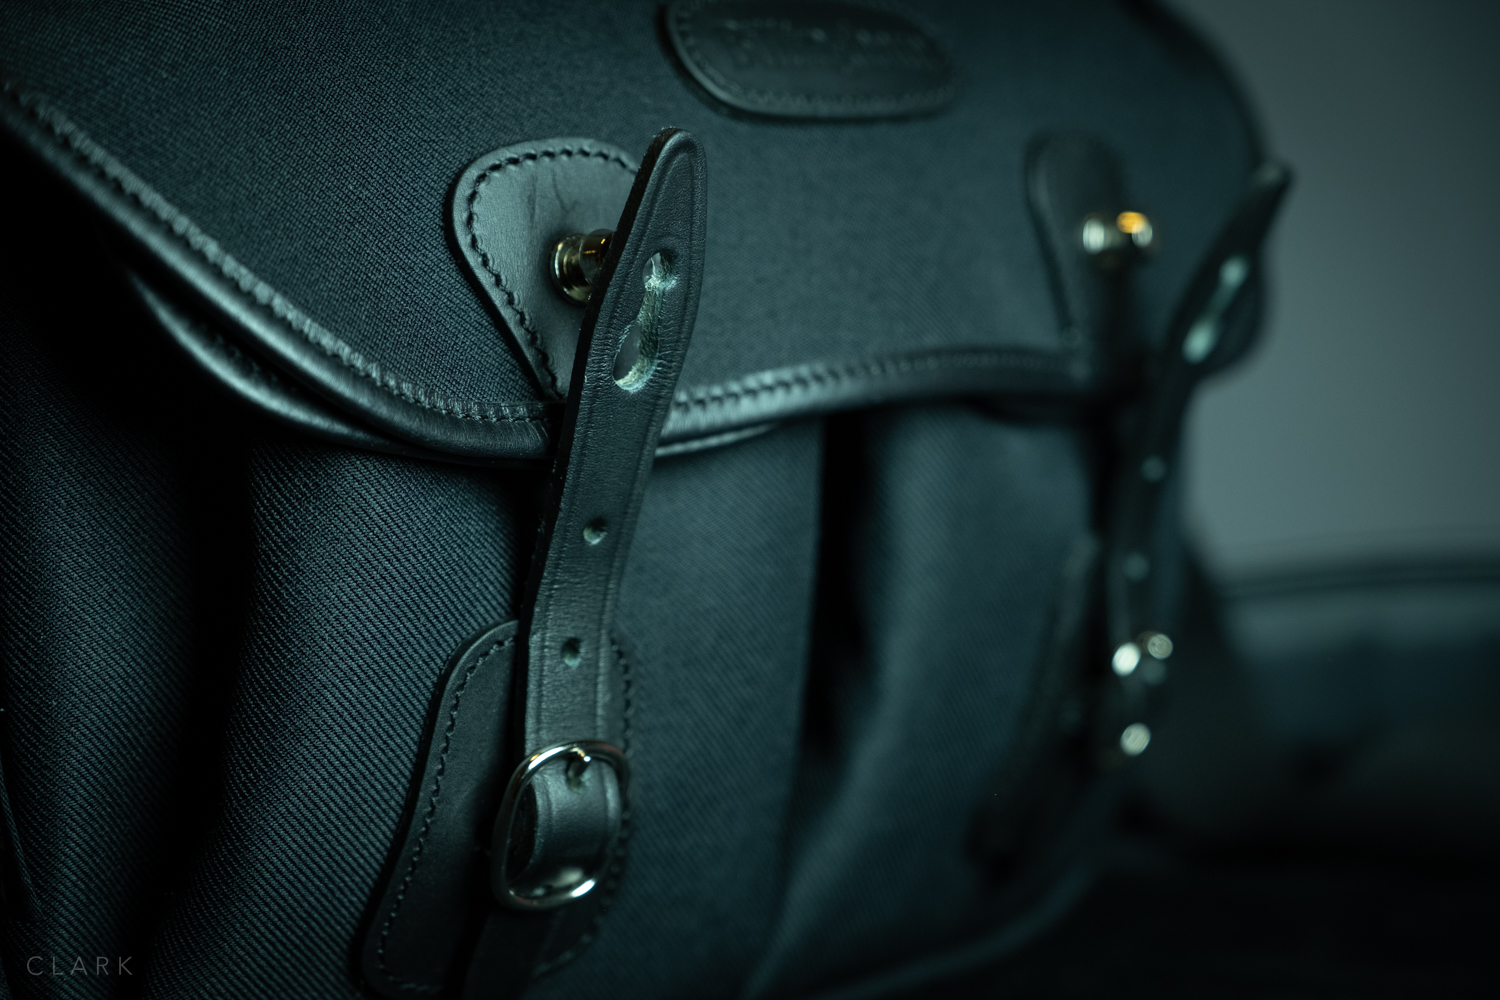
The front fasteners as extremely stiff due to the excellent quality of leather and can be awkward and time-consuming to open, but it should just take a short amount of time to loosen up to the point of opening the bag one-handed.


OPTIONAL ACCESSORIES
I opted to buy the SP40 leather shoulder pad at the same time as the bag. Not having tried the bag before, I wasn’t sure if I would even need a shoulder pad, but I thought it was better to be over prepared than have a sore shoulder. The pad is as well made as the bags and is easily attached or removed by two heavy-duty stud fasteners. The underside of the pad is grippy and curves around your shoulder perfectly due to grooves that allow it to bend without kinking.
CONCLUSION
The Hadley Small Pro is an ideal bag for smaller kits. Leica owners or mirrorless shooters alike will love it. I have a backpack for my more demanding shoots, which is where my X-T3, X-T2 and most of my other lenses live (including the bigger red label f2.8 zooms). But for day to day walking around documentary and street shooting, this is an ideal bag. It’s waterproof and versatile and I'm looking forward to using it on a few trips abroad this year.
I also have a Tenba Cooper 13 Slim that I use when I need to carry my 13” MacBook Pro with me. The Cooper has been a fantastic bag, but I might try a Hadley Pro or a Hadley One to see if it would work as my mid-sized bag. Life would probably be a bit easier using different sizes of the same bag...I think.
Pros.
Top Handle.
Luggage Strap.
Rear waterproof pocket.
Removable camera insert.
Good amount of padding.
A generous amount of dividers (unlike ONA).
Good sized and expandable front pockets.
Comfortable to wear on long walks.
Cons
I would have preferred leather on the base or some sort of wipe clean material.
Leather tabs are a bit short to get a proper grip when opening the bag.
Difficult to open one-handed (this might change as the leather softens).
Find out more at www.billingham.co.uk
But the Hadley Small Pro at Amazon UK
Domke Or An Ass? : The Domke F-3X Review
Watch any Hollywood films featuring photojournalists and chances are there will be a Domke in there somewhere. I rewatched an old documentary on YouTube recently called 'The Photographers (a film about National Geographic photographers) and all of them were using Domke. I've been using the F-3X for a couple of months now as my every day carry around camera bag and have also recently used it while traveling to the Czech Republic.
A Brief History Of Domke
You can download a free ebook by Jim Domke from the Tiffin website for an interesting and detailed history of the Domke company's beginnings, but here is my very short version. Skip this section if you have no interest in the past.
Jim Domke was a staff photographer for the Philadelphia Inquirer back in the '70's. Frustrated by the hard shell camera cases available at the time, which were made for setting down and working out of, rather than working out of while it was on your shoulder. Mr. Domke started using fishing bags, which although offered little to no protection, did allow him to work out of and swap lenses on his cameras. Fishing bags were also soft and adjusted to the shape of the user's body.
He then went to a manufacturer and showed them his fishing bag but asked them to make him a similar thing but with a few modifications to suit photo gear. The Philadelphia Inquirer liked the bag so much that they ordered the bags for the rest of the staff photographers. They even started to sell them as an add in the paper. This went well until advertisers started to complain because it conflicted with their own products. So the New York Times stopped selling the bags and Jim Domke was in business. Many photographers made requests for modifications, so the original version went through a few changes until the Domke F2 Shooters Bag as we know it today, was finalized. The F-3X is a similar style of bag to the F2, but a little smaller. Domke is now owned by Tiffen
Waxy As A Waxy Thing
My first impression of the F-3X was not exactly what I had expected. Having looked at many pictures on the web, I decided to order the Rugged Wear wax canvas version because it looked as though it would become really beat up looking very quickly. I had read various reviews and comments about the wax finish, with some saying it was too waxy (greasy) and some saying theirs had no residue problems. So when mine arrived I was a little disappointed that the wax was indeed a bit too heavy. Nobody wants to get wax all over their hands and then have to handle cameras and lenses. So I left the bag outside, hoping the sun would burn the wax off. The F-3X instantly looked wet. Over time the wax has worn off and I'm sure when I eventually give it a scrub in the shower (Domke recommends this rather than putting it in a washing machine), the wax feel will be gone. A tin of wax is supplied with all Rugged Wear bags, so it can be reapplied if required.
F-3X Build Quality
I was a little surprised when I first held the lid of the F-3X up to the light. The wax canvas material was much thinner than I had expected. I bought the bag from Amazon and my initial thought was that it might be a fake Domke (to shoot all that fake news). But on closer inspection, I noticed how well made the bag is. The single clip on the front to hold the lid of the bag closed is solid and with a bit of practice is easy to work with one hand. It's not always necessary to use the clip though as the lid also has Velcro.


One of the most impressive features in the build quality front is the shoulder strap and handle. The latter is a simple canvas strap that comes in really handy when lifting the bag to and from the passenger seat of a car. It can also be unclipped and reattached to a couple of D rings on the back of the bag. I think this is to allow the bag to be held onto the handle of rolling luggage. I managed to do this fine while the handle was in its normal position. In my opinion, the handle is a little longer than it needs to be.
The shoulder strap is impressive in a few ways. It isn’t noticeable because of the side pockets, but the shoulder strap actually goes around and under the bag, so it is actually supported from the bottom, rather than from the sides. That isn’t the full truth though, because the strap that goes under the bag and the one that hangs from your shoulder are two separate straps. The good news is that they are joined together by really tough plastic attachments. The underside of the strap has two strips of rubber to grip your shoulder and keep the bag from sliding off. This works really well. I also purchased the optional Post Office Pad which has a thick rubber padding and makes a huge difference in comfort when carrying a fully loaded F-3X. Jim Domke copied the shoulder pad used on the bags of US postal workers bags.
The F-3X In Real-World Use
The only way to really know how good a camera bag is and how well it functions in the field is to use it. So I've carried the F-3X with me every day for the last couple of months, using it for everything except for a couple of shoots where I needed to use more kit that would fit in the Domke.

This is the original Dome configuration. Great to work out of with a little amount of kit, but very little padding
The F-3X is a strange shapeshifter of a bag. It's happy with a little kit or a lot of kit and molds nicely to the shape of your body. I must admit that I haven’t used the bag in its usual setup, which is basically two thin canvas hoops that are sewn in the sides of the bag. These look like two lens pouches. A single lightly padded square with Velcro at either side is also supplied. This pad connects both of the side pouches and sets the bag up as a two camera and two lens configuration in the main compartment. The downside with this setup is that there is very little protection for the gear and the top half of the bag is wasted space. See the next section for my two preferred ways to set up the F-3X with optional inserts
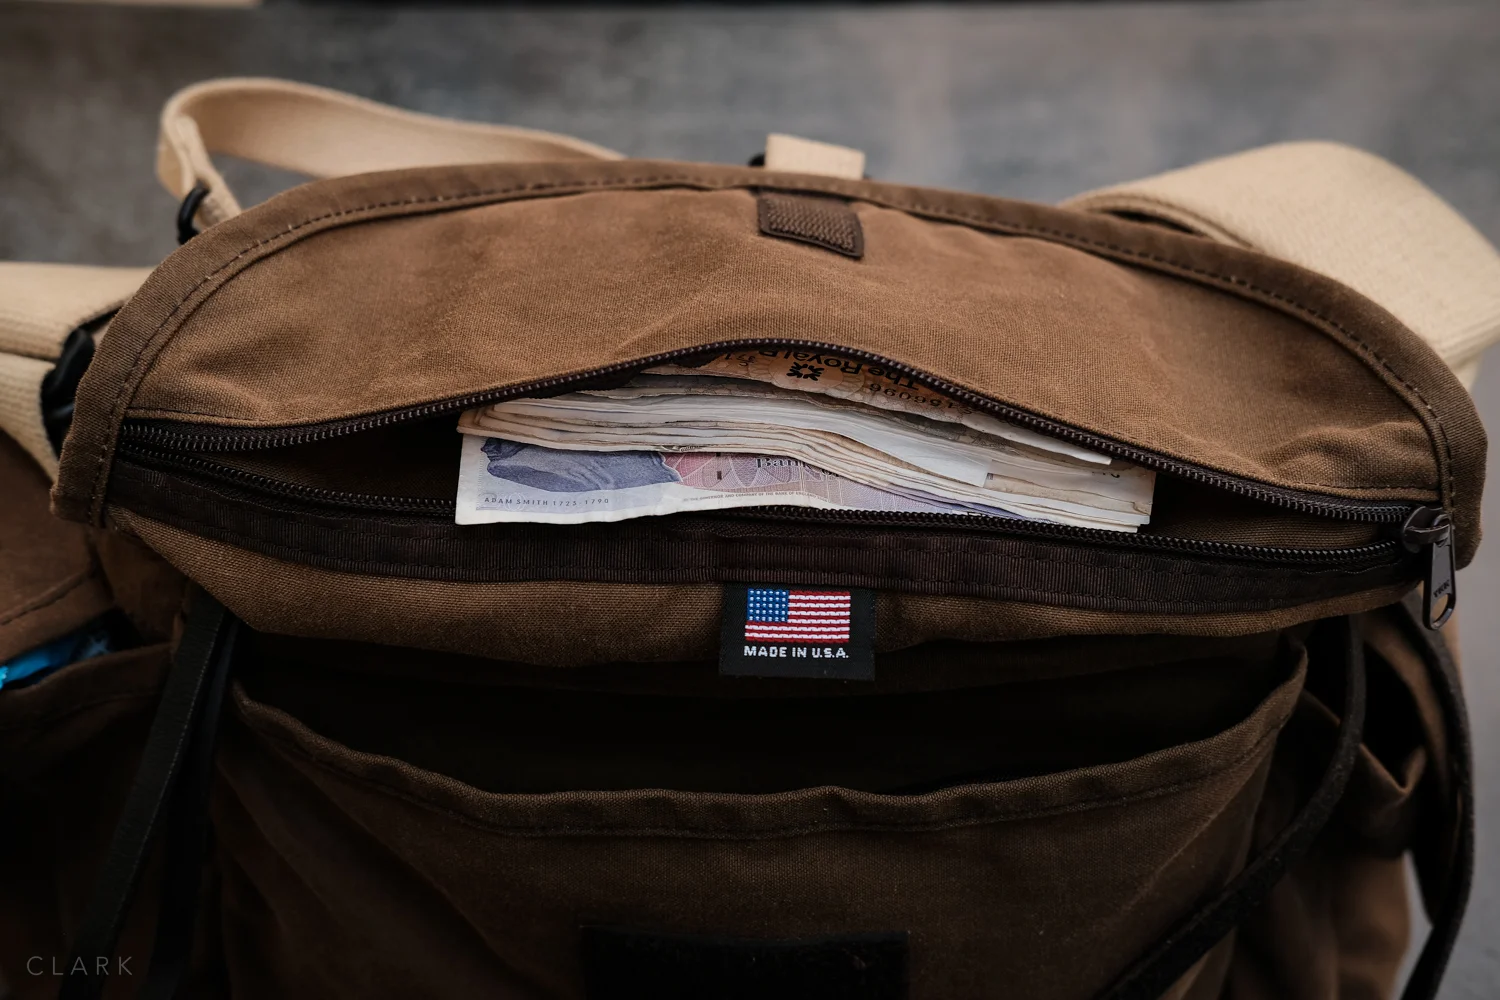
The F-3X has a good amount of pockets for storing all sorts of kit. The hidden one under the main flap is really handy to store cash and passports as it has a zip. I can only guess that this was the pocket Lindsay Addario used to store her passport when she was kidnapped in a war zone a few years ago. Although her kidnappers went through her Domke, they didn't find her passport and she was able to pass herself off as an Italian photographer (rather than an American one). Read Lindsay's great book called 'It's What I Do' for the full story.
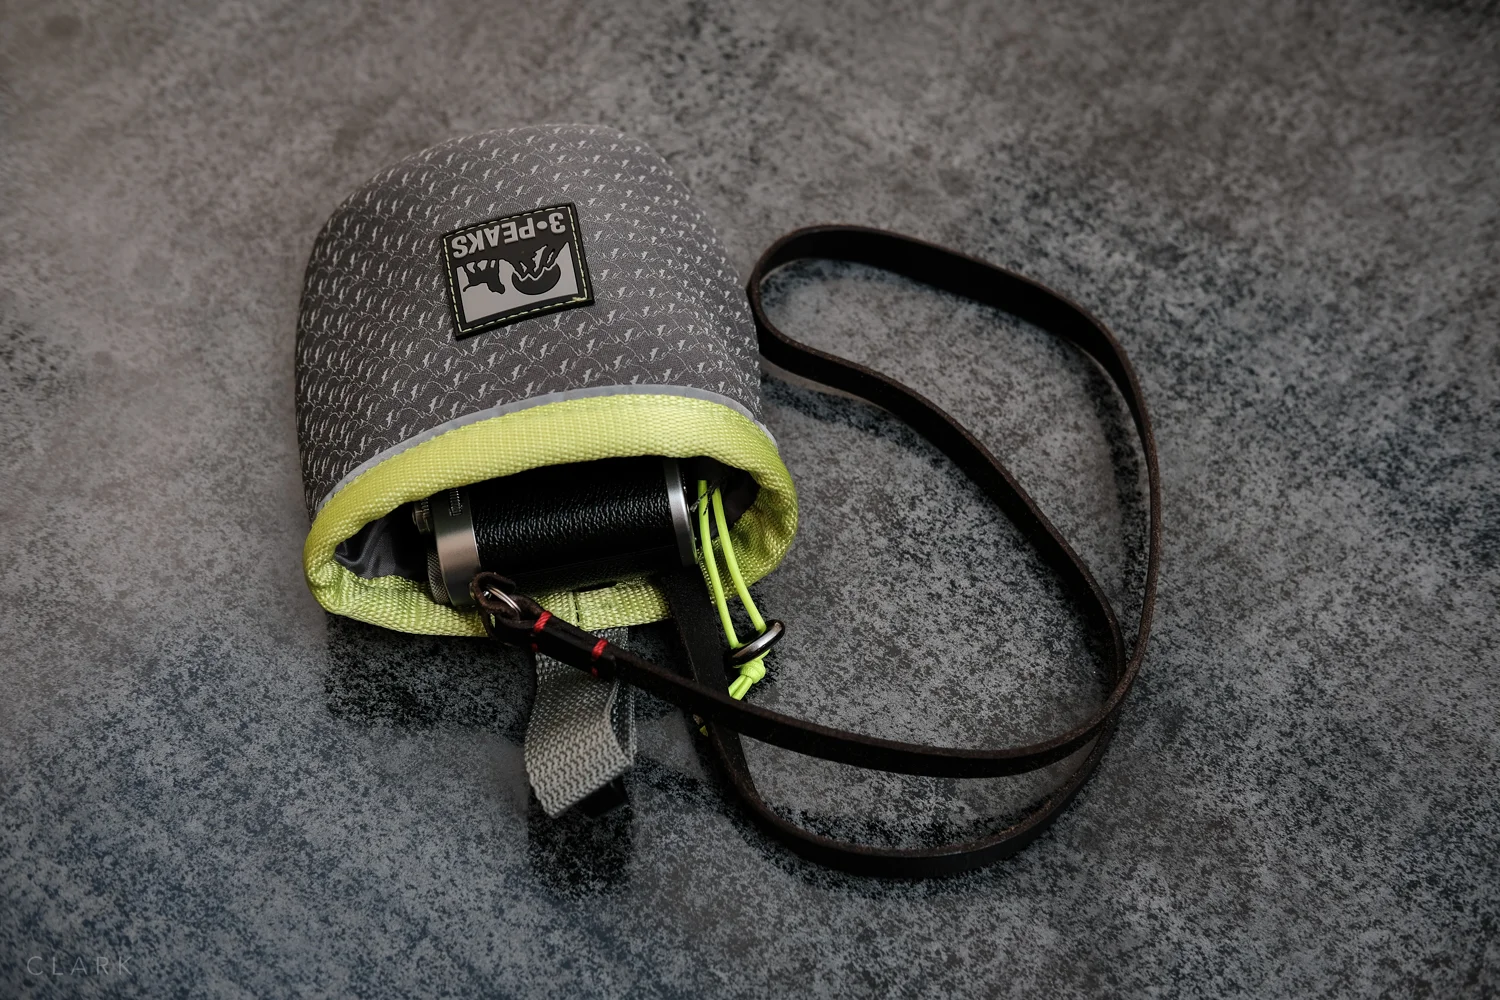


The front pocket is the large single space variety, rather than sewn up into two smaller ones. It functions well and is good for sunglasses and memory card wallets etc. But it's the side pockets that are the jewel in the crown. Two many bag companies either make the side pockets too tight or forget to include them at all. Not Domke. The side pockets on the F-3X are large enough to carry lenses or water bottles. I bought a pet treats pouch from the local pet store (beats me too), which holds any of my Fuji primes snuggly and with extra padding. A climbing chalk bag is basically the same thing.


One major flaw of the Domke Shooters Bags is the way they design the top lid and the lids on the side pockets. In both cases, the material is cut too narrow at the end that attaches to the bag. So the side pockets have gaps that rainwater could get in. Likewise, there can be gaps on each side of the top lid unless you take the time to pull each stretch the lid out over the bag. In the case of the lid, unlike other bags that have flat lids, the F-3X is stitched so that it forms a little roof.
Two Ways To Set Up The F-3X With Aftermarket Inserts
Like I said, the Domke setup doesn’t protect gear much and has a lot of wasted space too. Although the side dividers are sewn and can’t be removed, they easily fold flat against the sides of the bag leaving one large compartment. So I've been using two different aftermarket camera bag inserts depending on what my needs are.
The Dome F-3X with the Hadley Small Insert keeps the bag nice and slim. The centre space holds my X-Pro2 and 35mm f2 attached.
The Hadley Small insert (above) was given to me by my friend John Summers and is the same width as the main compartment on the F-3X. I can divide the insert up into three sections and get my X100F, X-Pro2 with the 35/2 attached and X70 with the WCL-X100 underneath. That leaves a bit of space in front of the insert for a book and still leaves all the pockets free for extra lenses and batteries etc.


The Koolertron (above) is an insert I bought on Amazon especially for the F-3X that is almost exactly the same size as the main compartment. I also have this one divided up into three compartments. This insert gives a little more room for longer lenses, so I can have my X-100F with the WCL-X100 attached and the X-Pro2 with anything up to the Fuji 90/2 attached. Again this leaves the other pockets for lenses or batteries etc. Click HERE for a link to the Koolertron on Amazon UK.
Traveling With The F-3X
I chose to use the Hadley Small insert for my trip to the Czech Republic. The Koolertron is great for holding lots of kit, but because it’s almost exactly the same size as the main compartment (and fairly rigid), it makes the F-3X a bit boxy and I wanted it to be soft and easy to carry. I wanted it to sit on my hip and mold around me, making it easier to move through crowded spaces and busy public transport. I made the right choice.
My Bose QC25 headphones fit in any of the end pockets and the hidden zipper pocket in the lid allows me to put my watch, cash, and passport in there as my bag goes through airport security. I don’t need to worry that someone will grab my cash if I get stopped at security. The rear pocket is ideal for my iPad mini and all the hotel and travel documents that I print out just in case I need them (I also keep digital versions in Evernote). I don't think the Domke is a bag that will attract the attention of thieves. It doesn’t look like, nor is it an expensive bag. It’s a really functional travel camera bag.

Conclusion
Domke bags may not be for everyone. Even if you like Domke, the Rugged Wear version may not be for you. I would say it's best to see them in the flesh at a proper camera store (if you can find one of those). The F-3X is a winner for me and I'll be using it a lot. This bag was never meant to be my every day carry around bag, so I'll be going back to my ONA Bowery for that. But my Domke is so versatile I can see this as my go-to bag of choice for a number of situations. Like ONA bags, the Domke bags just get better looking after lots of use and abuse. I can't think of a better camera bag for traveling either. My F-3X already looks as though it has been on the road for a long time. Maybe I'll do a follow up to this when it starts to get really frayed at the edges and has a few battle scars.
Positives
Shapeshifter
Large side pockets
Hidden pocket with zipper
Grab handle/luggage strap
Great for inserts
The strap goes under the bag
Rear pocket fits iPad Mini or paperwork
Negatives
Wax is too waxy
Flaps are too small to keep rain out
Very little padding
You can buy the F-3X at Amazon UK
ONA Bowery Bag In Dark Truffle Leather
I've had an ONA camera bag on my wish list for a while. It was originally the Street Prince in Dark Truffle Leather that I had in mind, but I couldn't get one in the UK at that time. I asked a friend to pick me one up in the US last year, but the dealer was too far from where she was staying. I ended up buying a Tenba Cooper 13 Slim instead, which I'm still using and love, especially for travelling as it has a sleeve to fit over the handle of rolling cases and it has a pocket at the front big enough for my Bose QC25 headphones.
So when a trip to London appeared on the horizon, I found out that The Classic Camera stocked a selection of ONA bags in various styles and finishes. I still liked the Street Prince and even considered the Berlin II, but I've been on the look out for something small that would force me to carry less gear on a day to day basis. I have a backpack for shoots where I need a lot of kit, but for street photography or just a go anywhere bag, I was in need of something smaller, but with enough space to hold a few accessories as well as two or three X-Series cameras with lenses attached.


I kept coming back to the Bowery and was drawn to the leather versions especially. The Antique Cognac looks good (it looks much better in the flesh than it does on the internet actually), but I loved the look of the Dark Truffle leather version. I liked the Tan canvas version when I was looking at them at Classic Camera, but I knew I wouldn't get it out of my system unless I bought the leather one.
I paid the £219 at The Classic Camera and resisted buying a Leica M6 (for now) while I was in the shop. I ended up carrying the Bowery around in it's box for six hours that day while I shot some London Street Photography with the X70 and X-Pro2.
BUILD QUALITY:
The leather ONA bags are made to wear-in really quickly, so if you want one to stay looking as new as the day you bought it for many years, leather ONA bags are not for you. But if you want your bag to look as though you've been using it for years, even though it's fairly new, then look no further because ONA is definitely what you're after.
Build quality on ONA bags is fantastic, in fact I would say it's the best I have seen on any bag! The leather versions especially look as though they would last for many years, possibly out lasting me. The leather is thick and tough and the rivets and buckles are chunky and already look aged, which is in keeping with the rest of the bag.
WHAT FITS INSIDE THE BOWERY:
The Bowery can hold a lot of kit for such a small bag. The leather version is a good bit heavier than the canvas one and as I said earlier, the purpose of this bag for me is to travel lighter on a day to day basis when I don't have a shoot that requires larger lenses. But I can basically get all of the following into the Bowery. I don't always need this amount of gear, but it's good to have the option.
- Fuji X-Pro2 with the 35mm f2 attached
- Fuji X100T (with lens hood)
- Fuji X70 (with lens hood)
- GoPro (under the X70)
- Moleskine (Evernote edition) Notebook
- Parker pen
- Apple Earbuds (headphones)
- A couple of spare batteries
- Short iPhone cable
- 2 spare SD cards (in their cases)
- Business cards and bank/credit cards
- Lens cloth
Here's a short video showing how I fit all this inside the Bowery.
CONCLUSION:
This Bowery is a really cool bag. It feels great over my shoulder and has that rare quality of feeling lighter than it actually is. I was tempted to buy the wax version because it was a good bit lighter and felt and looked great, but I knew I would still have had gear lust over the leather version, so I'm glad I bought this one. The Dark Truffle is the one for me, even though ONA are now doing a black leather versions too.
These bags are not inexpensive by any means, but will last for years, and even though they will get scuffed and worn very quick, they will look as cool as an old Leica that's worn down to the brass. I would highly recommend paying a visit to The Classic Camera store if you happen to be in the London area, I know I'll be back there on my next visit to London. If you're on the fence about buying an ONA bag, just take the plunge. You won't be disappointed.