BLOG
Voigtlander 18mm - The Most Exciting Lens For Fujifilm In Years!
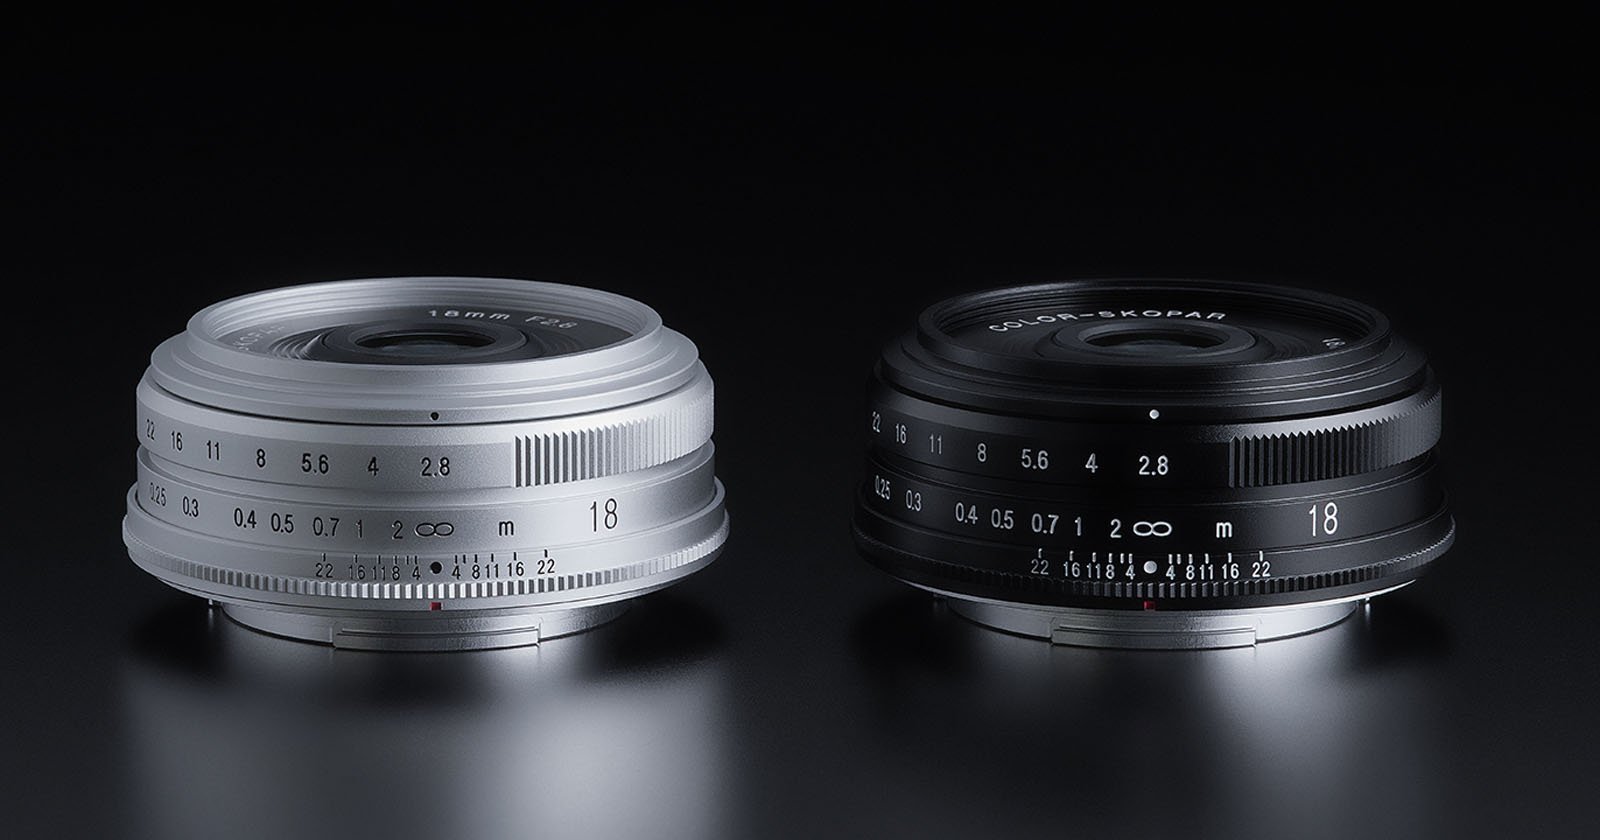
Voigtlander 18mm f2.8 Color Skopar for Fujifilm X-Mount
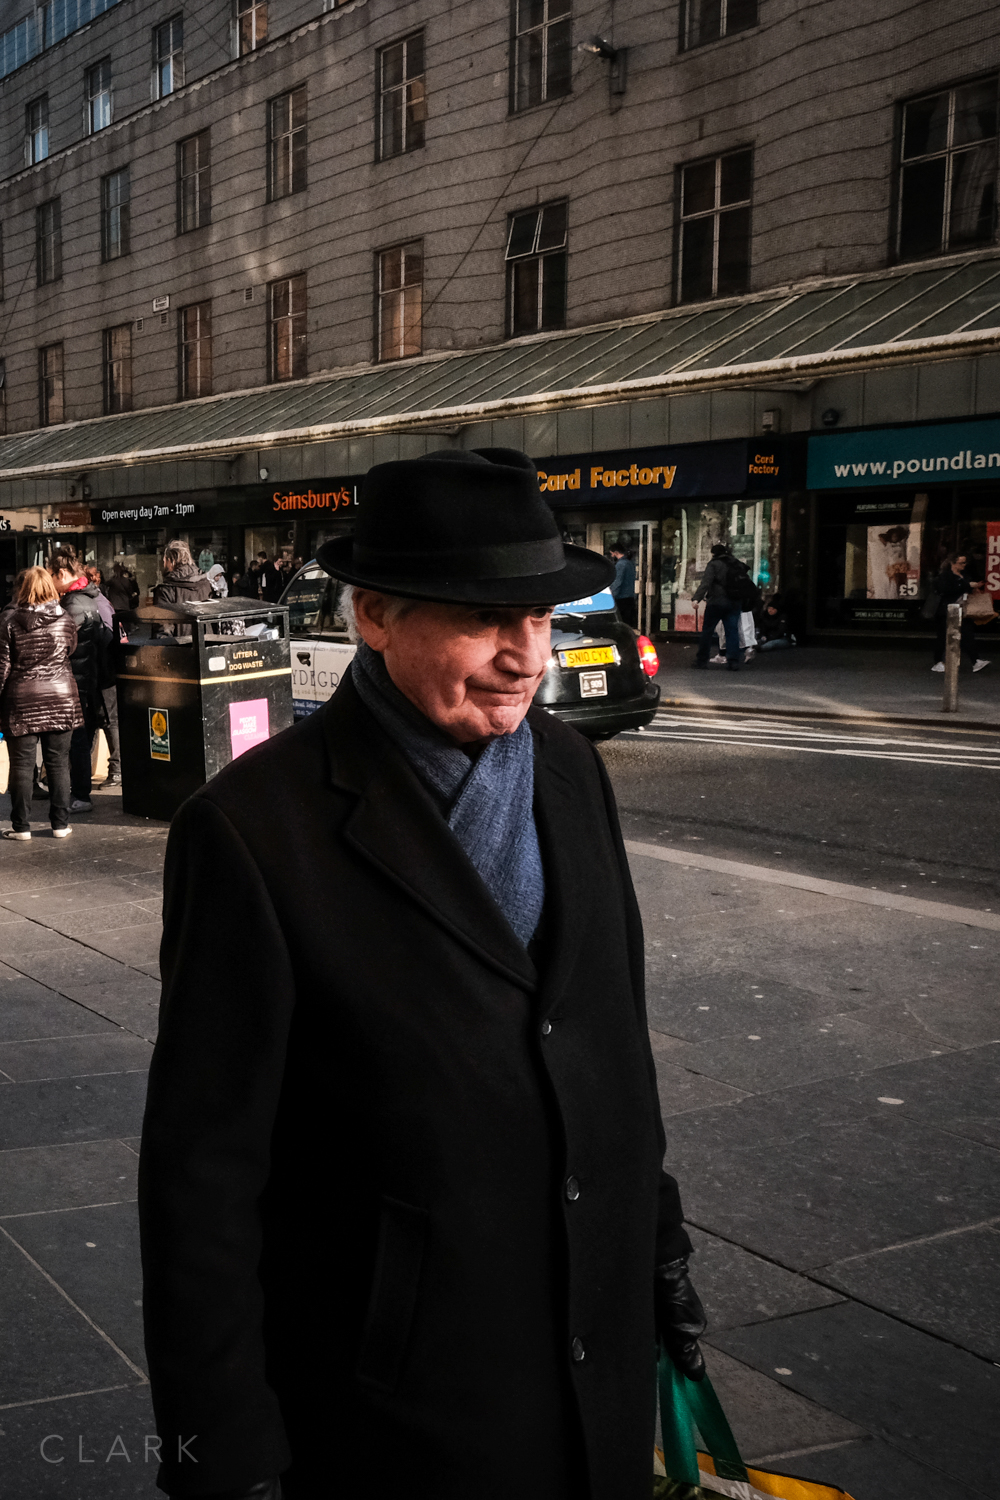
I have been waiting for this for years! A small and compact, 28mm (full frame equivalent), manual focus lens, with focus tab. This just might be the best street photography lens for Fujifilm, ever!
As an owner of the Voigtlander 27mm f2 Ultron (review coming shortly), I already know that the built quality on the new 18/2.8 will be premium. The focus will be smooth and the aperture ring will have just the right amount of clicks stiffness. The 27/2 is a great little lens, but for street photography using zone focus, this will be amazing!
My one concern is the very short distance between 2 meters and infinity. The 27/2 has the same travel distance between 3 meters to infinity and I found that to be very short. But I did get used to it fairly quickly, plus the 18mm will have much more depth of field than the 27mm
I still love my original Fujifilm 18/2, but it’s never been the best lens for zone focusing on the street.
I’ll review this as soon as I get my hands on one, but needless to say…I’m excited!
The Digital Contact Sheet :: Episode 8
X100F 23mm f2 - 1/150, f2, ISO 200
This Digital Contact Sheet and the next one will be from the same documentary shoot, but with very different pictures. The theme is life-changing surgery and it’s from a project back in 2019. I won’t rehash the details of the story here but you can read all about it by clicking HERE

I tend to shoot with two (sometimes three) cameras for documentary work. For this shoot, I had the Fujifilm X100F and the X-Pro2. The X100F has a fixed 23/2 lens and I was using a 35/2 and 50/2 on the X-Pro2. With the 1.5x crop of the APS-C Fuji’s, that was giving me a 35mm, 50mm, and 75mm. I also had the WCL-X100 for the X100F in my bag, which would give me a 28/2, but I didn’t use that till the next day. These f2 lenses are not the fastest, but as I would be shooting in a hospital, I knew that it wouldn’t be too dark and nothing would be moving that fast.
As you can see from the digital contact sheet, I was trying to get wide shots, mid shots and close-up shots to tell the story. At one point I was drawn to Mai’s bag. Other than a holiday, when does someone take a bag with a change of clothes etc to cover the unknown? Although she was with her husband, it was obvious that she was very alone and scared; this was a journey that only she would be making.
[My X100F file numbers might look as though it was brand new, but it had actually been round the clock.]
I shot frame 100F0016 and the frame after with lots of headroom; I wanted to have Mai small in the frame as I imagined that’s how she must have been feeling. This is my favourite shot of this sequence as I think it conveys exactly what I was trying to achieve. It also has all sorts of leading lines that pull the eye toward the subjects.
Frame XPR20937 (below) is pretty much the same shot using the X-Pro2 with the 50/2 lens for a close-up, but it’s not as visually compelling as the wide shot, although still a get storytelling shot.
X-Pro2 & 50mm f2 - 1/125, f2, ISO 250
Frame XPR20937 (above) is pretty much the same shot using the X-Pro2 with the 50/2 lens for a close-up, but it’s not as visually compelling as the wide shot, although still a good storytelling shot. The 50/2 lens is such a terrific little lens that gets very little attention in my opinion. Although not as dreamy as my 56.1.2, the 50/2 is the lens that I carry with me pretty much all the time.
X100F 23mm f2 - 1/125, f2, ISO 250
100F0020 (above) is also a favourite from this set. Again, it shows the loneliness and fear; possibly more so because Mai is sitting by herself with an empty chair on either side.
The next Digital Contact Sheet will be based on the following day, post-op, and more dramatic; where fear is swapped for pain and discomfort.
Fujifilm Framing Outline Feature

As a music photographer I often have trouble seeing where the edge of the frame is inside my viewfinder while shooting in dark venues. I often have pictures where my subject’s head is just touching the top of the frame where I thought I had allowed headroom.
So I was delighted when I found (by accident) a feature that is in the X-T2, X-T3, X100F, X100V, and I’m sure all the latest cameras. It’s called ‘Framing Outline’ and it puts a grey outline around the frame on both the electronic viewfinder and the rear LCD screen. Here’s where to find it.
SET UP - SCREEN SET-UP - DISP. CUSTOM SETTING - 'FRAMING OUTLINE (usually the last on the 4th page). Just make sure that’s ticked and you will see an outline on your frame.
This is not just a great feature for those of us shooting in dark music venues, but for portraits against black or dark backgrounds or any kind of night shooting. Give it a try and leave a comment below if you find this useful.
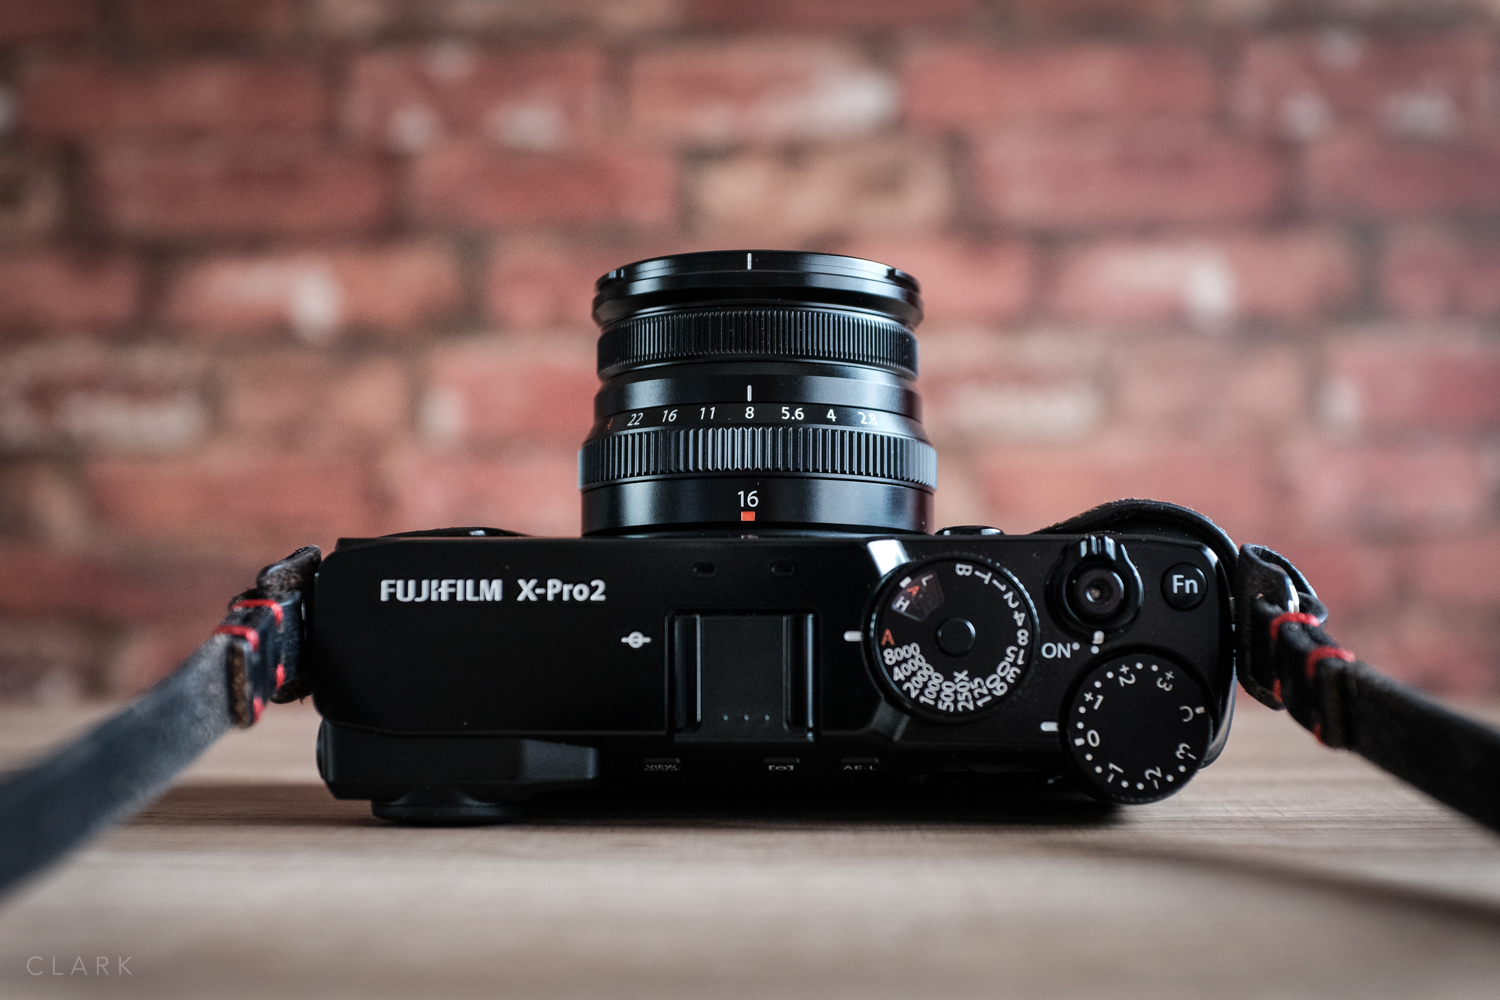
Will Sports Finder Mode Turn A 16mm f2.8 into A 28mm?

I’ve had a recent comment on my review of the Fujifilm XF16mm f2.8 R WR from Kid Sodbrennen about using this lens with the Sports Finder Mode in the newer Fujifilm cameras. Kit reckoned it would crop in to match a 28mm. After doing a quick test, I replied that it was not as wide as a 28mm. But testing further for this post, I have come to change my mind. The problem was that I was basing my opinion on the 18mm f2, which is actually more like a 27mm.


The 16mm f2.8 is actually a bit wider than the 16mm f1.4. As you can see from the two example photos above, the f2.8 is more like a 15mm. 1mm doesn’t add or subtract to a longer lens, but on a wide Ange lens this can make a big difference.


As you can see from the image to the left, the 18mm with a 1.5x crop comes in at 27mm. The picture on the right shows the 16mm f2.8 using the X-T3’s Sports Finder Mode, which has a 1.25x crop. So assuming the 16mm f2.8 is actually a 15mm - 15 x 1.5 = 22.5. 22.5 x 1.25 = 28.1.

But if you compare the pictures above, one shot on the X70 and the other shot on the X100V with the 28mm WCL-X100 conversion lens, the 16mm f2.8 using Sports Finder Mode is indeed just like a 28mm.
The downside to this is that you are throwing away megapixels, but I’m still shooting street with my X70, which has a 16.3mp sensor, as opposed to the newer 26.1mp sensors in the latest cameras.
Apart from the X100V, my only camera with Sports Finder Mode is my X-T3, which I would never use for street photography. So I guess I won’t get the chance to make use of this setup. But I’m sure with the X70, X100V with the WCL, and the X-Pro2 with the 18mm, I’ll manage for now.
But imagine a new 18mm f2 mkII and an X-E4 with an X100V style flip-out screen (for shooting from the hip). That would be an awesome street camera!
UPDATE:
An X-E4 was indeed released with an X100V style flip-out screen. Unfortunately it has no front focus selector, no View Mode button, and of course, no D-Pad. Not only that, it has less Fn buttons that might have allowed to compensate for these short-comings. I really fear for the future of Fujifilm’s next generation of cameras. But at least it’s saving me money by forcing me to stick with older models :o)
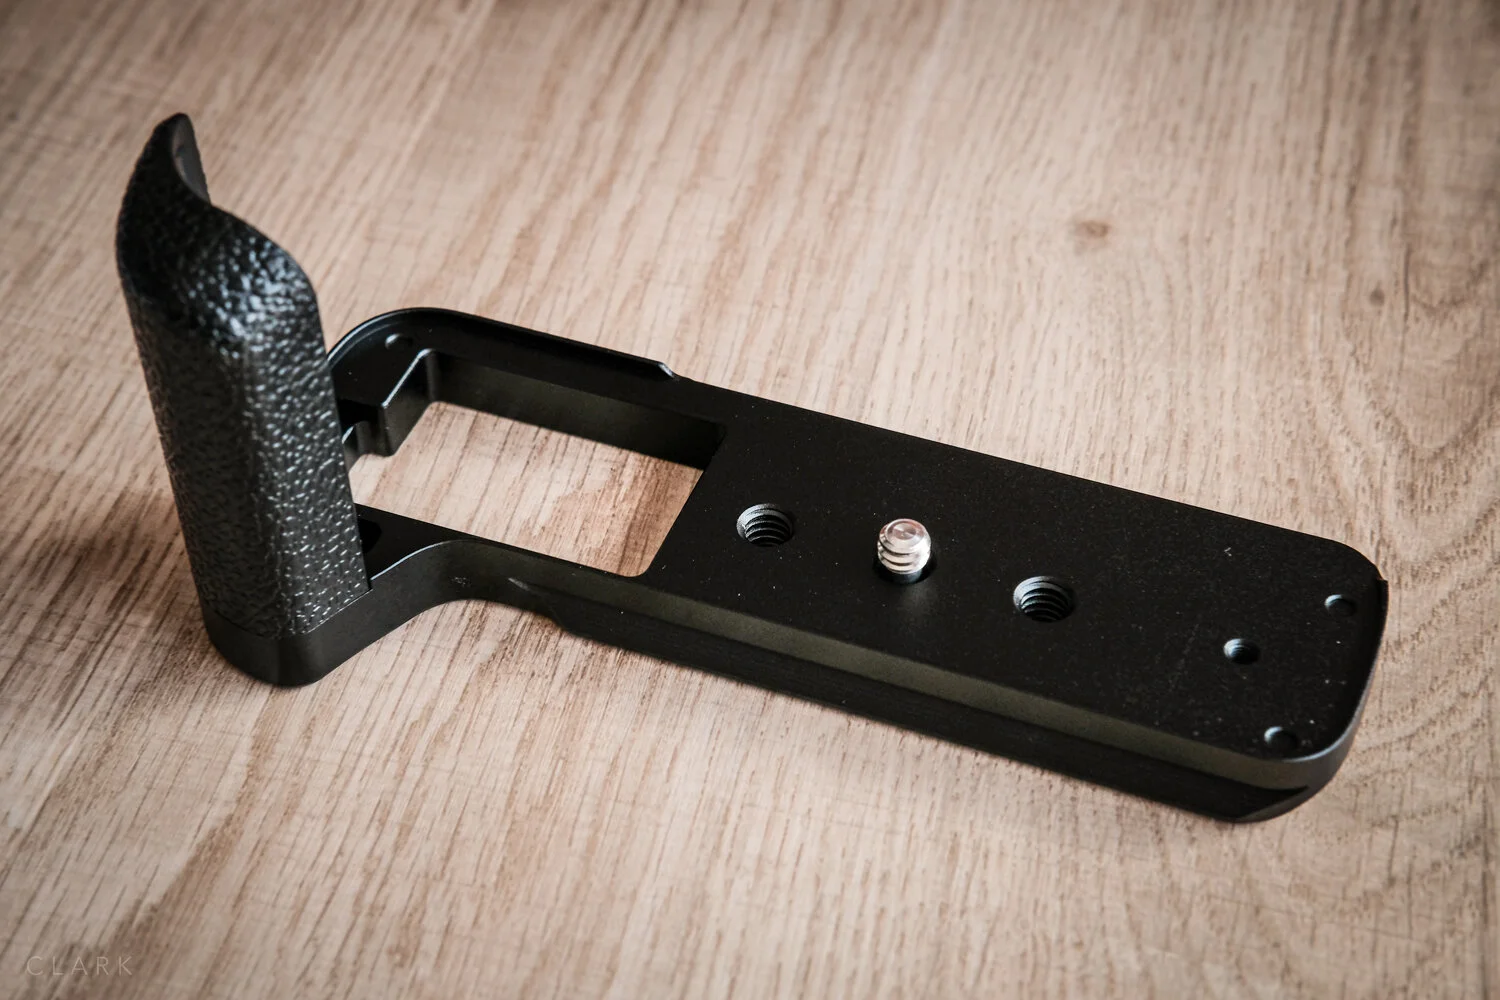
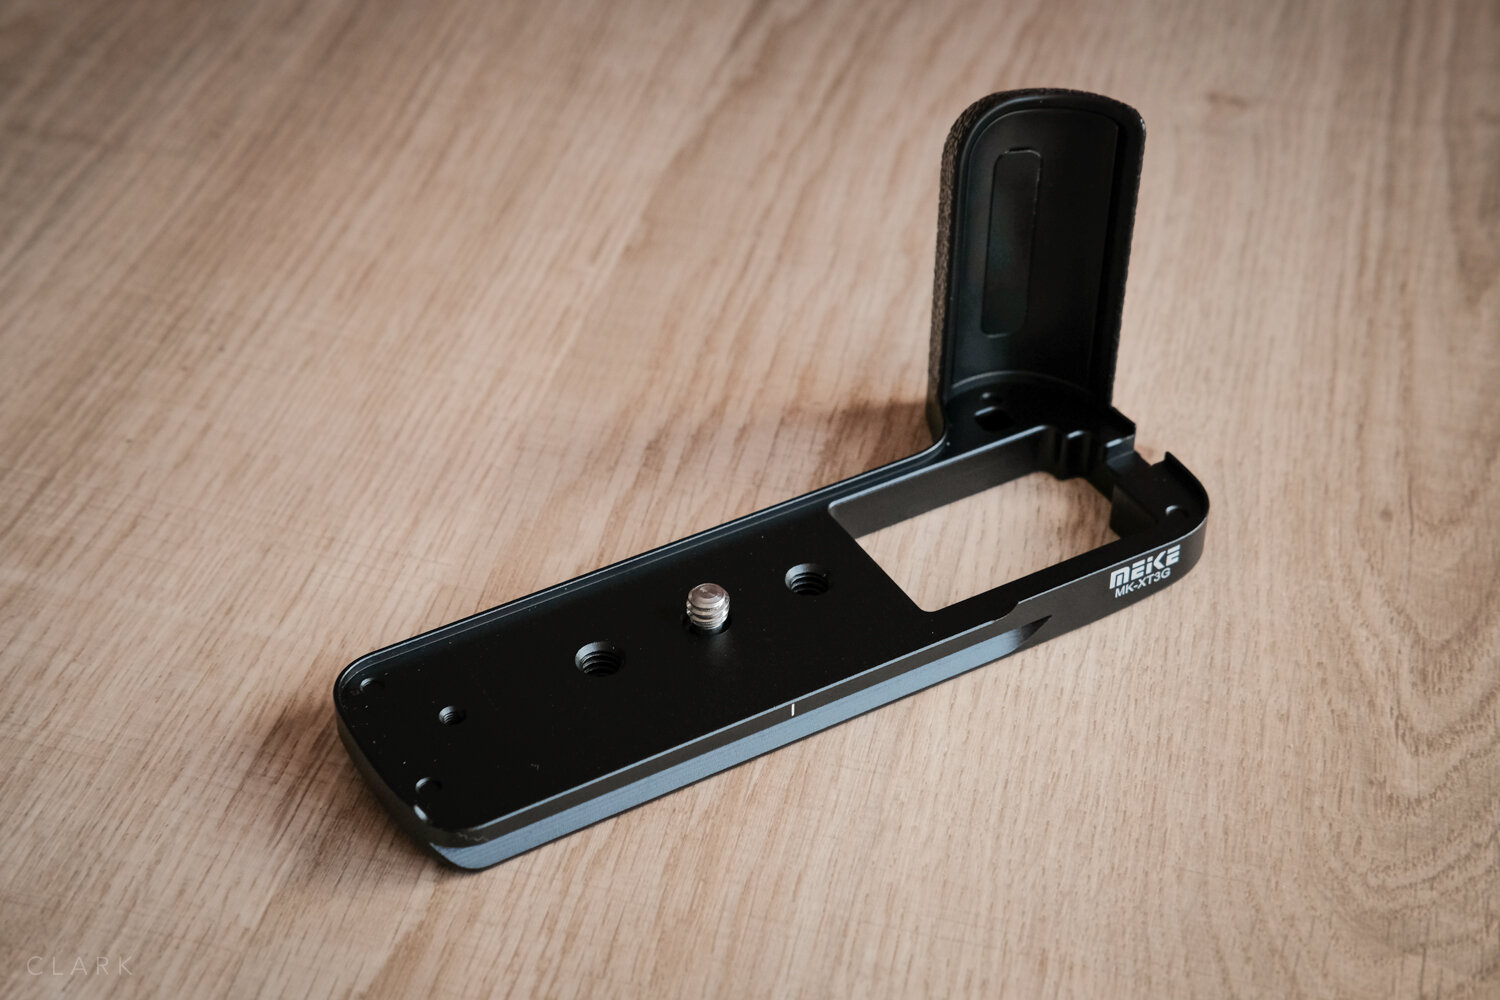
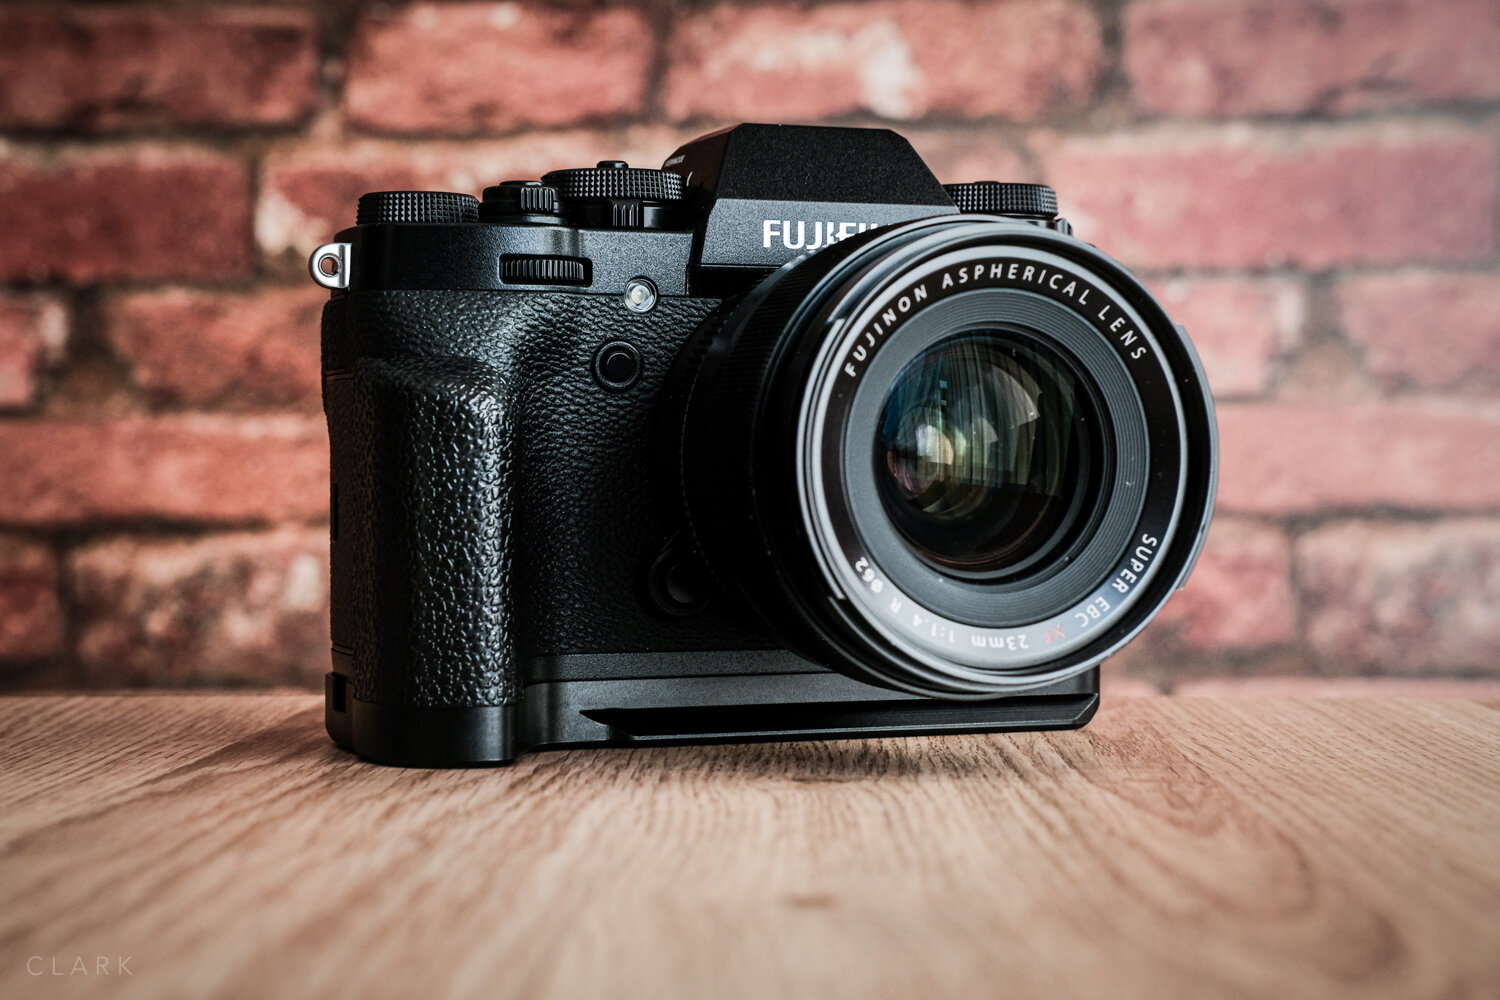
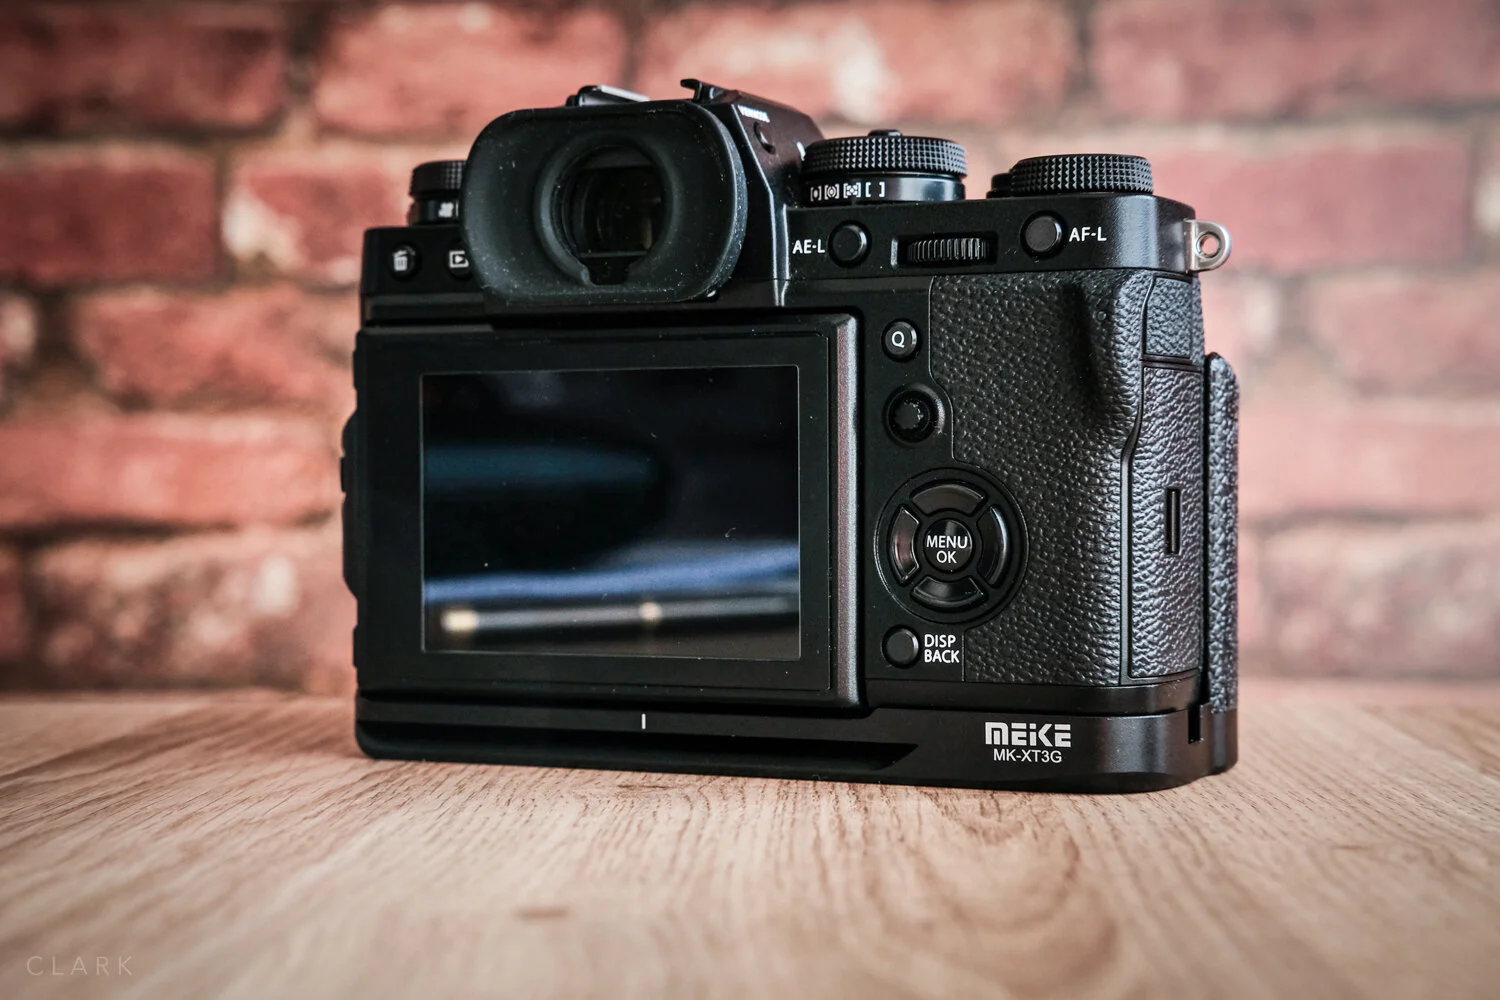
Meike MK-XT3G Fujifilm X-T3 Hand Grip
I’ve never been a fan of these metal grips for cameras, preferring a good old battery grip that has a more useful function of extra power. But I’ve been shooting a lot of video this year on a Zhiyun Weebill S gimbal and wanted to use a quick-release system rather than having to rebalance the gimbal every time I used it, each time I needed to change batteries. I started off using a Manfrotto quick release plate, but as I also shoot stills on the same gig, I didn’t like that square block attached to the bottom of my camera when not on the gimbal. Enter the Meike MK-XT3G hand grip for X-T3 (there’s an X-T2 version too).
Although Fujifilm makes there own version of this, like all Fujifilm accessories, it is a little overpriced. JJC produce a version of this grip too, but in the end, I opted for the Meike one as I preferred the design.

BUILD QUALITY
Built quality is first class. It is solid and made of metal. The vertical part of the grip is also made of metal but has a plastic grip at the front. This thing is built well and should last for years.

LOOKS
Although I find the vertical grip part (that sits in front of the camera’s grip) is a little too glossy for my liking, which looks a little cheap on close inspection, this is the only downside but will hopefully look better with a little wear. Its finish is not a match for the X-T3’s more rubber look.
The bottom of the grip (the important part) looks nice and is well styled to suit the camera. It might even add to the looks of the X-T3. Rather than just putting a brick on the bottom of the camera, Meike has added a few design curves that give it a more expensive look and feel.
The logo on the back is a little oversized, but I’m just being picky now. Put up with it or add a little bit of black tape if you don’t like it.
FUNCTION
Instead of having to screw a plate on to the bottom of the camera each time a tripod is required, the Meike grip just stays attached and simply locks into the quick release plate on the gimbal or tripod. It’s a functional grip when hand-held, or a tripod bracket when required. The front and rear of the grip has built-in rails Which allow the quick release plate to lock it in place on any Arca Swiss bracket. The simplest things can often be the best, and that little white line on the back of the grip that marks the centre position is great! I can use it to line-up with similar markings on the quick release plate to always lock my camera in the same spot, allowing my gimbal to be balanced each time.
On the bottom of the grip, there are two threaded holes that can be used to attach standard tripod screws or BlackRapid style straps. Each corner of the base is curved to make it more comfortable on the hands. The grip is also cut-away to allow the flip-out screen to move freely.


VALUE
At £39 on Amazon, this is outstanding value for money and a bit of a no-brainer if you need to use a tripod or gimbal with a quick-release Arca Swiss system. I paid a further £15 for the Arca plate to attach to the gimbal, so for a total of £59, this saves a lot of time having to re-balance the Weebill S each time I use it at a different location (which could be up to six times per day).


SHOULD YOU BUY ONE?
There are three good reasons to by the Meike MK-XT3G.
If you use a tripod regularly.
If you use a gimbal, but don’t want to have to constantly balance it.
If you find the camera a bit small in your hands.
If any of these reasons apply to you, it’s probably a no-brainer, especially at the price on Amazon. Time is money, so for me, this grip will more than pay for itself in very little time!
RELATED CONTENT
One Frame 009: Decisive Moment
We’ve all heard about Henri Cartier Bresson’s ‘The Decisive Moment’ I guess. The shot of the man leaping over the puddle (or into it) springs to mind. But HBC just meant that you have to press the button at the right moment. A lot of the time if you see the picture - you have already missed it. So you have to anticipate the moment. But to be honest, sometimes you just get lucky!
This frame was shot during the second month of the Covid-19 lockdown when exploring places off the beaten track was not only fun - it was essential if you wanted to avoid contact with fellow humans. While walking with my wife and kids we came across this burned-out car. I was flying a drone at the time so I grabbed 7 frames of the kids playing on and around the car as the drone hovered above. I only took a single shot of my son jumping off the wreck, and this is that frame. I used the drone footage for my Coronatime film, which I was asked to make for the Fact Not Fear series (below).
SHOT WITH FUJIFILM X100F
One Frame 007: Man Down
Each year in the stifling heat of Italy, runners set off from Venice on The Moonlit Marathon, pounding the streets through Jesolo. During the 2012 event, one of the runners suffering exhaustion and possibly dehydration collapsed outside Hotel D’Annunzio. Spectators tried to help the runner by placing his feet on a chair and the hotel owner brought glasses of water, with most of that water being poured over the runner. An ambulance was called and the man was treated on the ground by paramedics before being taken away on a stretcher.
I picked up the Professional Photographer of the Year Award in the news category in 2013 for this picture. It’s still one of my favourites to this day. Although the composition is technically flawed. as the main subject is in the centre of the frame and there is a lot of dead space. at the bottom, I think it adds to the. drama, especially with the extremely crooked verticals. I shot frames before and after this one but everything just came together in this one shot, the water on the ground, the number on his chest blowing down and the man leaning over him with his hands on the runner’s chest. It’s a shot made for black and white.
SHOT WITH FUJIFILM X100
What's In A Music Photographers Bag
I sort of fell into the genre of music and over the last seven years, I’ve shot more than 300 artists and taken more than 50,000 pictures as a music photographer. I shoot all types of music, but mostly jazz. I am currently the official photographer for the Scottish National Jazz Orchestra (SNJO) and my pictures have been featured on album covers, tour posters and magazine publications. At the time of writing this post, I am putting the finishing touches on a book featuring the last 7 years with the SNJO.
THAT WAS THEN
There was a time when I shot Nikon alongside my Fuji’s, but with the release of the Fujifilm XF50-140mm f2.8 my D800 (amazing camera) ended up staying at home, and after six months or so of no use my full Nikon kit was sold. I also used a Lowepro backpack for a long time, but as I often have to pull my camera back out of the bag just as I am about to leave a venue, a shoulder bag is the way I go these days (mostly).
THIS IS NOW
These days I am using a Domke F2 (black canvas) bag. It’s not a massive bag, but it’s not small either. What I can fit inside the F2 is about as much weight as I want to carry and as it is packed full, I have to take out a lens if I want to include a different one. This works well for me as I would end up carrying way to much gear otherwise. If I know I’ll be shooting a lot of backstage pictures I might wear my belt-pack to the gig and put an X-Pro2 body in one of the side pockets as I prefer a rangefinder-style body for that sort of shooting.


SIDE POCKETS
Starting at the F2’s side pockets. I have a BlackRapid Yeti double harness strap, a Manfrotto Pixie mini tripod and a Spider Holster in one pocket, and a small pouch that attaches to my belt in the other pocket.
BLACK RAPID YETI
The BlackRapid strap takes up a lot of room and I have thought of getting rid of it and using regular straps many times, but this harness works well and is easy to adjust quickly for one camera or two.
SPIDER HOLSTER
The Spider Holster is rarely used but can be handy when using a third camera. I keep the spall spanner/wrench in my belt pouch for attaching the little stud to the bottom of the camera.


BELT POUCH
These tactical pouches are available on Amazon for very little money and are essential for what I do. I put this on my belt as soon as I arrive at the venue and it saves me from having to get to my bag (which can be at the side of the stage) for essentials. I keep a notebook, pens, spare batteries, SD cards, business cards and a lens cleaner in this. It also has a section on the outside for my iPhone, which I insert upside down, face inward (and muted) so that it doesn’t light up on its own.
LOWEPRO PADDED WRAP
I have had this green Lowepro padded wrap, that came with another bag, for years. It is folded like an envelope and mostly just lies on top of my gear as the F2 doesn’t have any padding. I keep an iPad mini in the zippered pocket on the lid of the F2, which protects the screen on the back of my camera, but the wrap is just added protection. It can also come in handy for kneeling on or a number of other uses.
INSIDE THE BAG
FUJIFILM X-T2 AND XF 16-55mm F2.8 WR
The Fujifilm XF 16-55 f2.8 lens is attached to my X-T2 most of the time and this the camera and lens combo that I keep handy at the top of my bag so that I can pull it out or put it back in the F2 easily. It sits in the bag with the lens facing down. This comes in handy when leaving a venue as I often have to pull a camera out for a few shots, or if I keep it out it means I can slip it back in at the venue door without needing to remove the bag from my shoulder. Something the backpacks are not functional for.
THE FUJIFILM X-T3
The amazing 50-140 f2.8 lens is my concert workhorse. It can’t fit in the Domke attached to my X-T3, so the camera body fits inside the F2 square insert. These inserts are divided into 4 sections for lenses, but unlike the older versions that were sewn, the newer ones have Velcro so the section can be adjusted to take the X-T3 with the battery grip attached. This also creates a space for my Zoom H1 audio recorder (more on that later). I attached a spare Billingham Velcro insert above the X-T3 that acts as a hinge and folds over to protect the X-T3 and X-T2 from bumping into each other.


SWITCHABLE LENS
Still on that square Domke insert (this one is included with the F2). I have the 23mm f1.4 lens in the photo above, but this is where I keep my switchable lens. By switchable, I mean that if I need to bring another lens, it will go in here and the 23mm will stay at home. This stops me from carrying too much equipment and weight (more on these extra lenses later).
Front pocket contain audio equipment (left) and white balance tools & business cards (right)


LENSES
I have a 16mm f1.4 and a 56mm f1.2 stacked in a tall square Domke insert I bought on Ebay. I use the JJC square metal lens hood on both these lenses (and the 23/1.4), so they can be stacked safely as they have flat plastic caps. I highly recommend these lens hoods. They are equal in quality to the Fuji optional ones, but less expensive.
The 50-140mm f2.8 workhorse lens sits inside a Domke insert that comes with an F-4AF bag. This insert is a bit wider and has the space required to include the tripod mount on the lens. I attach the BlackRapid strap to the tripod mount instead of the camera as the weight of this heavy lens would put too much strain on the camera’s lens mount.
NISSIN i40 FLASH
I rarely use flash for music photography (never ever for shooting during a concert), but sometimes I might need to use it for a backstage portrait if the light is really bad. The Nissin i40 is small and slips in the F2 between the sidewall of the bag and the smaller of the lens inserts. It sits in there and I forget about it until I need to remember. The i40 runs on 4 AA batteries and has enough power for anything I need on a music shoot. If I am required to shoot promotional portraits or promo shots, I will take a bag full of Yongnuo YN560 IV’s, stands and modifiers. But that’s another story.


AUDIO EQUIPMENT
After being asked to shoot some after-show video clips and interviews without any notice, then having to cobble a less than ideal setup to get by with, I now always keep a small audio kit with me. You have already seen where I keep the Zoom H1 inside the main compartment of the F2, and the Manfrotto Pixie that can be used as a tabletop tripod for shooting video. I use one of the front pockets to store a Rode lav microphone and extension cable (including an adaptor to allow it to fit the X-T3 or my iPhone). I also have a set of Apple earbuds for monitoring sound and a spare 3.5mm to 3.5mm cable that can be used to attach the Zoom H1 to the X-T3’s headphone socket. So I can record audio in camera, lav mic to Zoom H1 or both at the same time.
WHITE BALANCE
The other front pocket of the F2 is used for business cards and white balance tools. I have a Color Checker Passport, ExpoDisc and a set of white balance cards on a lanyard. Overkill? Perhaps. I also use this bag for portrait shoots so the Color Checker is invaluable.


OPTIONAL LENSES
The three lenses that I often swap out when needed are the 12mm f2.8 Samyang, the Fuji 10-24mm f4, and the awesome Fuji 90mm f2. These lenses all have their use, but it can often depend on the venue or the job. For instance, The 12mm Samyang is useful if I can get on stage behind a band or orchestra and shoot toward the audience.
CARDS AND CLEANING
I also take a JJC SD card holder (stored in with the white balance tools) and both the RocketBlower (F2 side pocket) and a Lens Pen. I also have a lens cloth in my belt pouch. I don’t use lens caps so like to clean my lenses before a show.
iPAD
It’s not shown in the photos, but I also keep an iPad Mini inside the zipped pocket in the top lid. I often send a couple of pictures during the interval from a camera to the iPad using the built-in wifi feature. I edit these using Snapseed and then send them to the client so they can be used on Facebook to promote the following night’s performance. It saves me having to do it when I get home.
Lowepro CompuTrekker 350 backpack, Domke F2 and the Domke F-1x
OPTIONAL BAGS
If I really must take extra gear I can use the larger F-1x (bottom right in the picture above) which can hold a massive amount of gear but can get too heavy. Or I might opt for the LowePro Computrekker 350 backpack if I’m travelling by train and have a long walk to the venue.
A FEW LAST TIPS
Always have more than one camera.
Always have at least one camera with a lens attached in your bag.
Always keep spare batteries and cards on your body.
Use a belt bag or pouch to carry your spares and phone.
Make sure you get a photo pass from the venue or the client.
Lock in your white balance, it will save you hours of editing time later.
Shoot completely manual. I tend to shoot at f2.8, /125th of a second and adjust my ISO using the front command wheel.
Clean lenses before a show.
Sync camera clocks before the show (see below if you forget).
Make sure you have enough space on SD cards for the full show.
SYNCHRONISING CAMERA CLOCKS AFTER THE SHOOT
It is crucial to synchronise the clocks on all cameras used on a shoot. It’s always better to do this before the gig, but it’s very easy to forget. So here is a method I use when I get home. I use a world clock app called ClockZ which constantly updates the time and is extremely accurate.
Shoot a photo on each camera of your phone while it displays the world clock time.
Ingest all the pictures from your shoot into Lightroom.
Press G on your keyboard to enter Library Module Grid Mode.
Click on Metadata above your pictures.
In the camera section, choose one of your cameras.
Now go to the last picture you shot (which should be the one of your phone).
Click on that picture.
Hold down Command (Ctrl on Windows) and press A on your keyboard to select all.
Now ho to the Metadata menu at the top of your screen and choose Edit Capture Time.
Make sure ‘Adjust to a specific time and date’ is checked.
Input the time & date from the picture of your phone into the ‘Corrected Time’ section.
Click ‘Change’. It will warn that this can’t be undone but don’t worry about that.
Now repeat the process for your other cameras and all your pictures will be in sync.
If you have found this post helpful and you are thinking of buying any of the gear I use? You could help me out (at no cost to yourself) by buying from Amazon UK using the links below. Thanks.
Hopes For A Fujifilm 18mm F2 MkII

Mock up of how I would love to see a new Fujinon 18mm f2 with true manual focus instead of by wire
There are probably three popular choices when it comes to street photography lenses. There’s the 50mm, 35mm, and the 28mm (in full-frame terms). In a crop factor of 1.5 like the Fujifilm X-Series cameras have, that would be 35mm, 23mm, and 18mm. We already have 2 versions of the XF 35mm and 2 versions of the XF 23mm (more if you include the XC series). But the original 18mm f2 sits on its own and compared to the newer Fujicron lenses (as they have been nicknamed), like the 16mm, 23mm, 35mm, and 50mm, the 18/2 is getting long in the tooth.

The original Fujifilm 18/2 (left) and the Leica 28/2 Summicron (right). Leica do make beautiful glass
The Fujifilm X70 is still the best Fujifilm option for 28mm field of view for street photography at the moment, IMO.
HOPES AND DREAMS AS A STREET PHOTOGRAPHER
There are rumours that Fujifilm are working on two MkII versions of older lenses and I would think it would be two of the original lenses released along side the X-Pro1 in 2012. Those lenses were the 18/2 the 35/1.4 and the 60mm f2.4 Macro. My best guess would be that one of the new MkII lenses will be the 18'/s.
So as a street photographer, what I feel is lacking in the X-Series lenses is a proper street lens like the Leica 28mm f2 (above) and the Voightlander equivalent. So here is what I would love in a new 18/2 lens from Fujifilm.
Old school manual focus (not by wire) that has hard stops at either end of the focus range.
A depth of field scale printed on the lens that accurately matches that of the camera.
A similar size and shape to the 16/2.8.
A focus tab on the focus ring.
Feet and metres marked on the focus ring in bright, but different colours.
A small detachable metal lens hood.
I know what you are thinking - just buy a damn Leica 28mm Summicron. But A. I shoot Fuji cameras. and B. I couldn’t afford a Summicron (or any Leica gear).
Fujifilm make some of the most popular cameras for street photography. The X100V and the X70 are amazing and have fixed lenses. I highly recommend both. But the X-Pro series are fantastic cameras for street, especially having hybrid viewfinders. It’s frustrating as a street shooter that my chosen brand of camera has nothing to offer in a proper 28mm focal length that is up to the job of not only being able to autofocus but to be excellent at manual focusing.

ZONE FOCUSING
Street shooters like me often Zone Focus when out on the streets. But we also need the ability to quickly go from our prefered distance to either our close focus distance or infinity, especially on days where the light is low and we can’t shoot at f11 or even f8. A focus tab is ideal for this as it allows you to gauge focus ring distances without looking at the lens.
Who knows what Fujifilm will do if they actually make a new version of the 18/2, but I really hope they will think about what a 28mm (FF) focal length lens is mostly used for. Imagine if they also made a new 23/2 like this too! I’m sure they could win over many Leica and Ricoh street shooters with two reasonably priced Fujicron’s.with the best manual focus performance in the range!
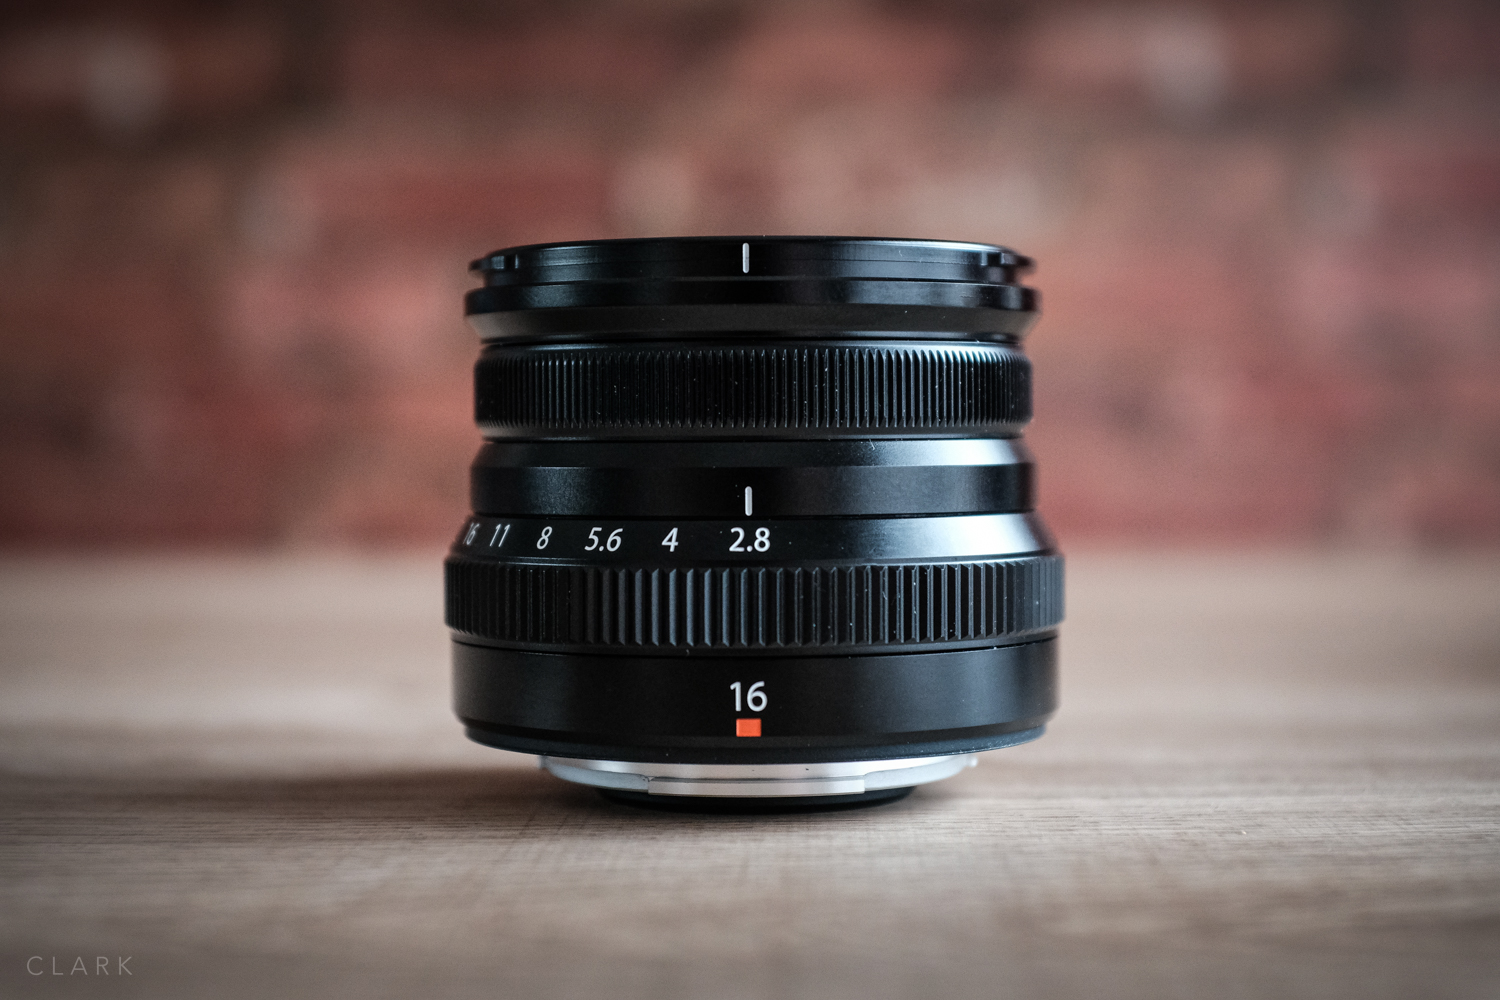
Fujifilm XF16mm F2.8
AND THEN THERE WERE 4 (or is it 5?)
So the 16/2.8 has arrived and it joins the Fujicron trio of 35, 23 & 50mm f2's (that's if we don't count the original small 18/2. More on that lens later). These three lenses were a runaway success for Fujifilm and the quality is stunning. They are small, well priced and so much easier to carry around than the larger f1.4 or f1.2 versions. People often question whether you should buy the f1.4 over the f2, shallow depth of field over size and weight, or even why Fuji should make two versions of the same focal length blah blah blah blah blah. But I think the great thing about these small lenses are that not everybody can afford to shell out loads of money on the bigger faster glass. These Fujicron lenses might be the only way someone on a tighter budget can own the equivalent to a wide angle 24mm or a decent 75mm portrait lens, and that's good enough reason for their existence in my book.
WHY BUY THE 16/2.8 IF I ALREADY OWN THE 16/1.4 VERSION?
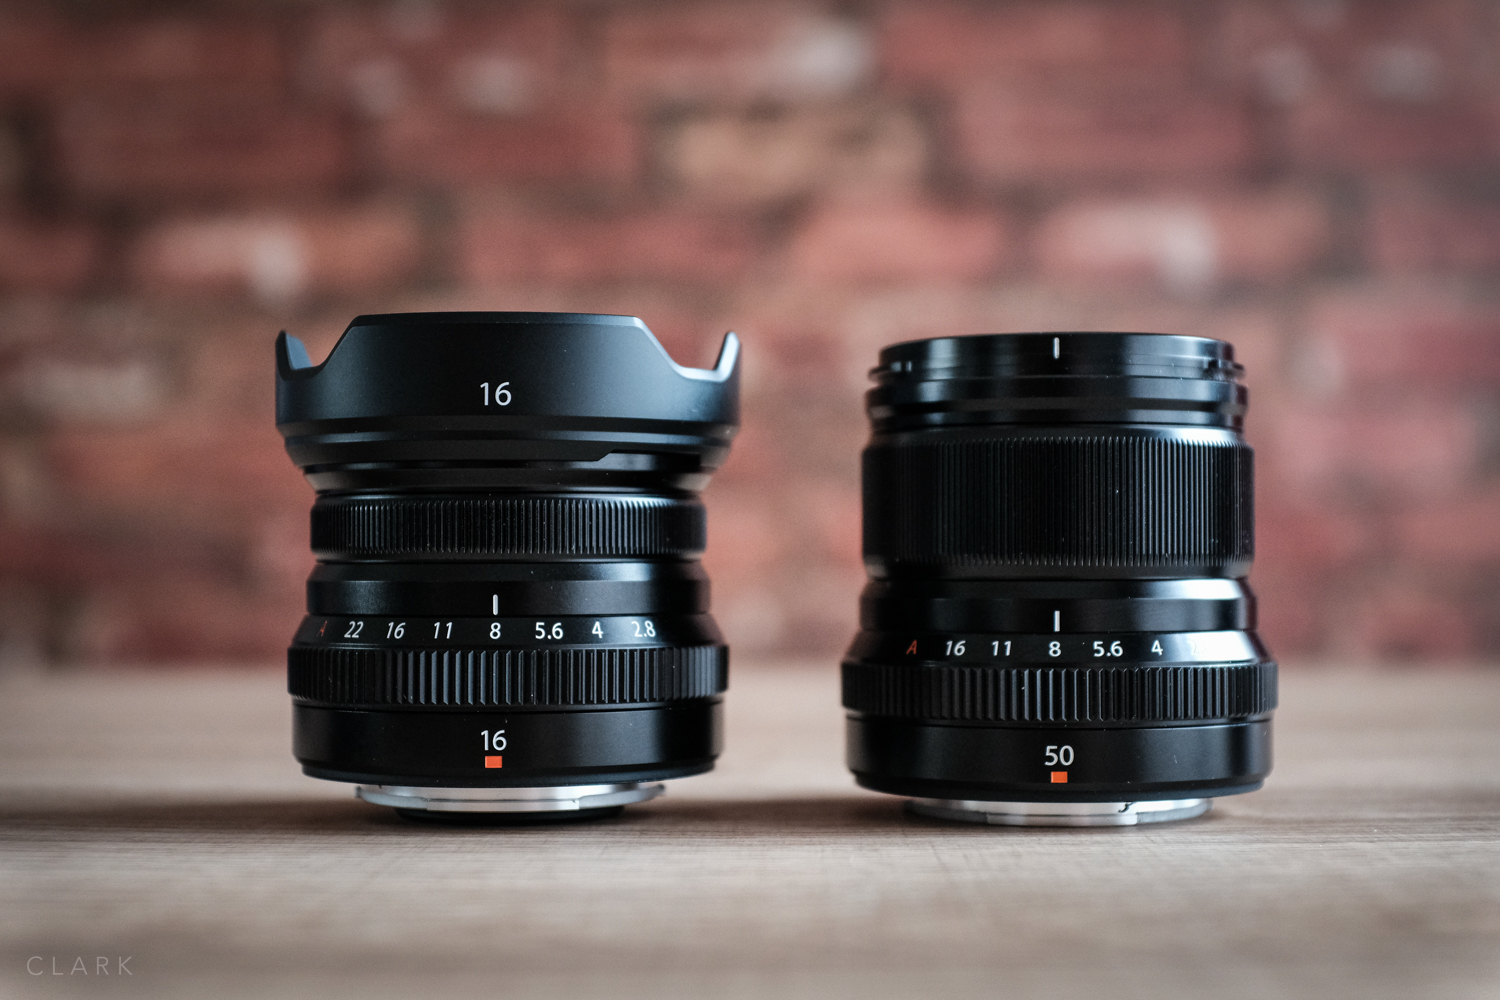
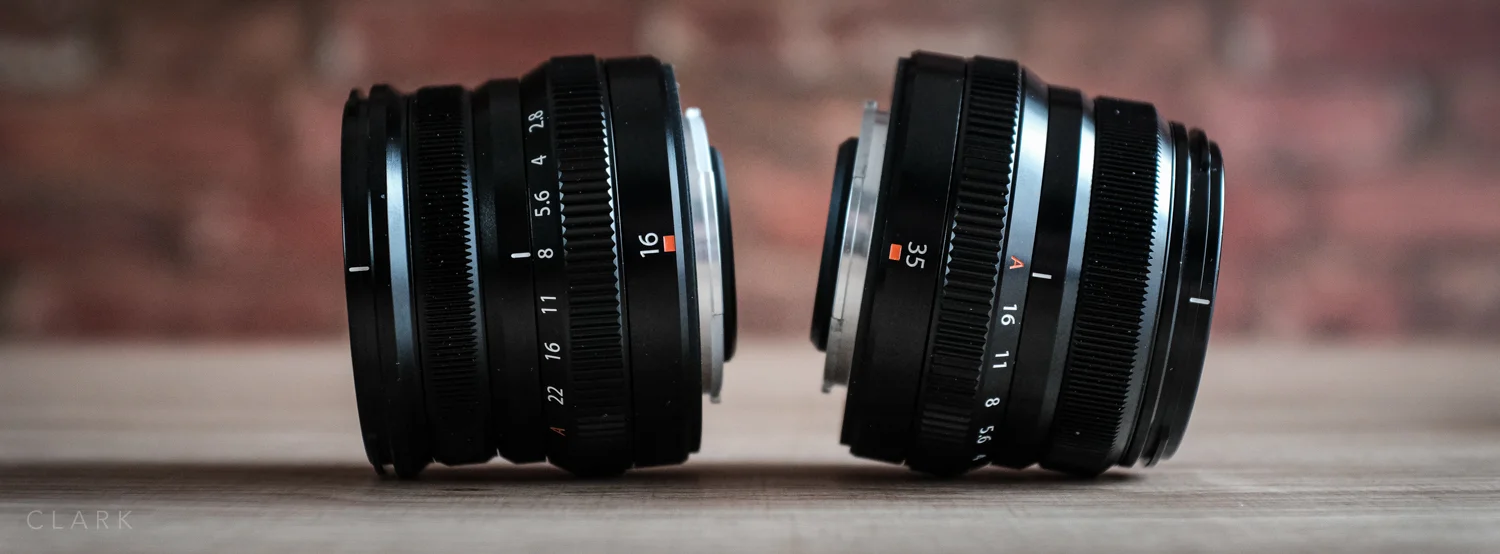
I have a couple of setups. One is all about widest apertures and quality over size, which has my X-T3 & X-T2 bodies, plus all the best glass. There'e the 50-14/2.8, 16-55/2.8, 90/2, 56/1.2, 35/1.4, 23/1.4 and of course the 16/1.4. My other setup is my everyday carry around and street photography bag, which is my favourite because it's the one that is all about personal photography, rather than work. This small setup can change now and then, but it's basically an X100F, X70 and X-Pro2 with the Fujicron lenses. I have the 35/2 and the 50/2. I don't own a 23/2 because my X100F is pretty much always with me. So by adding the 16/2.8, I will have a full frame range from 24mm to 75mm. Or to break it down, with the 1.5 crop on the Fuji X sensor, my 16, 18.5 (X70), 23 (X100F), 35, and 50mm lenses will give me 24, 28, 35, 50, & 75mm in full frame terms. All of this fits in a Billingham Hadley Small Pro or an ONA Bowery. Not only am I keeping this setup as small and lightweight as possible; I also know that when I grab my backpack for a shoot that all my working lenses are in there and not in some other bag.
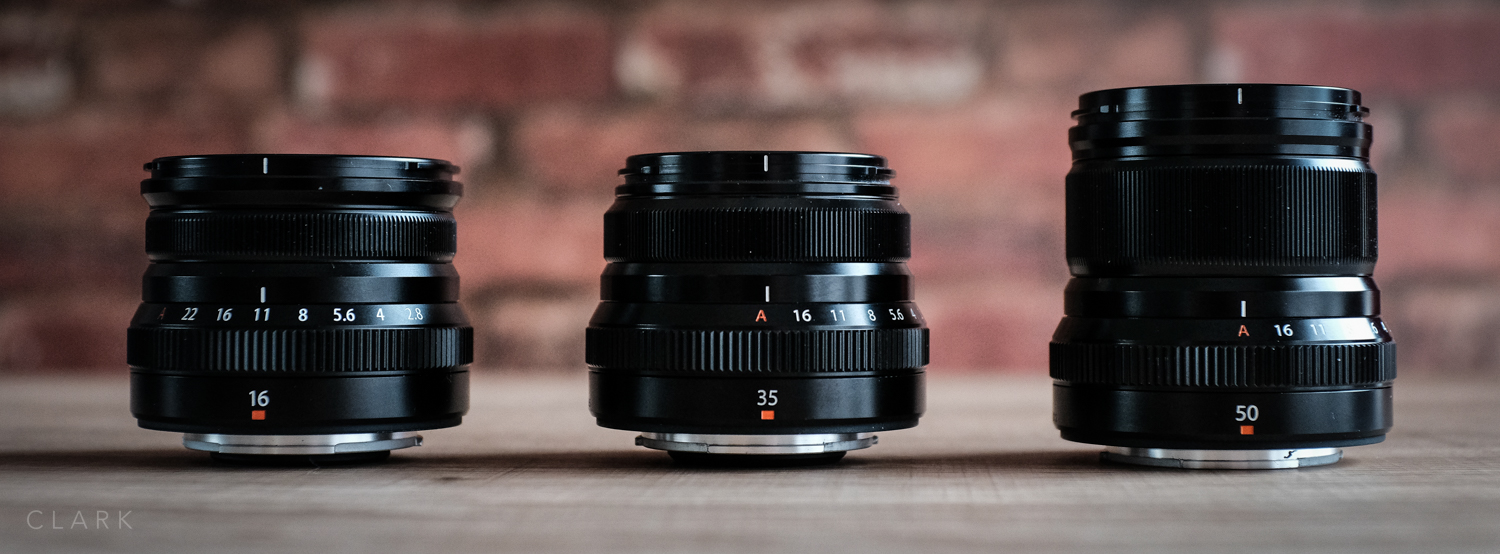
PHYSICAL SIZE OF THIS LENS
The 16/2.8 is tiny, even (slightly) smaller in height than the 35/2. But compared to the 35/2's 43mm filter size, the 16/2.8 has a 49mm. This makes the front end wider than all the other Fujicron's, and in my opinion, the best looking of this range of inexpensive primes. Let's face it, they are not the best looking bunch, mostly due to that weird tapered design (which helps not to obstruct the optical view finder of the X-Pro2). The 35/2 is passable, the 23/2 is fugly, the 50/2 would be just as ugly, but gets saved by the wider lens hood. But the 16/2.8 is actually quite attractive due to it's dumpy design with a wide front, which means less taper.

BUT WHAT ABOUT THE 18/2?
So the 18/2 was one of the three original XF lenses back when the first Fuji ICLC (the X-Pro1) came out. Some people knock it, but it's actually a great little lens, even though it's getting a bit long in the tooth. The 18/2 is as near as damn it a 28mm lens in full frame speak. 28mm is fantastic for street photography, and I think Fuji should take this opportunity to go full Tonto. Get right off the reservation by making an all metal, non fly-by-wire lens with a proper depth of field scale that is easy to read. So basically a small lens that has hard stops at either end of the focus range (not a continuous wheel).
A focus ring that has hard stops at either end of the focus range (preferably not fly-by-wire.
a focus tab to allow guessing focus without looking at the lens or through the viewfinder.
A proper depth of field scale that is wide enough to read (the 14, 16 & 23mm lenses DOF scale is too cramped).
Depth of field scale would be nice in orange
A clutch would be nice for selecting AF or manual focus, but not if it makes the lens too large.
I suppose what I’m looking for is something as close to a Leica Summicron 28mm f2.


I haven’t had a lot of time to use the 16/2.8 due to shoots over the weekend that needed much longer lenses. But I managed a little bit at a jazz gig and a little bit of street photography. But I can say that this lens is not the sharpest wide open at 2.8 (especially at close focus) but is definitely sharp at f4. That’s how the 23/2 was when I had one from Fuji for a couple of weeks too. There is also a bit of chromatic aberration, but nothing major an it’s usually an easy fix in post. There is also a bit of distortion at the edges, but you would expect that on a 24mm focal length. If these few things are a deal breaker for you, you should definitely get the 16/1.4 instead. However; If you are looking for a small, lightweight and sharp (f4 and beyond) lens with super fast focusing and is water resistant, then the 16/2.8 is for you.

Just like the other Fujicron lenses, the 16/2.8 is extremely well built and has just the right of resistance on the focus ring and aperture ring. I’m really happy with it and look forward to using it on a few trips abroad this year. If you own any of the other lenses in this range, you already know what to expect. As long as this focal length is not too wide for you, I would highly recommend the XF16mm f2.8.
Check out my post Fujifilm 16mm f2.8: Too Wide? on my street photography blog for more pictures using the 16/2.8, but here are a few examples to wet your whistle.
You can buy the Fujifilm 16mm f2.8 at Amazon UK