Blog

Expert Shield :: Screen Protectors

ExpertShield-XP1X0798The folks at Expert Shield sent me a couple of their screen protectors to try out on the D800, but will also be sending a couple for the X-T1 when available. If you're like me, you have probably tried loads of these stick on screen protectors from Ebay, only to curse them when you're looking at your LCD on the back of the camera with a cluster of air bubbles. ExpertShield-XP1X0768

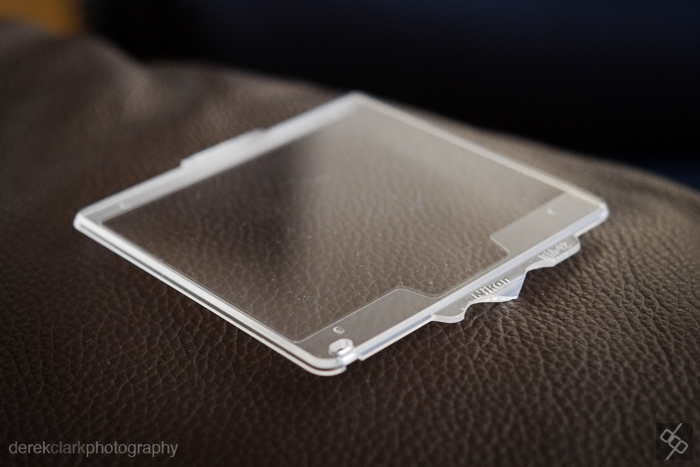
So I wasn't holding out much hope when the Expert Shield pack arrived last week. I've also been super busy lately, so the thought of a bubble wrestle was all I needed to put off trying these out and concentrating on getting edits done. But having recently broken the plastic LCD cover that comes with the D800, I thought it might be some sort of omen. I have however put glass covers on my D800 screens and didn't want to remove these (still thinking bubbles at this point). So I was about to have two layers of protection. But obviously this is overkill and one screen protector is enough for any photographer.

ExpertShield-XP1X0775


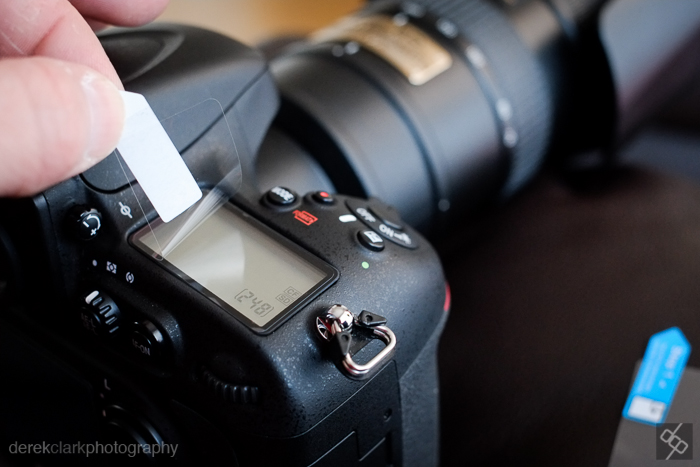
Boy was I wrong about these things! The application was quick (even though I was taking photos as I went) and there wasn't a bubble in sight. The Expert Shield protectors use silicon to stick to the screen, so no sticky residue and you can also peel them off and reposition if you don't get it right first time. Oh, and did I mention...no air bubbles?

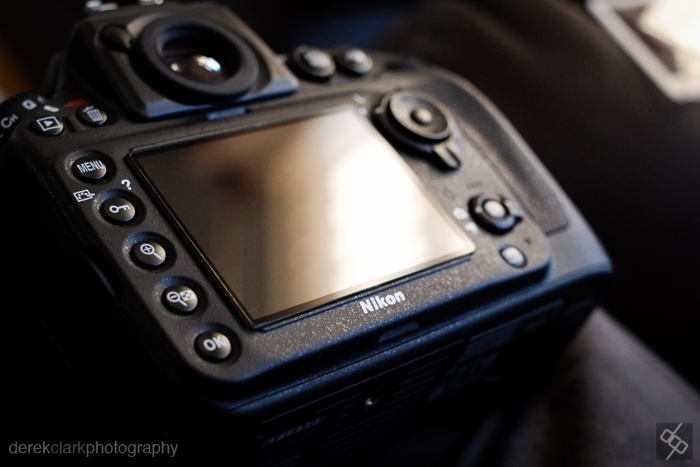
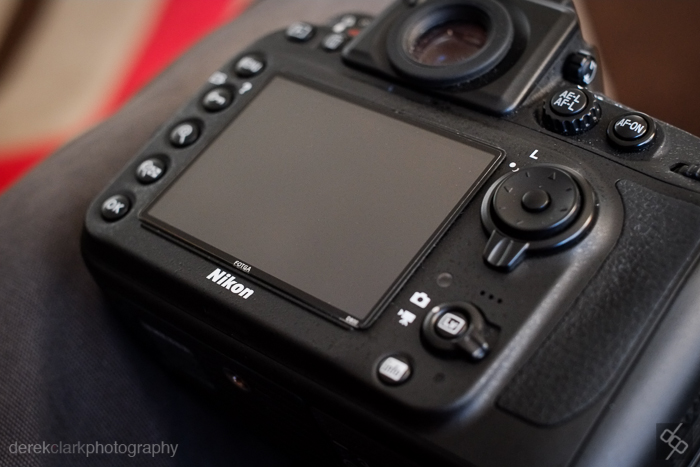
Applying the screen protector was a breeze and very quick to do, even with the D800 having two screens. As the instructions say "dust is your enemy", so the included lens cloth was both handy and essential. As you can see from the photos below, the finish is absolutely flawless and there are zero air bubbles.

Our camera screens are not something we want to replace. In fact when they do get scratched we tend to just put up with them. So it's mad not to cover them with some sort of protector (My X-E1 is without protector, so I'm guilty with that one). I highly recommend the Expert Shield protectors as they're not much more expensive than a cheap ebay version, but the quality is far higher and of course the best bit is that they are air bubble free (I might have mentioned that). You can find more information HERE for the UK and HERE for the US. There's also a video on the site that's worth watching.


Freedom Through Photography :: Part 3

This is the second film from the Freedom Through Photography project that featured photographers David Cleland, Andrew James and myself. This one is Andrew's mission to photograph Tom, a sheep farmer in the beautiful Lake District (UK). As you can see from the stunning black and white shots in the film, Andrew not only nailed the assignment, but he also created some wonderful photographs that show both the amazing quality from the Fuji's X-M1 and the awesome X-Trans sensor, plus what a great eye Andrew has.

The purpose of the Freedom Through Photography project was to showcase the collaboration between Fujifilm UK and outdoor bag company Millican. Thanks to the great folks at Millican (especially founders Joritt and Nicky), we X Series shooters now have a dedicated bag for all our great Fuji toys. The bag featured in the film above is the 'Christopher', but there is also the option of the smaller 'Robert' bag. These bags are really high quality and will last for years. You can see the Millican bags for the Fujifilm range HERE.

A big thumbs up for director Giles Brown and camera guys Andrew Lawrence and James Barns. As well as being great guys, I'm sure you will agree that the quality of these films are fantastic. Credit to Sophie Crewdson, for not only co writting the screenplay with Giles for these films, but Sophie was also my guide while shooting my part at the Lake District. If you missed the first film from this project by David Cleland, you can click HERE to watch it now.

Andrew also has an in-depth article on street photography at the moment in Digital Camera Magazine (UK issue 148), which has three photographs of mine and features some other great photographers.

The next Freedom Through Photography film will feature yours truly. Be afraid (I know I am).

Click on these links for more information. More on this project. David Cleland (Flixelpix) Andrew James Fujifilm UK Home Of Millican Digital Camera Magazine

Kage Collective :: Now We Are 7

image The big announcement today is that we have gone from four to seven members over at The Kage Collective. Our three new members are fellow documentary photographers (in alphabetical order) Vincent Baldensperger fron Toulouse, France, Craig Litten from Palm Beach, USA and Fuji X photographer Bert Stephani from Steenokkerzeel, Belgium. All three of them are great photographers in their own right and we look forward to including their stories in the near future. But for now you can take a look at our updated Members Portfolio section on the Kage Collective site. All seven portfolios are newly updated...so check them all.

It's a privilege to be part of a collective with such a fantastic group of photographers. I would like to single out the hardest working member of the Kage Collective. Patrick (La Roque) created our Kage website and keeps it up to date and running smoothly. We all upload our own content, but everything else is Patrick. He is also the founder and both the magnet that brought us together and the glue that keeps us as a collective. A friend, a colleague and an absolute star.

The Fujifilm X-T1 :: DSLR Coffin Nail?

X-T1main I had very little interest when the rumors of the X-T1 started to appear. A pentaprism stuck on the top of the camera was exactly what I didn't want. But seeing both the leaked (allegedly) photos and the teaser picture from Fuji, I started to get a little interested. So I waited eagerly to see if the rumored specs matched that real specs when the camera was officially announced. As usual they were pretty accurate, especially the ones on FujiRumors. Although I'm an out and out Fuji shooter, I still have a Nikon D800 and all the top 1.4 G glass and a 70-200 f2.8. The long zoom is probably my main reason for keeping the Nikon system, followed by faster focusing than my X-Pro1 or X-E1. The X-T1 looks like it will probably out focus the D800 (which has it's anoying little pause before firing), and with a 16-55mm f2.8 (24-82mm in full frame) and a 50-140mm f2.8 (75-210mm ) being added to the Fuji Lens Roadmap recently. Add to that the new lenses and X-T1 are weather sealed and this is looking like the final nail in the DSLR coffin.

image


Here are a few of the great features of the X-T1. Click HERE for a full list of specs. * Weather sealed body. * 0.77x magnification EVF with 60fps refresh rate. * EVF has picture in picture option and automatically changes for vertical shooting. * 6 Fn Buttons. * View Mode button (left out of the X-E2) is on the pentaprism. * comes with small (camera powered) Flash included. * PC Sync port * Top plate ISO dial. * Dedicated video button. * Drive Mode is on a top plate dial. * Photometry (Metering Modes) is on a dedicated dial on the top plate. * Tilting LCD Screen. * WiFi can shoot tethered. * Can use UHS II cards. * Side slot for memory cards. * Dedicated DSLR style vertical battery grip (optional extra). * dedicated Focus Assist button. * 3 stop exposure compensation either way.

image

CONCLUSION Sometimes I think Fuji are bringing out too many bodies for the X-Series. I was surprised when they announced the X-M1, but it is a great backup body to slip into your bag. I'm not so sure about the X-A1 - why buy a regular APS-C sensor when you can have the X-Trans in the X-M1? When I heard about the X-T1 I thought "not another one", but now that I'm seeing information about it, I think Fuji has once again took the X Series to another level! I still prefer the Rangefinder style (especially for documentary photography), but this mini DSLR style will be more than at home on more commercial shoots. The X-T1 with the new 56mm f1.2 will be an absolute dream combination for portraits and I'm looking forward to a new project with this setup.

This camera has took me by surprise. I thought I was holding off buying any bodies until the X-Pro2 arrived, but the X-T1 looks like a solid workhouse that will get the job done in all conditions and I can't wait to put it through it's paces. Watch this space.

Marc Horner takes a first look at the X-T1 on Fuji Uk's blog Fuji Guys first look video X-T1 Microsite

All photos curtesy of Fujifilm.

The Fuji X Series With Flash :: Part 3

In this third and final part of The Fuji X Series With Flash (Part 1 is HERE and Part 2 is HERE) I'll be looking at using multiple flash guns and radio triggers with the X Series cameras. You can use any make of flash for this as the radio triggers are only telling the flash to fire. There's no information about exposure or anything else, it simple triggers the flash.

There are many different radio triggers available, but by far the most popular are the Pocket Wizards. I came from a Nikon flash setup and worked with the SU800 Commander unit, and because of this I never owned any radio triggers. But after buying into the Fuji X System I realized that my trusty SU800 would not be usable. The Pocket Wizard Plus III's had just came out, but were expensive for a multiple flash setup. Pocket Wizard's also don't have hotshoes for mounting the guns directly on to them. Instead the work with cables. My older SB800's have sync ports, but my newer SB700's don't (I replaced my SB900's with SB700's due to the overheating problem and so glad I did). In the end I decided to go for the Flashwave III system because they were reasonably priced, had both sync and Pocket Wizard size ports and most importantly the receivers have hotshoes. They come with a great verity of cables and adaptors that so far have coped with everything. The receivers have a tripod mount on the bottom, but also come with adaptors to change them into hotshoe mountable. So the flash mounts on top of the receiver and the receiver to the shoe on the light stand.

The transmitter's are tiny and even look small on the X-M1. They include a test fire button and have a choice of 16 channels via small dip switches on both transmitters and receivers. An X-E1 or X-E2 can also be fired remotely by attaching a Flashwave III receiver to the microphone input on the side of the camera and triggering it using the test button on the transmitter. I've used this setup when doing long exposures instead of a cable release.

Lighting doesn't come any more basic than a radio trigger setup. Lights are all set to manual and you adjust power settings on each one individually. I use anything from one light to six lights, but I only have four receivers. If I need more than four lights I set the extra guns to slave mode. The radio triggers fire one set and the extra guns are triggered by the flashes.

I wanted to shoot some fresh portraits for this post and I've been meaning to do some up to date shots of my kids. So excuse the self indulgence, but if you're from a modeling agency...they are available:o). I shot these using Nikon Flashguns and Flashwave III radio Triggers. As you can see from the photo above, I used a Lastolite Hilite background. The Hilite works well with two flash guns inside, tilting upward and back to blow the background to pure white. I also use the Lastolite Superwhite Vinyl Train and a piece of thick toughened glass for a reflection. For this shoot I used a Lastolite Hotrod Strip Softbox which is a fantastic modifier for the money. Some of these shots were with one light, some are with three. I used the X-Pro1 and the X-E1 with the 35mm f1.4 and the 60mm f2.4.

Thank you for reading this series and I really hope you found it useful. Flash with the X cameras seems to be a mystery to a lot of people that are moving over from DSLR's, so I thought this series of posts would help to clear up a few of the common questions. Click on the links below if you haven't read part 1 or part 2.

The Fuji X Series With Flash :: Part 1 :: The Fujifilm EF-42 TTL FlashgunThe Fuji X Series With Flash :: Part 2 :: Off Camera TTL

The Fuji X Series With Flash :: Part 2

What Is TTL?

I'll start part 2 (part 1 is HERE) by describing what TTL actually is. Feel free to skip this part if you already know this.

Back in the good old film days a lot of flash guns had a small calculator in the form of a chart or a small disk that rotated. These things basically calculated what setting worked for the Guide Number of the flash you were using. I had a Vivitar 283 back in the early 80's, which was one of the most popular and reliable guns of it's time. It had a dial built into the hinge of the bounce head (photo left). You set the dial to whatever ASA/Din number your film was (now called ISO) and the dial told you what distance you would cover with the varies apertures. The coloured sections corresponded to a dial on the front of the camera. It all goes a bit hazy after that...it was a long time ago. But I do remember having a cable that plugged into the front of the gun to use it off the camera.

Fast forward to today and we have much more sophisticated flashes that talk to the camera and vice versa. The camera takes it's exposure reading through the lens (TTL) and tells the flash the information it needs to know. The flash then works out how much power it needs to put out to achieve a good exposure. The flash gun can also let you know via it's display if the right exposure was obtained.

What TTL Cable Works With The X Series If you want to do off camera TTL photography with your X Series camera, you will need an EF-42, EF-20 or an EF-X20 and a TTL suitable for a Canon (usually called ETTL in Canon speak). The Canon hotshoe pins match the Fuji ones and allow TTL flash with a Fuji X camera. Nikon has a different pin arrangement and definitely won't work in TTL. Remember to turn off both camera and flash when attaching a TTL cord as the contacts are sliding into position and could short out. I've never been a Canon shooter so I don't have access to their flash guns and I can't say if an X camera and Canon flash can speak to each other and work in TTL harmony. Nikon guns do not work in TTL. Nikon flashguns will work on an X series camera in Manual or Automatic, but not in TTL. If used on an X camera's hotshoe or with a TTL cord, A Nikon flash is only being told by the camera to fire - exposure settings are up to you the photographer. The flash must be set to Manual (not TTL) or it won't fire.

The Pixel FC-311/S TTL Flashgun CableCanon's own ETTL cords will be great for the job, but they do tend to be a bit spendy. I bought the Pixel FC-311/S 1.8m cable (for Canon) from Amazon UK for £17 and it works fine. A really nice feature with this cable is that it has both a tripod mount and a cold shoe for attaching it to a light stand. This could come in really handy (although a longer cable might be better for using on a light stand). I'm using an SB700 soft case to hold the Fuji EF-42 and the TTL cable and there's even space for a plastic foot too.

Hand Holding For Off Camera Flash Obviously if you are doing off camera flash without the use of a stand or tripod, you have to be careful of camera shake as you'll be holding the camera with one hand. Thankfully X cameras are great for hand holding due to their size, weight and the lack of a mirror popping up and down. But having a good solid grip and steadying technique is very important. In the photo below you will see the grip I use. By holding the flash in the left hand and crossing it over to the right, you can rest the camera on the left shoulder, the flash can be stretched out as far to the right as you like, as long as it's pointing in the right direction a bit of shake won't make any difference. If your TTL cord has a hotshoe or tripod mount at the flash end (Like the Pixel cord), you could easily use a handle. Lastolite do an extending Handle and a Brolly Bracket.

Off-Camera-Flash-Grip

So that's off camera TTL, what you do with it after that is up to you. There are some interesting accessories available like the Rogue Flashbenders to spread or direct the light, or Rogue Gridto focus it exactly where you want without light spilling all over the place, which is a must if you have a coloured gel on the background. The possibilities are vast and a lot of fun.

The Fuji X Series With Flash :: Part 1 :: The Fujifilm EF-42 TTL FlashgunThe Fuji X Series With Flash :: Part 3 :: Using Multiple Flashes With Radio Triggers

The Fuji X Series With Flash :: Part 1

This is part one of a three part series on using flash the Fuji X Series. This part is a review of the EF-42 flash and this will be followed by Part 2 : TTL Off Camera TTL and then ending with Part 3 : Using Multiple Flashes With Radio Triggers.

I often get emails asking about using Flash with the Fuji X Series. Mostly the questions are about using TTL, Nikon or Canon Flashguns or the Nikon SU800 Commander with the X series. Another big question is - Can an off camera TTL cord be used and if so, which one? So I thought I'd take a fresh look at using Fuji X cameras with flash. My friend John a commercial photographer and he's really tempted by the X-Pro1, but he uses flash most of the time and isn't sure if the X system is up for it. I have a job at the end of this week that might need flash due to the time of day in January and a dark venue. There won't be time to use one of my Nikon guns in manual mode with a radio trigger, so TTL will be a must. This all added up to a good excuse to pick up a Fuji EF-42 TTL Flash and give it a blast.

FUJIFILM EF-42 TTL FLASH The EF-42 is basically a Sunpak PZ42X with a jacket on (the EF-20 is also a Sunpak model). It's not as well made as a Nikon or Canon flash gun, but at half the price, it's good enough. When you mount the flash on the camera and switch it on, autofocus won't work until the flash charges and the Test/Charge light is iluminated and like a kettle boiling, it seems to take a long time when you're watching it. But when it's lit there's no problem and everything works as it should after that. But I would rather take a shot without the flash firing than miss the shot as it could maybe be recovered in Lightroom with a bit of exposure and a possible conversion to black and white.

The back panel on the EF-42 is minimalist compared to a Nikon or Canon unit, with buttons for Mode, Select, On/Off and Test. It’s certinly easy to understand how the controls work, which is a breath of fresh air if you have ever used an SB800 at any point. But it would be nice to have dedicated a couple of buttons for -EV & +EV, as there's too many button presses to move up and then down EV. TTL works well and the handy pop-out wide angle lens is usefull. I think it's a bit mean not to include a dome diffuser or a foot/stand, but I picked up a diffuser from eBay and I had a spare Nikon foot. A Nikon SB600 Dome Diffuser will fit, but it's very tight and once attached it would be a good idea to leave it in place. A soft case would also have been a welcome addition, but I have a solution for that in Part 2. The hotshoe mount at the bottom of the flash is plastic and looks cheap, plus a switch style lock would have been preferred over a screw down plate.

I would recommend buying a Dome diffuser as the bare flash can be a bit harsh. With the diffuser attached and the flash head tilted up you will get great soft and even light that can fill a small room without any problem. You can find a suitable diffuser on Ebay for very little money. There are even packs of three available (one white and two coloured) that allow balancing the colour of the light from the flash with the room (I prefer gels).

In conclusion, the EF-42 does the job well, but could be a bit better on the built quality front. I think if Fujifilm had made this flash from the ground up, it would have been a much higher quality unit. Now that the X Series lenses are plentiful (almost), it would be nice if Fuji could dedicate a little time to develop a flash system on a par with Nikon's CLS system, but with built in radio instead of infrared and a dedicated commander unit that allows the user to set the power on multiple flashes without moving from camera position. A dedicated flash system is about the only thing the X Series is lacking now.

So that's the EF-42. Stick it on the camera, set it to TTL and you'll get a pretty decent job. But a flash on a camera hot shoe is not the best look for your pictures. The shots look flat, lifeless and can make ugly shadows in the background. So in Part 2 we will look at getting the flash off the camera using a TTL cord and what cord will work with the Fuji X range.

The EF-42 is available on Amazon UK for £155

The Fuji X Series With Flash :: Part 2 :: Off Camera TTL The Fuji X Series With Flash :: Part 3 :: Using Multiple Flashes With Radio Triggers

Two Great Photography Ebooks

ShallowRoamingNow that the Xmas mayhem has subsided and the new socks, DVD's and Aftershave / Perfume are sitting neatly in the cupboard, you might be on the prowl for something to inspire you photographically in the new year? Well here's two great ebooks from a couple of top guys that will do just that? Patrick LaRoque and David Cleland (also known as Flixelpix) are both Fujifilm X-Photographers and gifted lensmen. They are also very generous when it comes to sharing their knowledge about photography. So for less than the price of a DVD, you can kick back with your favourite tablet or laptop and treat your eyes and mind to some great photography and knowledge. I'll start with Patricks as his was released first. Disclaimer: I'm friends with both of these guys. I shot the Freedom Through Photography campaign for Fujifilm UK and Millican Bags with David (and Andrew James) and Patrick is a friend and colleague from The Kage Collective. That said, I wouldn't write a blog post about these ebooks if I didn't feel they would be a great resource for the readers of this blog.

Patrick sent me a copy of his ebook a couple of weeks before it went on sale (for some feedback), and although I know his style pretty well, I was really excited to see 1EYE Roaming open up on my iPad. I love the minimalist look of the layout and the way Patrick lets both the photographs and the words breathe. If you're not a reader of Patrick La Roque's blog, you really are missing out. You'll never find a better match of great photography and well crafted words. 1EYE Roaming is all about Patricks trip to France and is split into two with the first part dedicated to the photos and the second to Case Studies. Each section of the first part has a page of text followed by all the photos from that area or subject (Paris, Trains, Port Leucate etc). The photos are given either a full page or almost a full page (Landscape) to themselves. Case Studies take up the second half and are a gold-mine of information on how Patrick sees and edits his photos. shootingshallowpages700

This is David's second ebook. His first was the brilliant Long Exposure and if you haven't read it, David has a discounted price on his website if you buy both his ebooks. This latest offering is called Shooting Shallow and as the name suggests, is all about the art of shallow depth of field, wide open apertures and how to get that beautiful Bokeh (the creamy out of focus part of a photo). David has written an ebook that will be interesting to any photographer, but for the beginner this is an absolute must. Getting that shallow depth of field look is a big mystery to a lot of people that have just started taking pictures with a DSLR or Mirrorless camera. This ebook is packed full of information that strips away the big mystery for the newbee photographer, but still very interesting to the more advanced.

Both of these works are the kind of books that you can go back to again and again and I recommend keeping them on your favorite reader. Both Patrick and David have done a stellar job! Lets hope they do more.

Fujifilm 56mm f1.2 & Black X100s

image

Fuji have announced a lot of new products today at CES, but the two most important ones IMO are the Fujinon XF 56mm f1.2 R and the Black X100s.

The 56mm f1.2 is now the fastest lens available for the X Series and one that portrait photographers will be excited about. With a full frame equivalent to 85mm and a wide aperture of f1.2, this looks like it could be one of the finest lenses available for your X-Pro1, X-E1, X-E2 or even the M or A range. I was a bit surprised that the aperture ring is not the push/pull type (to select manual focus) found on the 23mm or 14mm. It could have made a nice trilogy of lenses with the same design and function. Check out the full spec on the Fujifilm website HERE

image

There's not much to say about the black X100s, other than it's black. It's the same amazing camera as the silver version, but it's..eh..black. I'm not sure which I would choose when I finally upgrade from my X100? The black looks great, but I still think the silver looks great too. The black case and lens hood for the original X100 Black also fit the S model, so no problem there. Take a look at the black X100s page HERE

There's an updated Lens Roadmap for the X Series too, with great news on the fast zoom front. There's the 16-55mm f2.8 (24-82mm in FF) and the 50-140mm f2.8 (75-210mm in FF), both lenses are OIS (Fuji's image stabilization). I'm sure this will mean a lot more photographers leaving DSLR's behind.

FujiLensRoadmap06.01.14

BlackRapid Yeti

BlackRapidYeti02 I have an RS4 and RS5 strap from BlackRapid and a couple of straps to convert them into a double harness. This setup was great when I shot with two identical Nikon DSLR's. But These days I'm either shooting with a single Fuji X camera, a pair of X cameras or an X camera and a DSLR together. If I'm forced to shoot with a DSLR, it's usually because I need a fast 70-200mm (according to Rumors, Fuji is working on one). My double RS4, RS5 setup is great as long as both cameras are of a similar weight, but otherwise the heavier camera pulls the strap to one side and the full thing feels awkward and counterproductive. Enter The BlackRapid Yeti.

The Yeti has just become my favorite BlackRapid product and will make life so much easier in 2014. I'm a two camera shooter when I'm on a job, usually with one prime on each camera, but sometimes with a prime and zoom combination. The yeti has a similar design to the RS-Sport where the strap goes over the left shoulder using a comfortable pad with a rubber grip, then crosses over the back and chest and attaches to the cameras tripod mount via a FastenR (included). BlackRapid have redesigned both the FastenR, by making it more stelth, and the ConnectR (the clip that attaches to the FastenR), by making it smother. The new smother ConnectR allows you to clip it to the FasternR much easier (the older nobly version was awkward and scratched the FastenR).

BlackRapidYeti01

As I said, the Yeti strap goes across the chest, but the magical part is that the second part of the strap connects to the shoulder pad front and back and hangs on the left side of the body with camera number two attached. Because the two cameras are hung from a single pad on the left shoulder, both cameras don't need to be the same weight. The downside of this is that the left shoulder is taking all the weight, but this should only be a problem with two DSLR's, but I don't think this strap is designed for that. It's more at home with a single DSLR (on the right) and a mirrorless camera (on the left). But where this strap really shines is with two Mirrorless cameras. I've been using it with the Fuji X-Pro1 (right) and the X-E1 (left) and it's absolutely perfect. It doesn't feel like you have to cameras on and the pad is very comfortable on the shoulder. The rubber grip on the underside of the shoulder pad does the job of keeping it in place and the adjustable sliders restrict the glide of the camera on the straps any way you like it.

The Yeti comes in two versions, the Yeti is the standard version and the Yeti Slim is..you guessed it, is a slimmer one. I went for the Slim as it will be used mostly for the Fuji X System and I wanted to get away from the bulk of the RS4/RS5 setup. Both Yeti versions come as a full kit with the main strap, the second strap, two optional stabilizer straps and two FastenR tripod mount connecters.

[embed title="BlackRapid Yeti & Yeti Slim Straps - How To Instructions"]http://www.youtube.com/watch?v=Hz84LiBJaMU[/embed]

I'm really impressed with the Yeti. As soon as I put it on with two of my X cameras I knew it was a winner. BlackRapid's usual way of connecting strap to camera via the tripod mount is very secure, but as I'm using Gariz half cases on both my X cameras and the FastenR's will be connected to the bottom of the cases which are then connected to the cameras, I'm wondering if I should play it safe. I was thinking of adding a wrist strap to each camera for times when I'm not using the Yeti. These wrist straps could be used as a tether to the BlackRapid ConnectR for a bit of piece of mind. I wouldn't bother with this if the FastenR's were going directly into the camera tripod mount, but with the half cases between them, I'd maybe prefer to play it safe. I'll give it some thought. BlackRapid also have a dedicated tether kit available which do a similar job (although I haven't tried them). The Yeti is available in the UK from WEX for £79 or from B&H in the US for $100.