Blog

Hopes For A Fujifilm 18mm F2 MkII

Mock up of how I would love to see a new Fujinon 18mm f2 with true manual focus instead of by wire

Mock up of how I would love to see a new Fujinon 18mm f2 with true manual focus instead of by wire

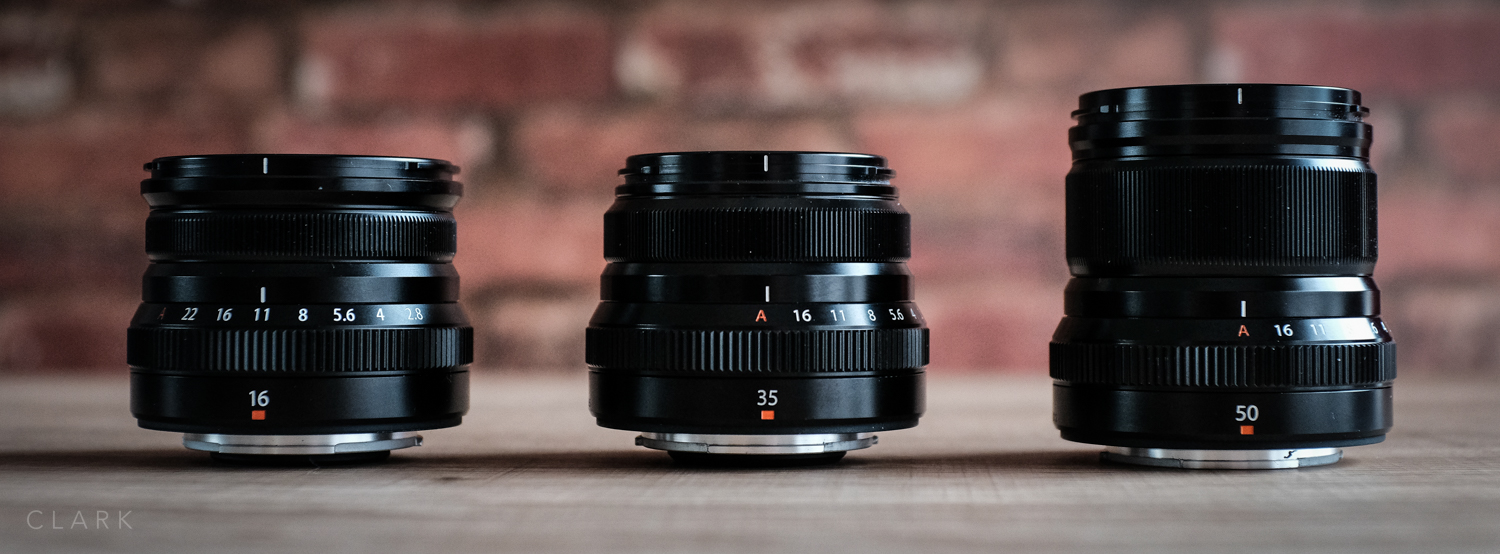
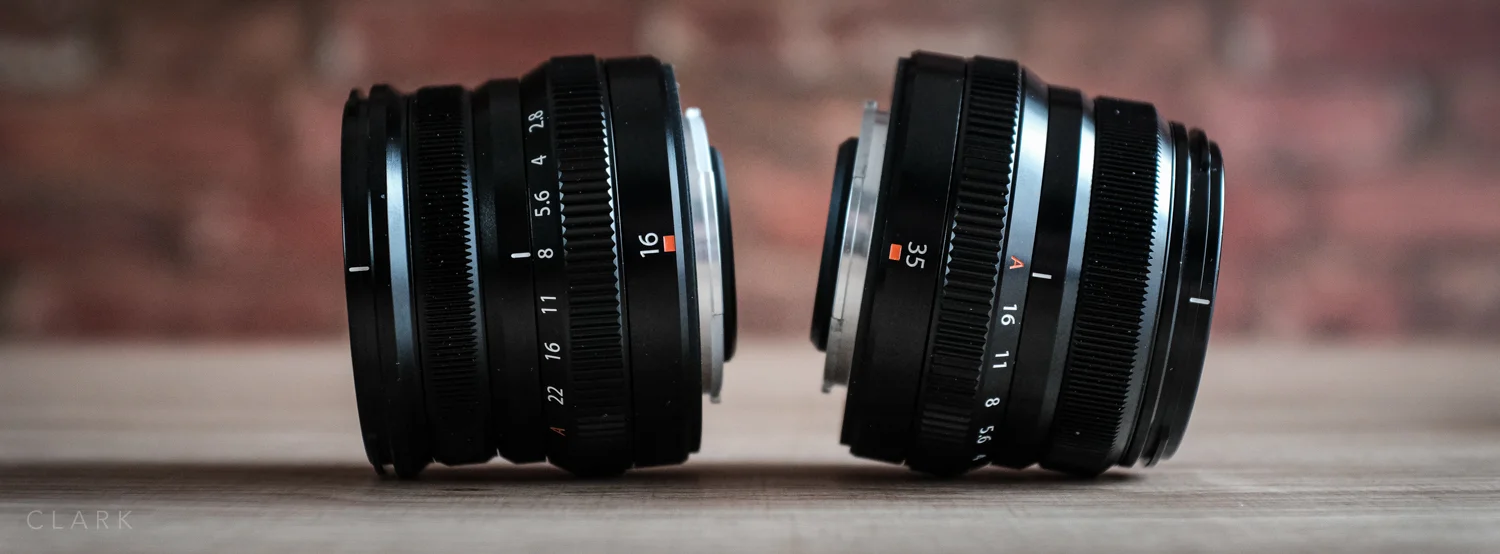
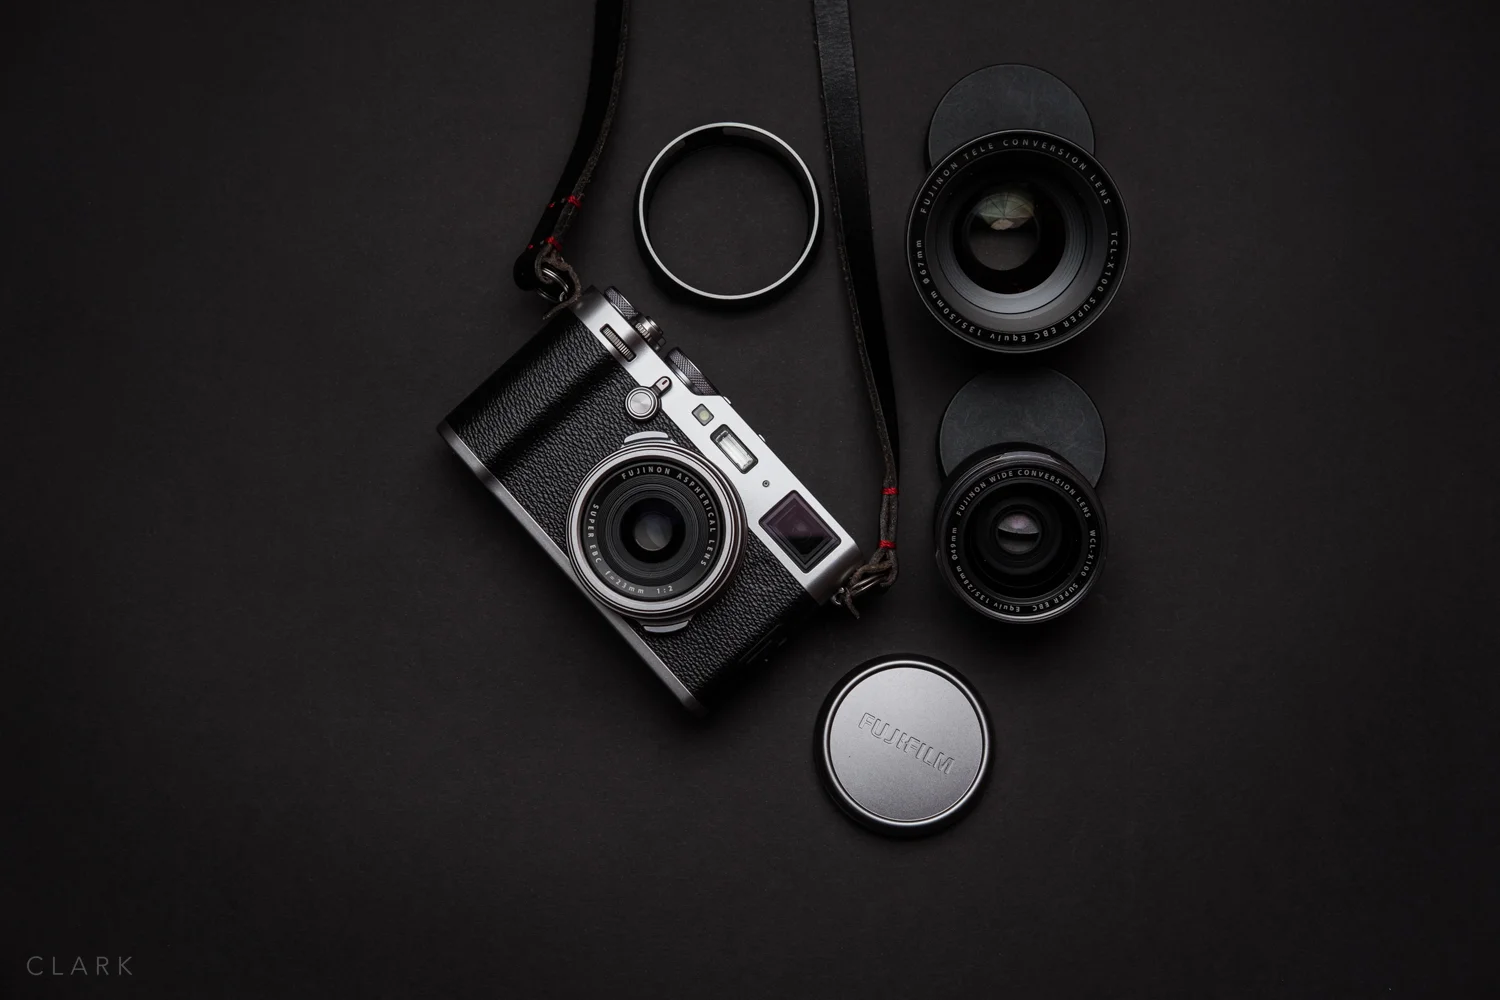
There are probably three popular choices when it comes to street photography lenses. There’s the 50mm, 35mm, and the 28mm (in full-frame terms). In a crop factor of 1.5 like the Fujifilm X-Series cameras have, that would be 35mm, 23mm, and 18mm. We already have 2 versions of the XF 35mm and 2 versions of the XF 23mm (more if you include the XC series). But the original 18mm f2 sits on its own and compared to the newer Fujicron lenses (as they have been nicknamed), like the 16mm, 23mm, 35mm, and 50mm, the 18/2 is getting long in the tooth.

The original Fujifilm 18/2 (left) and the Leica 28/2 Summicron (right). Leica do make beautiful glass

The original Fujifilm 18/2 (left) and the Leica 28/2 Summicron (right). Leica do make beautiful glass

The Fujifilm X70 is still the best Fujifilm option for 28mm field of view for street photography at the moment, IMO.

HOPES AND DREAMS AS A STREET PHOTOGRAPHER

There are rumours that Fujifilm are working on two MkII versions of older lenses and I would think it would be two of the original lenses released along side the X-Pro1 in 2012. Those lenses were the 18/2 the 35/1.4 and the 60mm f2.4 Macro. My best guess would be that one of the new MkII lenses will be the 18'/s.

So as a street photographer, what I feel is lacking in the X-Series lenses is a proper street lens like the Leica 28mm f2 (above) and the Voightlander equivalent. So here is what I would love in a new 18/2 lens from Fujifilm.

  1. Old school manual focus (not by wire) that has hard stops at either end of the focus range.

  2. A depth of field scale printed on the lens that accurately matches that of the camera.

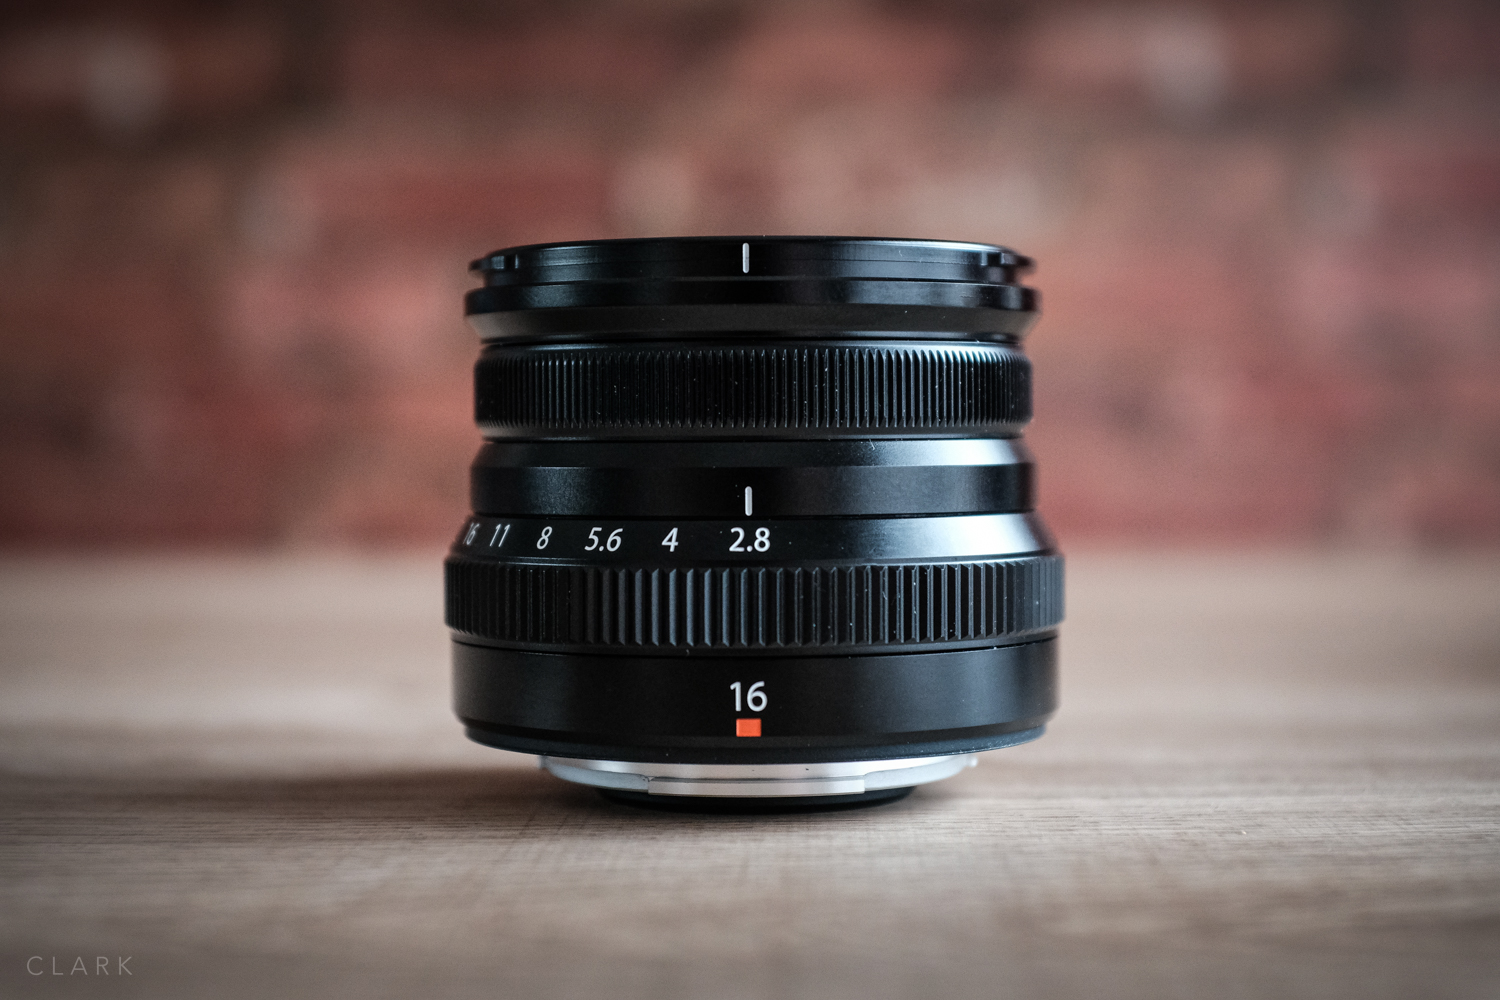
  3. A similar size and shape to the 16/2.8.

  4. A focus tab on the focus ring.

  5. Feet and metres marked on the focus ring in bright, but different colours.

  6. A small detachable metal lens hood.

I know what you are thinking - just buy a damn Leica 28mm Summicron. But A. I shoot Fuji cameras. and B. I couldn’t afford a Summicron (or any Leica gear).

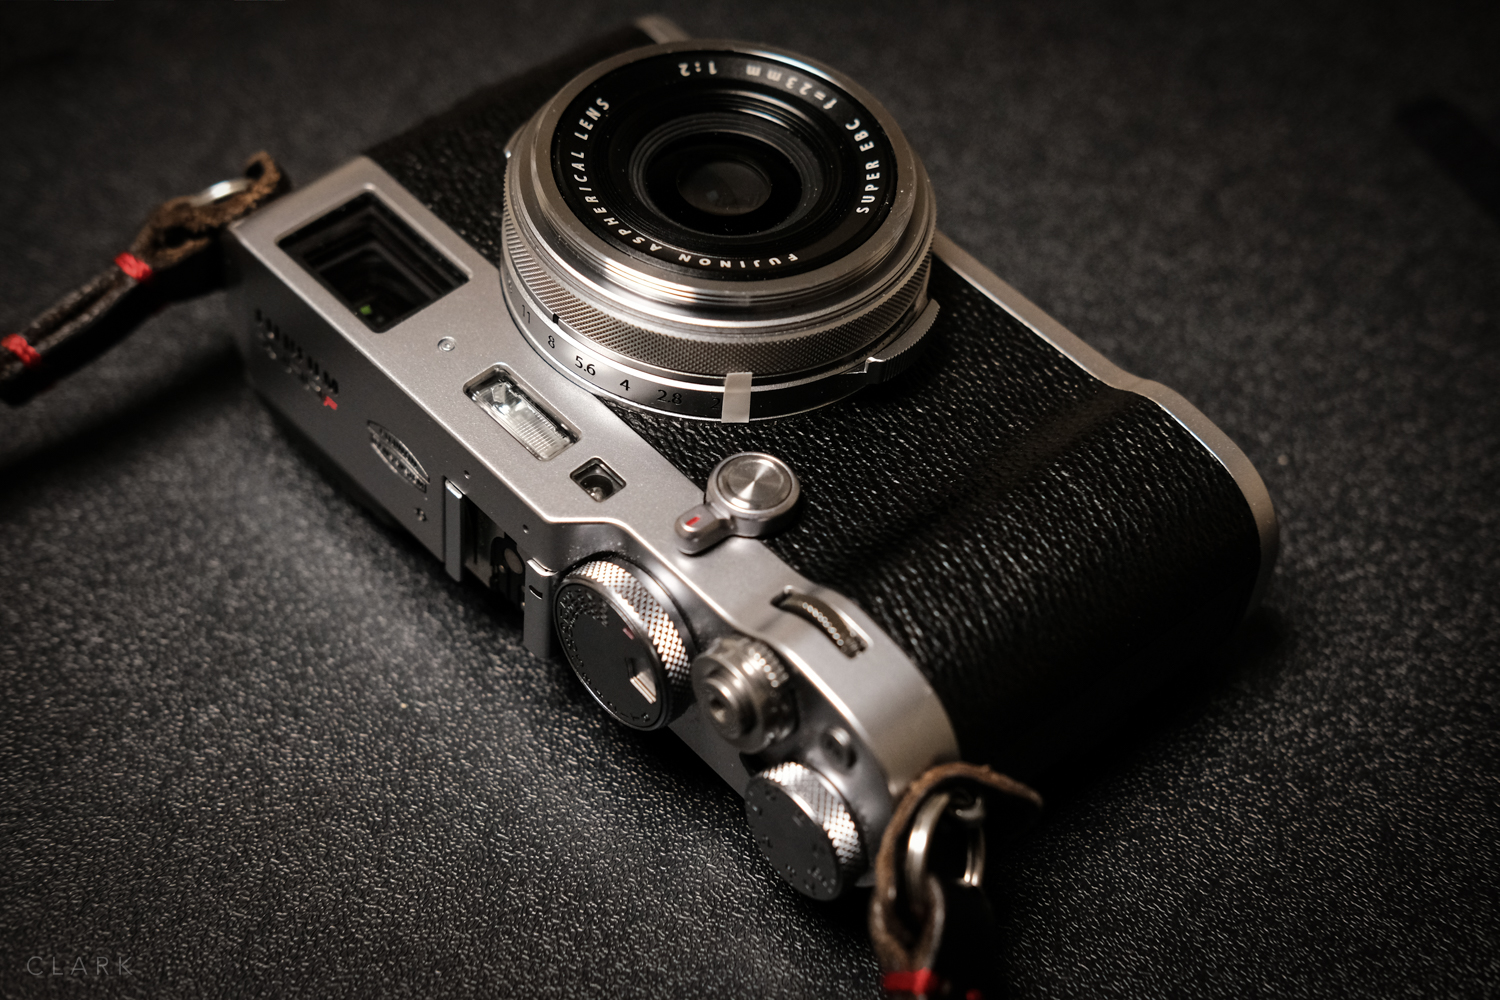
Fujifilm make some of the most popular cameras for street photography. The X100V and the X70 are amazing and have fixed lenses. I highly recommend both. But the X-Pro series are fantastic cameras for street, especially having hybrid viewfinders. It’s frustrating as a street shooter that my chosen brand of camera has nothing to offer in a proper 28mm focal length that is up to the job of not only being able to autofocus but to be excellent at manual focusing.

001_35mmStreet-Edinburgh-Fringe.jpg

ZONE FOCUSING

Street shooters like me often Zone Focus when out on the streets. But we also need the ability to quickly go from our prefered distance to either our close focus distance or infinity, especially on days where the light is low and we can’t shoot at f11 or even f8. A focus tab is ideal for this as it allows you to gauge focus ring distances without looking at the lens.

Who knows what Fujifilm will do if they actually make a new version of the 18/2, but I really hope they will think about what a 28mm (FF) focal length lens is mostly used for. Imagine if they also made a new 23/2 like this too! I’m sure they could win over many Leica and Ricoh street shooters with two reasonably priced Fujicron’s.with the best manual focus performance in the range!

The Domke F-3x One Year On

014_DerekClarkPhoto-Domke.jpg

I wanted to do a follow-up to my review of the Domke F-3x that I wrote back in August 2018 called Domke Or An Ass. There’s so much more you pick up on a bag (or any product for that matter) after using it over a long period of time. Those things tend to be both good and bad. Probably the biggest thing I’ve realised about the F-3x (which would apply to a lot of Domke bags) is that it’s a blank canvas and should be adapted to the individual.

Top row (left to right) Fujifilm X70, X-Pro2 & X100F. Bottom row (left to right) Fujinon 50mm f2 & 16mm f2.8 lenses stacked, GoPro Hero 7, Fuji WCL-X100 lens & wallet.

Top row (left to right) Fujifilm X70, X-Pro2 & X100F. Bottom row (left to right) Fujinon 50mm f2 & 16mm f2.8 lenses stacked, GoPro Hero 7, Fuji WCL-X100 lens & wallet.

BILLINGHAM SUPERFLEX INSERTS

I wasn’t keen on the setup of the F-3x main compartment as it had very little protection for my gear. Two very thin canvas loops (designed for lenses and a single piece of padding to keep two bodies apart is just not enough (for me at least). Smaller lenses can get under those bottomless canvas loops and go on a tour of the bag, visiting the rest of the gear inside with nasty results. So in my review, I used two different inserts. The Billingham Hadley Small is narrow, doesn’t really utilise the space of the F-3x that well, but is a good insert for the bag and provides a great amount of protection for the equipment inside. The Koolertron (seen in my review), although a great insert with good protection, didn’t really make use of the amount of space it took up, which was all of the main compartment. It also made the F-3x very boxy due to its tight fit and is the full height of the bag. Domke dividers didn’t give me the sizes I was looking for.

But then I came across the Billingham Superflex Partitions, a full range of fold-flat bottomless inserts that allow me to use the space in my F-3x more efficiently. The Superflex series are all 15cm in depth (back to front), which is almost perfect for the base of the F-3x (just overhanging slightly). The height and width of these dividers are in the names, with the last number always being the height. So a 9-15 is 9cm wide and 15cm tall (remember the depth is always 15cm across the range. A 10-18 is 10cm wide and 18cm tall. The F-3x can take the 18cm range comfortably, but I opted for the 15cm high ones as it provided a good depth for my cameras and lenses without having to dig down to reach my gear. It also leaves some room on the top for a scarf or a book if required, and lets the lid of the bag be a little more loose and floppy, which I like about the F-3x.

A view with the content pulled out slightly.

A view with the content pulled out slightly.

All of the Superflex inserts are divided into two compartments and there is a good amount of variation from size to size. The 9-15 is divided up into two sections of 9cm and 6cm, which is ideal for my X-Pro2 with a Gariz leather half case and either a 16/2.8, 18/2, or 35/2 lens attached in the 9x9cm part and then I can fit an X70 without a hood, or more small lenses. It’s worth pointing out that one compartment on each insert is always a square. So the first number of the name has that many centimetres square. 9-15 has a 9x9cm compartment, 12-21 has a 12x12cm compartment and so on (see diagram below).

My X100F sits nicely in the 8-15, which is divided up into 8cm and a 7cm compartments. So the X100F can fit in the 8cm space with lens hood attached and the X70 can fit in the 7cm space with lens hood attached too. My third and last Superflex divider is the 7-15, which like the 8-15 is divided up into 8cm and 7cm compartments. This one is ideal for lenses and accessories. Here is Billingham’s chart for the various sizes of Superflex inserts (the 9-21 to 12-21 won’t fit the F-3x, they are too tall). You can also find my review of the excellent Billingham Hadley Small Pro HERE.

These are the sizes available of the Billingham Superflex Inserts

These are the sizes available of the Billingham Superflex Inserts

THE WAX OF THE RUGGED WEAR BAGS

You can sit at a computer for days reading about all that has been written about the wax coating of these Rugged Wear Domke bags. In my opinion, they look good, but no-one wants to get wax on their hands that then gets transferred on to cameras and lenses. So I went through a phase at the beginning of leaving my F-3x outside in the sun and wiping the wax off with a towel as much as possible. Waterproofing is nice, but it’s not a massive deal for me, and if I really did get caught in a massive downpour I know that most of my kit is weather sealed. So one year in and the wax has been removed quite a bit by me and by natural use.

Domke Post Office Pad on the F2 Shooters Bag. The most comfortable shoulder pad I’ve used.

Domke Post Office Pad on the F2 Shooters Bag. The most comfortable shoulder pad I’ve used.

DOMKE POST OFFICE PAD

Domke’s Post Office Pad is an optional accessory that I bought at the same time as the F-3x. It can make a huge difference in the comfort of the shoulder strap when carrying a lot of heavy gear. I was very grateful for it on days when I had my Hasselblad system (500c/m, two lenses, two backs and a light meter) and the Fuji system together. But around the six-month mark I started to notice the glue that held the rubber padding to the plastic shoulder plate (that attached to the strap) was breaking down.

BILLINGHAM SP50 LEATHER SHOULDER PAD

Another option for a shoulder pad on Domke bags with a 2” strap is the Billingham SP50. These pads are well made and come in either Tan, Chocolate or Black leather. They have a decent amount of padding and look great, but the Domke Post Office Pad wins for comfort.

VELCRO ON THE MAIN FLAP

This is a negative point I’m afraid, but not a deal-breaker. The velcro on the main lid of the bag should have been twice the height that it is because unless the bag is stuffed full, the two pieces of velcro can miss each-other completely and be useless at holding the bag shut. This is a problem because Domke users tend to only fasten the metal clamps when in transit but rely on the velcro while working out of the bag.

One other slight annoyance is that the ring to attach the main clasp at the front of the bag seems to be under the bag rather than on the front. The clasps themselves tend to get a bad right-up, but I don’t find them to be a problem and I can easily undo the one on my F-3x one-handed while the bag is on my shoulder.

SLEEPING WITH THIEVES

After using the F-3x for a good length of time, I have found that they are pretty good for sleeping on while sitting in a chair at airports and hospital waiting rooms. I have my Shemagh scarf sitting on the top of my bag (between the cameras and the lid), so it’s quite comfortable to put both arms over the top of the bag and lay my head on my arms. This also ensures your bag will still be there when you wake-up. So I’ll admit it; I love my Domke so much I’ve slept with it :o)

Domke F2 (top left), F-1x (top right), F-3x (bottom left and the F-803 (bottom right). All three black bags are canvas but the F2 is new.

Domke F2 (top left), F-1x (top right), F-3x (bottom left and the F-803 (bottom right). All three black bags are canvas but the F2 is new.

DOMKE BAGS ARE MOREISH

Domke bags can get a little addictive once you have used one. It’s even worse in, like me, you have a natural affinity for really worn and even abused bags. Domke is sort of the Leica of camera bags. Just like an old M3 looks better with plenty of brass showing through the black paint, Domke bags look better the more scuffed and faded they become. I for one have spent far too many hours trolling Ebay for used and abused Domke’s.

Ruggerwear waxed canvas bags are sort new as they are made from a cloth material. The standard canvas bags are less pliable and take a while to break in but become soft like denin as time goes by.

SIZE COMPARISON

There can often be some confusion over the size of Domke bags, so hopefully, the pictures above will help if you are considering one of these camera bags. The F2 is my work bag and holds a lot of kit, but it has to be packed in a specific way to fit in everything needed for a music shoot with an X-T3 & X-T2 kit. I will get round to doing a post about the F2 soon. In the meantime, leave any questions in the comments below and I’ll try to hep if I can.

You can buy the F-3X at Amazon UK

I also have a review of the small Domke F-5xb

Mad As A Box Of Frogs

Probably the least amount of explanation for these pictures would be best. Lets just say that humans are absolutely bonkers mad! But hopefully it won’t be too long until the dreaded Covid-19 has been defeated and we can all resume the craziness once more.

SHOT WITH THE FUJIFILM X-PRO2 & 35/2 & 50/2

Yuri Goloubev: Two Chevrons Apart

SRCD572.jpg

Back in May last year, I was shooting pictures for my labour of love jazz book that I have been working on for four years now. It’s a slow process and I feel lucky when I get to shoot a single great jazz musician for the book. But on the 12th of May 2019, I struck gold with three great musicians. The Tim Garland Trio featured the bandleader on tenor and soprano sax, Jason Rebello on piano and Yuri Goloubev on bass.

I arrived early and set up my background and lights for the portraits. One camera was ready with a trigger on the hot shoe and a second camera was set for the wide-angle documentary shots that were needed. The band arrived and one by one I shot the pictures needed. Yuri told me about a new record he was working on and that he needed some pictures for the CD. We sorted out the details and I told Yuri I would send him some pictures.

I stayed to shoot the gig and it was such a fantastic performance by all three musicians. The venue was The Merchants House in Glasgow and it was a spectacular setting for the tight acoustic trio. A few days later I send Yuri the pictures and then forgot about it. Until a couple of months ago when Yuri got in touch to tell me the CD would be coming out on the 17th of April 2020, but he wanted to send me a pre-release copy. Sure enough Jiffy bag showed-up in the post a few days later.

The CD will be released and sold by Basho Records and is available by clicking the link at the bottom of this page. Two Chevrons Apart was recorded at Artesuono Studios, Cavalicco, Udine, Italy and engineered by Stefano Amerio, and what an amazing job they have done. Yuri is joined by Tim Garland on soprano and tenor saxophone, John Turville on piano and Asaf Sirkis on drums. Each musician adds precisely the right ingredient to this simmering pot of delicious jazz. Now and again the heat is turned up but then settles back down to simmer, keeping you hungry for more.

Do your ears a favour and pick up a copy of this great album. It will be available from Basho Records from April 17th 2020 by clicking the button below.

This Will Be The Past Some Day

Fujifilm X-Pro2, 35mm f2, 1/1000th Sec, f4, 500 ISO, Classic Chrome film simulation

Fujifilm X-Pro2, 35mm f2, 1/1000th Sec, f4, 500 ISO, Classic Chrome film simulation

I write many blog posts that just end up getting left as drafts on my website. Some I don’t get round to finishing on time and they are out of date before I hit publish. Some are rants about gear that have annoyed me, but I think twice about bitching about.

I was looking through my drafts today and I came across this one that I wrote back in September 2017. I didn’t think it was worth putting out at the time (maybe it still isn’t) and I was about to delete. But after reading it, I was surprised how it tied in with the current Coronavisus lockdown.

SEPTEMBER 2017:-

This is a picture from this years Edinburgh Fringe Festival. If you haven't been before, the Fringe is like a huge street party that goes on for weeks and has non stop performers and freaks (and that's just the public). I remember looking through the viewfinder of my X-Pro2 as I was about to take this shot and being reminded of a picture that hangs on the wall at my barbers. It's a photograph from the early 1900s that was taken in the small village where I live in Central Scotland, probably something to do with the first World War. A large gathering like we don't often see these days. Lots of suits and hats and the best Sunday dresses. But as I looked through my viewfinder at the scene above, I sort of saw it from the future looking back (probably prompted by my memory of that old picture I mentioned). What will people of 2117 see in this picture? Will the Fringe still be around? Will they wonder what this was all about? Will public gatherings even be legal by then? Maybe this will be one of those old fashioned 2D still pictures that don't have any movement or depth? And those mobile phones were so last century :o) Hopefully it's not used as a pre-nuclear war picture.

Meike 25mm F1.8 - A £65 Lens Review

001_DerekClarkPhoto-Meike-25mm-f1.8.jpg

£65 for a lens. I know what you’re thinking. But if you really are thinking what I think you’re thinking…think again.

During a recent trip to Milan where I shot with an X100F, X-Pro2 and X70, the latter of which I was zone focusing for street photography. I started thinking I would like a manual focus lens for the X-Pro2. I have the 16mm and 23mm, which along with the 14mm are the best manual focus x-series lenses available, but I wanted an old school manual focus lens. I wanted something small with depth of field markings. I also wanted something around a full-frame equivalent to a 35mm, but I wasn’t really interested in using a lens mount adapter. So a quick search on the web, a few YouTube videos later and I had settled on the Meike 25mm f1.8. It was a bonus that it was available for just £65 on Amazon.

A picture of my son after a paint ball session on a grey November day. A few small adjustments in Lightroom

BUILD QUALITY

Build quality on this multi-coated lens is fantastic. All metal construction with 7 elements in 5 groups and smooth aperture and focus rings. The lens feels solid and has a bit of weight to it. It actually looks and feels like a vintage lens in so many ways, helped I’m sure by the Voightlander style focus ring.

WHY BUY THE MEIKE 25mm v THE FUJIFILM 23mm?

Fujifilm lenses are fantastic but they are all, focus by wire, which basically is an electronic sensor, rather than a mechanical focus ring. So the focus rings continuously turn with no hard stop at either end. Sure the 14mm, 16mm and 23mm all have a clutch mechanism and have a definite stop at either end of the range, but they are not linear (except when using X-T3 or X-Pro3 linear focusing mode). The Meike 25/1.8 is just like a vintage lens in that the focus mechanism is mechanical and has hard stops at either end of the focusing range. I wish Fujifilm would make a full-frame equivalent 28mm & 35mm lenses that are not focus by wire. Proper street lenses similar to the Leica Sumicrone 28 & 35mm. Let’s hope they replace the current 18mm f2 with something like this, with hyperfocal distance markings. That would be worthy of a mkII version.

IMAGE QUALITY

The picture on the left (finger in the earhole) is straight out of camera (SOOC) and the one on the right has the following adjustments in Lightroom Classic.

  • +0.20 Exposure

  • +15 Contrast

  • -20 Highlights

  • +48 Shadows

  • +15 Clarity

  • +15 Texture

Adjusting contrast etc has pushed the saturation a little, and looking at it hear, I wish I had dropped it back down again. I’m too lazy to go back and fix it, so the yellows are a bit strong on this one. But I like the tones from this lens. These are the tones I always wanted when I used to shoot with Nikon DSLR’s, but I could never quite get there, even in post.

008_DerekClarkPhoto-Meike-25mm-f1.8-SOOC.jpg

I’m impressed with how the Meike lens renders colour. It’s rich and warm, plus there seems to be an earthy brown tone, which I really like. There is a difference in exposure by around -1/3 of a stop from what you see in the EVF to the darker image captured, but you get used to that and compensate as you shoot.

LIKES

  • Great build quality

  • Small size

  • Multi-coated

  • Smooth aperture and focus rings

  • Depth of field markings

DISLIKES

  • The centre markings are not quite in the centre

  • I wish the markings for feet or metres were in a different colour

  • Clickless aperture (It’s ok but I prefer clicks)

This one was shot using the Acros film simulation. It’s been given a bit more punch in LR, but the JPEG was nice too.

This one was shot using the Acros film simulation. It’s been given a bit more punch in LR, but the JPEG was nice too.

009_DerekClarkPhoto-Meike-25mm-f1.8-SOOC.jpg

CONCLUSION

I’m really enjoying using this lens. My X-Pro2 suddenly feels like an old rangefinder film camera. It slows the process down and that can be a good thing. Colours are also nice and it’s sharp enough (especially at street photography apertures such as f8 or f11. At £65 it is a no brainer to pick one of these lenses up and give it a try.

Buy on Amazon

Domke F-5xb: Lightweight Street Bag

006_DerekClarkPhoto-Domke_F-5xb.jpg

Over-filling camera bags is something I (and I would assume many others) have a problem with. If there’s a space for another camera I’ll throw one in. An empty front pocket? I’ll add more batteries, notebooks or who knows what. So the only way around this sad affliction is to use smaller bags if I want to travel light.

Street photography is one area where I like to travel light because of the large number of miles I end up walking, and The Domke F-5xb is an ideal little bag for that very reason. I have the brown RuggedWear wax canvas version. It’s one of five Domke bags I own (at the time of writing this). I bought this one-second hand for £22, it’s in great condition and has none of the waxiness that these RuggedWear bags can sometimes have.

The Domke F-5xb with a standard iPhone 7 for size comparison

The Domke F-5xb with a standard iPhone 7 for size comparison

These two Velcro patches sit too high to make contact with the narrow strip on the front flap

These two Velcro patches sit too high to make contact with the narrow strip on the front flap

EXTERIOR

Unlike a lot of the larger Domke models, the strap on the F-5xb does not go all the way around the base. Instead, it attaches by oversized clips onto an O ring at either side, and these rings are attached using looped pieces of thick canvas sewn onto the side. The clips are extremely tough and do not unlatch accidentally (like ONA bags do). The strap is the standard Domke webbing version with the dual non-slip rubber strips to hold it in place on your shoulder. Another oversized thing is the YKK zipper. It’s chunky and both the tabs used to close the zip are massive. This zip will probably last longer than I will.

I do wish Tiffin would change the straps to a dark brown on these brown Rugged Wear bags as these light ones get so dirty during day to day use.

The zip on the main compartment is covered by a flap. This flap acts as an extra layer to keep the rain out, to keep thieves from opening the zip, and also to cover the front pocket. The pocket is a single compartment, with no zip or velcro, for holding small accessories. I have my wallet, a tiny Moleskine notebook, two spare Fuji batteries, and my Apple AirPods. I probably shouldn’t keep my wallet in here as it’s not that thief-proof! The bottom of the pocket is oddly sewn an inch and a half up from the base of the bag making it a little too shallow, even though there doesn’t seem to be a reason for this.

One downside to this front flap is that the pieces of velcro that hold it closed are positioned in such a way that they only connect if the bag is stuffed full. Each piece should be taller in my opinion.

The oversized belt loop at the back

The oversized belt loop at the back

Domke says this is a small bag or belt pack, meaning you can unclip the strap and use the sewn-in loop at the back of the bag to attach it to your belt. This might work if you use a separate belt and don’t overstuff the bag with too much kit, but I wouldn’t recommend putting it onto the belt that’s holding up your trousers/pants or you might find the photographer becomes the photographed.

There’s enough room inside the main compartment for 3 mirrorless cameras and an iPad Mini

There’s enough room inside the main compartment for 3 mirrorless cameras and an iPad Mini

INTERIOR

Inside the main compartment of the F-5xb, you will find two dividers that allow for three compartments for cameras and lenses. I have three Fuji cameras in here, an X100F, X70 and an X-Pro2 in the centre compartment with one of the smaller Fujicron lenses attached (16/2.8, 18/2, 35/2, or 35/1.4). I mostly have the 35/2, which gives me 28mm, 35mm, and 50mm (in full-frame terms) across my three cameras. If I want to carry one or two other lenses, I have to leave a camera at home. The F-5xb is always a compromise but it keeps the weight down. For the past few weeks, I’ve had the manual focus Meike 25mm f1.8 attached to the X-Pro2. More on that lens in a future blog post (or two).

The interior padded section is sewn into the bag, but there is a compartment between the padded section and the inside front of the bag. This compartment is exactly the right size for an iPad mini with a low profile case. Obviously, this adds more weight, so a choice has to be made.

One downside of the interior is the lack of padding on the ends of the bag. Domke has many bags that lean toward being smaller and better for working out of rather than being heavily padded. But the F-5xb is well padded at the front, rear and base, so why miss out on padding the sides? The bag is tiny so a couple of extra centimetres in length wouldn’t have made that much difference. My X70 and X100F lenses both face outward (toward the sides) so I have added a couple of dividers from other bags to help pad the sides a bit, even though it does make the inside of the bag a little tight.

The front pocket doesn’t have a zip or Velcro to hold it shut and is only covered by the front flap

The front pocket doesn’t have a zip or Velcro to hold it shut and is only covered by the front flap

CONCLUSION

The Domke F-5xb is a fantastic little bag that is super comfortable to carry for a full day street shooting. When I’m using a camera on the street the 5xb feels so lightweight and the rubber grip strips embedded into the strap keeps it from sliding off my shoulder. This bag is equally good for using the strap crossbody style. Like all Domke bags, they are very well made, plus they look and feel better with age.

PROS

  • Small & lightweight.

  • Extremely tough.

  • Rubber grip strips embedded into the strap.

  • Over-engineered parts, especially the zipper.

  • Doesn’t look expensive (and isn’t).

  • An internal base plate that keeps water out.

  • Can be re-waxed to make water-resistant (can of wax supplied).

CONS

  • The front pocket is not very secure.

  • Front pocket could easily have been deeper.

  • Velcro for the front flap is positioned badly.

  • No padding on the ends of the bag.

  • Difficult to fit a pen.

Fujifilm XF16mm F2.8

002_DerekClarkPhoto-Fujifilm-XF16mm-f2.8.jpg

AND THEN THERE WERE 4 (or is it 5?)

So the 16/2.8 has arrived and it joins the Fujicron trio of 35, 23 & 50mm f2's (that's if we don't count the original small 18/2. More on that lens later). These three lenses were a runaway success for Fujifilm and the quality is stunning. They are small, well priced and so much easier to carry around than the larger f1.4 or f1.2 versions. People often question whether you should buy the f1.4 over the f2, shallow depth of field over size and weight, or even why Fuji should make two versions of the same focal length blah blah blah blah blah. But I think the great thing about these small lenses are that not everybody can afford to shell out loads of money on the bigger faster glass. These Fujicron lenses might be the only way someone on a tighter budget can own the equivalent to a wide angle 24mm or a decent 75mm portrait lens, and that's good enough reason for their existence in my book.

006_DerekClarkPhoto-Fujifilm-XF16mm-f2.8.jpg

WHY BUY THE 16/2.8 IF I ALREADY OWN THE 16/1.4 VERSION?

I have a couple of setups. One is all about widest apertures and quality over size, which has my X-T3 & X-T2 bodies, plus all the best glass. There'e the 50-14/2.8, 16-55/2.8, 90/2, 56/1.2, 35/1.4, 23/1.4 and of course the 16/1.4. My other setup is my everyday carry around and street photography bag, which is my favourite because it's the one that is all about personal photography, rather than work. This small setup can change now and then, but it's basically an X100F, X70 and X-Pro2 with the Fujicron lenses. I have the 35/2 and the 50/2. I don't own a 23/2 because my X100F is pretty much always with me. So by adding the 16/2.8, I will have a full frame range from 24mm to 75mm. Or to break it down, with the 1.5 crop on the Fuji X sensor, my 16, 18.5 (X70), 23 (X100F), 35, and 50mm lenses will give me 24, 28, 35, 50, & 75mm in full frame terms. All of this fits in a Billingham Hadley Small Pro or an ONA Bowery. Not only am I keeping this setup as small and lightweight as possible; I also know that when I grab my backpack for a shoot that all my working lenses are in there and not in some other bag.

001_DerekClarkPhoto-Fujifilm-XF16mm-f2.8.jpg
004_DerekClarkPhoto-Fujifilm-XF16mm-f2.8.jpg

PHYSICAL SIZE OF THIS LENS

The 16/2.8 is tiny, even (slightly) smaller in height than the 35/2. But compared to the 35/2's 43mm filter size, the 16/2.8 has a 49mm. This makes the front end wider than all the other Fujicron's, and in my opinion, the best looking of this range of inexpensive primes. Let's face it, they are not the best looking bunch, mostly due to that weird tapered design (which helps not to obstruct the optical view finder of the X-Pro2). The 35/2 is passable, the 23/2 is fugly, the 50/2 would be just as ugly, but gets saved by the wider lens hood. But the 16/2.8 is actually quite attractive due to it's dumpy design with a wide front, which means less taper.

012_DerekClarkPhoto-Fujifilm-XF16mm-f2.8.jpg

BUT WHAT ABOUT THE 18/2?

So the 18/2 was one of the three original XF lenses back when the first Fuji ICLC (the X-Pro1) came out. Some people knock it, but it's actually a great little lens, even though it's getting a bit long in the tooth. The 18/2 is as near as damn it a 28mm lens in full frame speak. 28mm is fantastic for street photography, and I think Fuji should take this opportunity to go full Tonto. Get right off the reservation by making an all metal, non fly-by-wire lens with a proper depth of field scale that is easy to read. So basically a small lens that has hard stops at either end of the focus range (not a continuous wheel). 

  • A focus ring that has hard stops at either end of the focus range (preferably not fly-by-wire.

  • a focus tab to allow guessing focus without looking at the lens or through the viewfinder.

  • A proper depth of field scale that is wide enough to read (the 14, 16 & 23mm lenses DOF scale is too cramped).

  • Depth of field scale would be nice in orange

  • A clutch would be nice for selecting AF or manual focus, but not if it makes the lens too large.

I suppose what I’m looking for is something as close to a Leica Summicron 28mm f2.

005_DerekClarkPhoto-Fujifilm-XF16mm-f2.8.jpg

I haven’t had a lot of time to use the 16/2.8 due to shoots over the weekend that needed much longer lenses. But I managed a little bit at a jazz gig and a little bit of street photography. But I can say that this lens is not the sharpest wide open at 2.8 (especially at close focus) but is definitely sharp at f4. That’s how the 23/2 was when I had one from Fuji for a couple of weeks too. There is also a bit of chromatic aberration, but nothing major an it’s usually an easy fix in post. There is also a bit of distortion at the edges, but you would expect that on a 24mm focal length. If these few things are a deal breaker for you, you should definitely get the 16/1.4 instead. However; If you are looking for a small, lightweight and sharp (f4 and beyond) lens with super fast focusing and is water resistant, then the 16/2.8 is for you.

007_DerekClarkPhoto-Fujifilm-16mm-f2.8.jpg

Just like the other Fujicron lenses, the 16/2.8 is extremely well built and has just the right of resistance on the focus ring and aperture ring. I’m really happy with it and look forward to using it on a few trips abroad this year. If you own any of the other lenses in this range, you already know what to expect. As long as this focal length is not too wide for you, I would highly recommend the XF16mm f2.8.

Check out my post Fujifilm 16mm f2.8: Too Wide? on my street photography blog for more pictures using the 16/2.8, but here are a few examples to wet your whistle.

You can buy the Fujifilm 16mm f2.8 at Amazon UK

003_DerekClarkPhoto-Fujifilm-16mm-f2.8.jpg
001_DerekClarkPhoto-Fujifilm-16mm-f2.8.jpg
002_DerekClarkPhoto-Fujifilm-XF-16mm-F2.8.jpg
004_DerekClarkPhoto-Fujifilm-XF-16mm-F2.8.jpg
001_DerekClarkPhoto-Fujifilm-XF-16mm-F2.8.jpg
006_DerekClarkPhoto-Fujifilm-XF-16mm-F2.8.jpg

Tip For Shooting X-T3 And X-T2 Together

003_DerekClarkPhoto-Fujifilm_X-T3_X-T2.jpg
004_DerekClarkPhoto-Fujifilm_X-T3_X-T2.jpg

EV Dials

Set them like this

I was just packing for a two day shoot and was reminded how I have to set my X-T2 and X-T3 differently to make them operate the same. I thought it might be of interest to anybody else that uses these two cameras as a pair.

This only applies if you use the front command dials to control ISO and set shutter speed and aperture manually. In other words, the cameras are in full manual and the front command dial is being used to adjust exposure. This works well for me in concert photography as I need as much light as possible, so shoot wide open. I also know I can’t go lower than 1/125th second when I’m zoomed all the way in with the 50-140mm f2.8 (OIS on). So my variable is ISO and I want to be able to adjust it with the front command dial and then press it to lock ISO. One more press and ISO can be adjusted again. This prevents me from moving ISO unintentionally.

The X-T3 works this way when the ISO dial is set to C. Each press of the front command dial cycles through ISO - EV. But when the X-T2 is set to C it cycles through F - EV - ISO. If The X-T3 is set to 0 on the ISO dial, ISO is always live on the front command dial and can’t be locked. This might be sounding a bit complicated at this point. So in short:

  1. Settings Menu - Buttons and Dials - ISO Dial Setting - COMMAND (on both cameras).

  2. Set X-T2 ISO Dial to 0 (zero)

  3. Set X-T3 ISO Dial to C

  4. Use the front command dial to adjust ISO and press it to lock/unlock the wheel (both cameras).

Fujifilm X100F: Auto Detect WCL & TCL Lenses

004_DerekClarkPhoto-WCL-TCL.jpg

If you have a Fujifilm X100F (update: or X100V) and the older mk1 WCL-X100 wide angle, and/or the TCL-X100 teleconverter lenses, and you’re still diving into the menus or using up an Fn button to tell the camera when any of these are attached…read on.

The X100F has a magnet next to the front element of the lens (under the surface), as does each of the newer mkII lenses. So when the WCL or TCL are screwed on to the font of the camera, these two magnets react to each other and the camera automatically switches to whichever lens is attached and corrects for barrel distortion. How does the X100F know which of the two lenses are attached I here you say? Simple; The polarity of the magnets are reversed on each lens. So the magnet on one lens pulls and the other pushes. But the original two conversion lenses don’t have magnets on them.

I bought a packet of really small magnets on Amazon UK and I crudely attached them using gaffe tape inside of the lenses next to the rear element. But they were either not strong enough or too slim. So I attached a second magnet on to each of them, this time just held by their own magnetic strength. They then worked as they should and although I meant to go back an do a neater job, I’ve never got round to it and the magnets have never moved at all. I might go back and use one magnet on each, with a bit of black Sugru to stick them down and raise them up at the same time.

The boxes that come with each of the conversion lenses actually have magnets inside the lids. If you don’t mind destroying your boxes you can cut these out with a sharp knife and use them.

INSTRUCTIONS

  1. Move the magnet over the front of the lens (close to the FUJINON logo).

  2. Check the viewfinder to see the point where the W or T symbol appears.

  3. Make a note if it was W or T and keep the magnet facing in the same direction (polarity).

  4. Place a piece of tape on the aperture dial where the magnet reacted (don’t move the dial).

  5. Now screw each lens and place a piece of tape on them at the same point as the camera’s

  6. Remove the lenses & attach a magnet using tape inside the back of the lens (see picture).

  7. You might need to re-check the polarity to make sure it’s correct for each lens.

  8. Screw the lenses on and check that the camera automatically switches to WCL or TCL.

  9. If the camera doesn’t automatically adjust, add another magnet on top of the first one

That’s it. No more menu diving or using up an Fn button. Plus, you’ve just saved a load of money buying the WCL or TCL mkII’s.

Good luck.